Chocolate Ganache 101: Ratios, Techniques & 7+ Tested Flavors
Ratios, techniques, and foolproof methods for smooth, glossy ganache, plus ready-to-use recipes.
This post may contain affiliate links. Read our privacy policy.
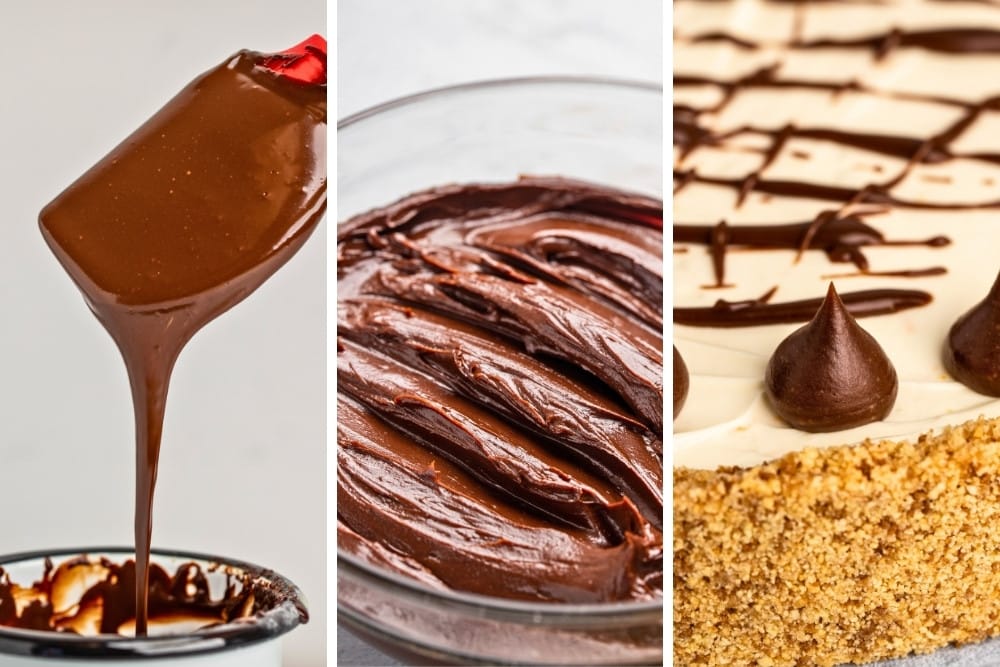
Ganache looks deceptively simple—just chocolate and cream—but getting it right comes down to ratios, temperature, and technique. Master those, and ganache becomes one of the most flexible tools in dessert making: pourable, spreadable, pipeable, or firm enough to set into truffles.
This guide breaks down that core formula so you can make ganache that behaves exactly the way you want it to. No guesswork.
You’ll learn how different types of chocolate behave, how cream ratios affect firmness, two reliable methods for making ganache, and a few techniques to help you along the way. You’ll also learn how to flavor ganache through infusions and mix-ins, with 5+ tested ganache recipes below, ready to use as-is.
Here for the technique? Start from the top.
Looking for ratios and flavors? Jump straight to the list.
Editor’s Note: I spent 8+ hours putting this guide together (not counting testing recipes and shooting photos). My goal is to make this your go-to ganache guide: base formulas, techniques, troubleshooting, and practical flavor ideas. Bookmark it, use it, and if there’s something you’d like to see added, tell me—I’ll keep expanding this guide as the ganache library grows.
What Is Ganache (in < 30 seconds)
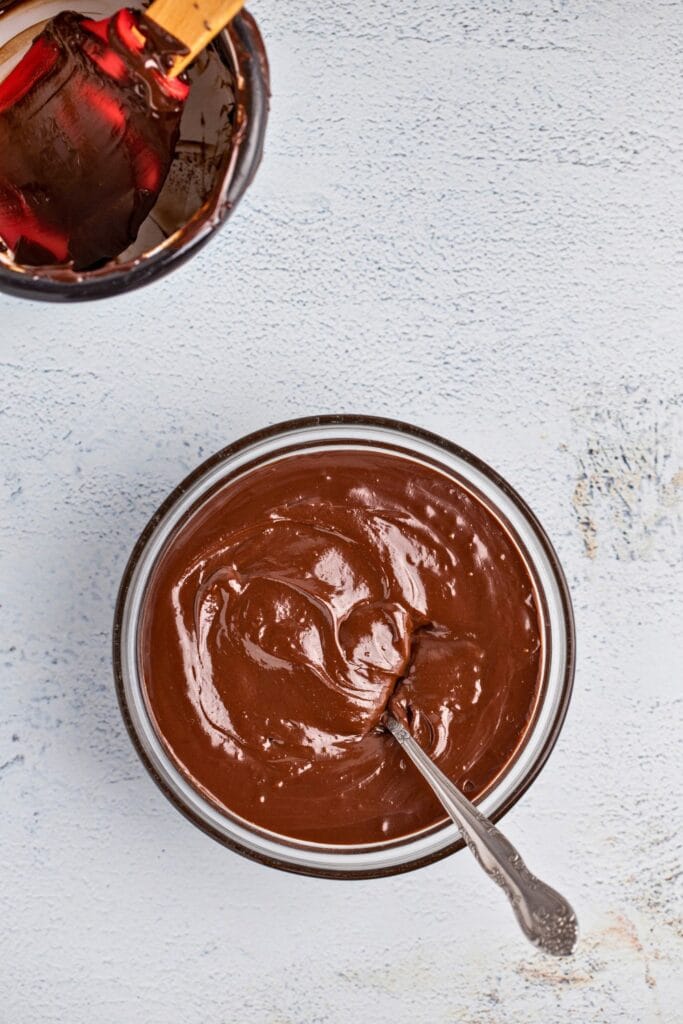
A basic ganache is a smooth, glossy mixture of chopped chocolate + hot cream (an emulsion). When the warm cream meets the cocoa butter in the chocolate, the fats and water disperse evenly, creating a stable, silky texture you can pour, whip, pipe, glaze, or set into truffles.
Change the ratio, and you change everything:
- more cream → fluid, pourable glaze
- less cream → thick, scoopable, truffle-firm
That’s it: 2 ingredients, endless textures depending on chocolate type and cream quantity.
You can also infuse it with flavors (like Earl Grey, or chai) or stir in extras such as nutt butters or pastes. We cover both later in the article.
Ingredients & Equipment
Chocolate
You can use white, milk, semisweet, or bittersweet dark chocolate to make ganache. The type you choose affects not only flavor, but how much cream you’ll need to reach the consistency you want. Milk and white chocolate contain more sugar and milk solids, so they require less cream than dark chocolate to set properly.
Different brands also behave differently: some melt silkier and more predictably than others. If you make ganache regularly, it’s worth testing a few brands in your price range to find your most reliable option.
You can also use chocolate callets (designed for melting), but they’re absolutely optional—and usually more expensive. I almost always use regular chocolate bars and stock up when they’re on sale.
| Chocolate | Cocoa % (solids + cocoa butter) | Behavior in Ganache |
|---|---|---|
| Dark (bittersweet) | 70–85 | low sugar → dense, firm ganache unless balanced with enough cream |
| Dark (semisweet) | 50–70 | medium sugar → softer, more balanced, great all-purpose |
| Milk | 30–50 | high sugar + milk solids → sweeter, softer, needs less cream |
| White | cocoa butter only | very high sugar + milk solids → softest of all, needs very little cream |
Heavy Cream
Use heavy cream with at least 30% fat. The exact amount depends on:
- the chocolate type (dark needs more, milk/white need less)
- the texture you’re after (drip vs spreadable vs truffle)
Optional Ingredients
- Butter. Added at the end, it creates a glossier finish and slightly softer set. It’s ideal if you want a shiny glaze without increasing cream and risking an overly loose ganache.
- Salt. A pinch dramatically boosts flavor. Use especially when your mix-ins benefit from contrast (caramel, Biscoff, nut butters, etc.).
- Mix-ins. One of two main ways to flavor ganache (the other is infusion). Stir-ins like caramel, nut butters, tahini, or Biscoff keep the chocolate base but shift the profile into flavored territory.
Equipment
- Silicone spatula. The best tool for stirring and scraping cleanly. Avoid a whisk unless you don’t mind air bubbles on your final surface.
- Heatproof bowl & saucepan. Useful for both hot-cream-over-chocolate and double-boiler methods, plus reheating set ganache.
- Kitchen scale. Ratios matter, and chocolate volume is wildly inconsistent when chopped. Weight > cups, always.
- Immersion blender (optional). Creates a perfectly smooth, glossy ganache and is your best friend if the emulsion starts to break.
Technique Basics
Before we get into specific methods, a few core rules apply to every ganache you make.
Temperature Is Everything
Chocolate is extremely sensitive to sudden temperature changes and can seize (clump and harden), split, or turn grainy if you don’t follow a few simple rules:
- Don’t cook chocolate. Too much heat leads to graininess, dull texture, or a broken emulsion.
- Keep ingredients within a similar warm range before stirring. That’s why we wait after pouring hot cream onto chopped chocolate—to let the chocolate gently warm—or why we heat everything together in a double boiler before mixing.
- Any liquid or paste you add (heavy cream, caramel, nut butter, Biscoff, etc.) should be warm, not cold. Cold additions almost always cause the ganache to seize or stiffen instantly.
- White chocolate is the mild exception—its fat makeup makes it less prone to seizing, but it still benefits from gentle treating.
Stirring vs Blending
You can make perfectly good ganache by hand, but the tool you choose changes the finish.
- Stirring with a spatula = smooth, matte, classic texture.
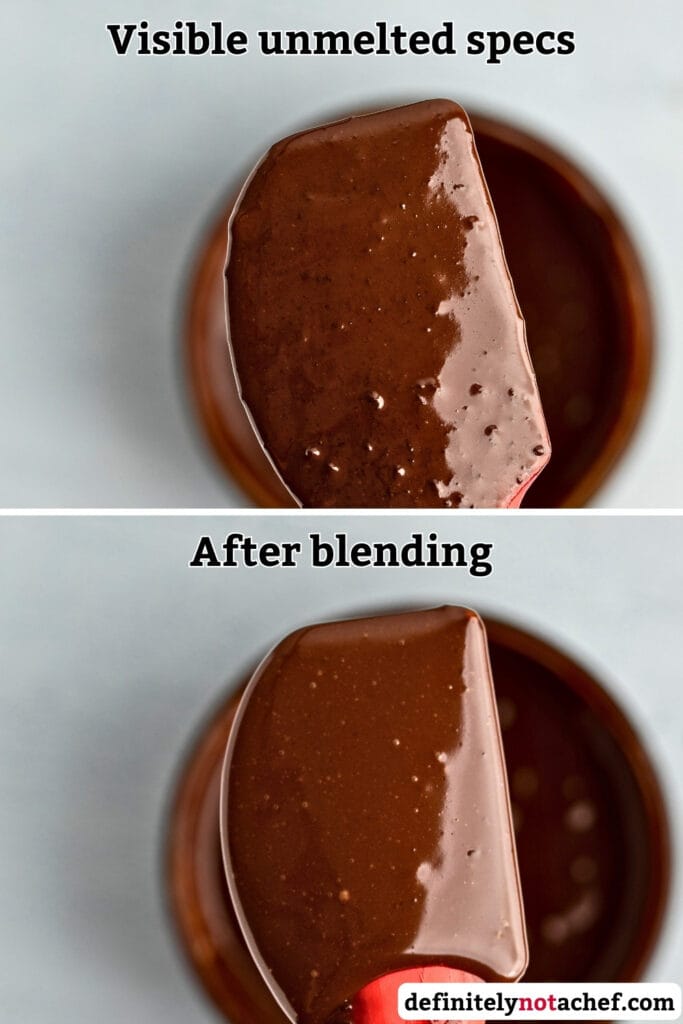
- If stubborn unmelted flecks remain, or you want pastry-shop gloss, use an immersion blender.
- Blend with the head fully submerged to avoid whipping in air. Air means bubbles, and bubbles mean tiny pockmarks on the surface of your pour.
Adding Butter (Why & When)
Butter isn’t required, but it’s one of the simplest upgrades.
- Stir it in at the end, once the ganache is already emulsified but still hot enough to melt the butter.
- It gives you a silkier texture, glossier finish, and a slightly softer, more luxurious set.
2 Ways to Make Ganache
Method 1: Hot Cream → Chocolate
This is the classic, most widely used approach.
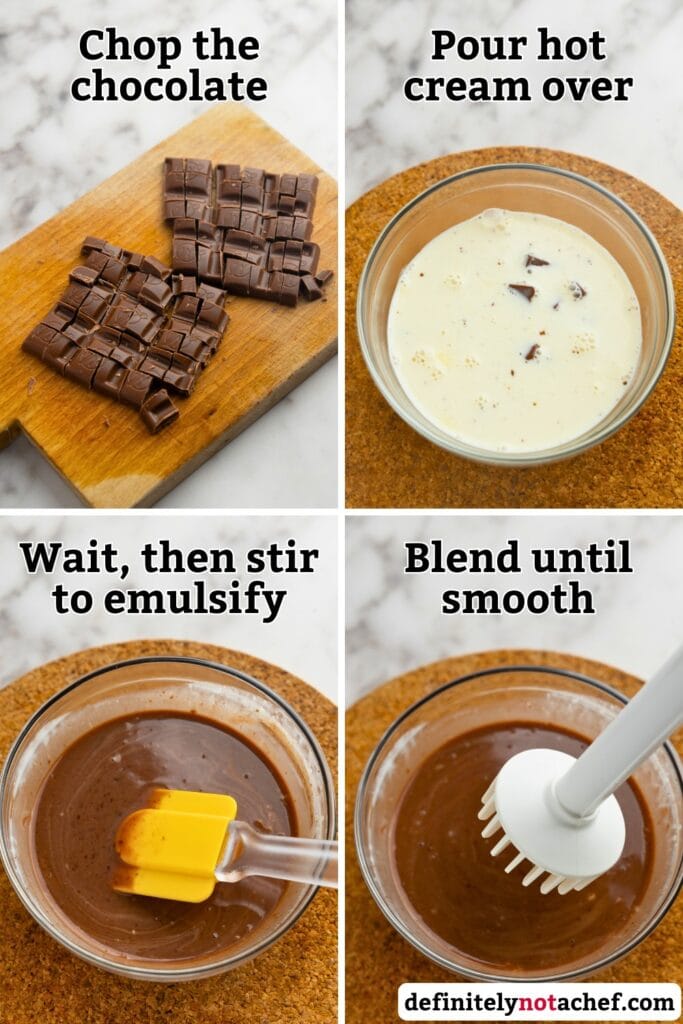
- Chop the chocolate finely. The smaller the pieces, the cleaner the melt.
- Heat the cream just below boiling (tiny bubbles at the edges, no rolling boil).
- Pour the hot cream over the chocolate, then do nothing for 2–3 minutes. This waiting step gently brings the chocolate up to temperature.
- Stir to emulsify using with a spatula. Once smooth, you can optionally blend for extra gloss and smoothness.
When to use this method:
- great for dark and milk chocolate
- perfect when you want a quick, streamlined process
Alternative workflow (use with caution):
- add the chopped chocolate directly into the pot with hot cream (off heat), then wait 2-3 minutes to let it warm gently
- stir to emulsify
- if there are some stubborn unmelted pieces, place the pot back on the lowest heat for 1–2 minutes, stirring constantly, to finish melting
- blend if desired
Important: This method gives you more heat (as we also use the warmth of the pot), but also less margin for error—it’s easy to overcook chocolate if you stop stirring or if the heat is even slightly too high.
Method 2: Double Boiler (Everything Warms Together)
This method uses gentle steam heat and gives you the most control.
- Add chocolate + cream + optional mix-ins (nut butters, Biscoff, tahini, etc.) to a heatproof bowl set over water. Bring the water to a simmer.
- Let everything warm slowly until the chocolate is soft and fully warmed through.
- Stir until uniform, then optional immersion blend for perfect smoothness.
- Remove from heat once everything is combined.
When this method shines:
- white chocolate ganache (needs less cream, so the hot-cream method may not melt it fully)
- ganache with thick additions like peanut butter, praline, Biscoff,
- any time you want extra control and almost no risk of overheating
Alternative workflow for large batches:
- Warm cream + mix-ins together first over the double boiler and mix together.
- Then add chopped chocolate, wait 2–3 minutes to let it warm gently.
- Stir to emulsify, blend if desired.
Standard Ganache Ratios Cheat Sheet
(These are all by weight chocolate : cream)
| Result Wanted | Dark | Milk | White |
|---|---|---|---|
| All-purpose | 1 : 1 | 2 : 1 | 3 : 1 |
| Truffles (firm set) | 2 : 1 | 3 : 1 | 4.5 : 1 |
What “All-Purpose” Means
“All-purpose” ganache is your flexible workhorse ratio. It pours smoothly when warm, thickens as it coolrs, and sets softly when cooled. And it gives you that classic, gorgeous finish on:
- glazed cakes
- eclairs and cream puffs
- brownies
- tart tops
It firms enough to slice cleanly, but not so firm that it becomes dense or truffle-like.
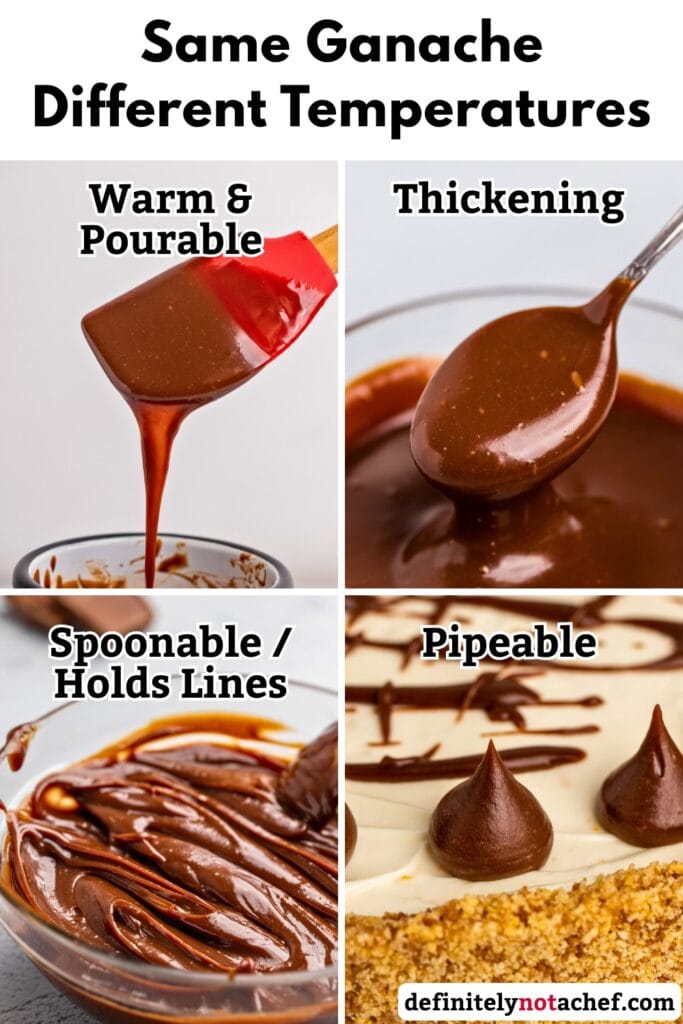
Think of Ratios as a Spectrum
Ganache isn’t a fixed formula—it’s a continuum of textures.
- More chocolate → firmer set.(moving toward truffle consistency, pipeable fillings, molded bonbons)
- More cream → softer set. (moving toward drippy glaze, sauce, dipping texture)
If you keep adding cream beyond ideal ratios, you simply slide into chocolate sauce territory instead of ganache that sets.
Seeing ganache ratios this way makes choosing easy: you’re not aiming for one “correct” ratio—you’re selecting a texture.
Add-Ons Change the Texture
These ratios are a reliable starting point, as long as you’re working with just chocolate and cream.
Once you introduce extras—nut butters, Biscoff, tahini, praline paste, dulce de leche—the math shifts. These ingredients bring their own fat, sugar, and solids, which all impact how firmly (or loosely) the ganache sets.
This is why a tested recipe becomes much more useful than ratio guesswork. Two tablespoons of peanut butter, for example, can make the same ganache noticeably softer, while Biscoff (high sugar + oil) both loosens and sweetens the base. Without confirmed ratios, you can end up with something either too stiff to pour or too loose to set.
Infusions (Flavoring the Cream)
Infusions let you build flavor directly into the cream before it ever touches the chocolate. Instead of simply tasting like “chocolate + extract,” infused ganache tastes integrated and rounded. Popular examples include Earl Grey, vanilla bean, chai, citrus zest.
How to Infuse Cream
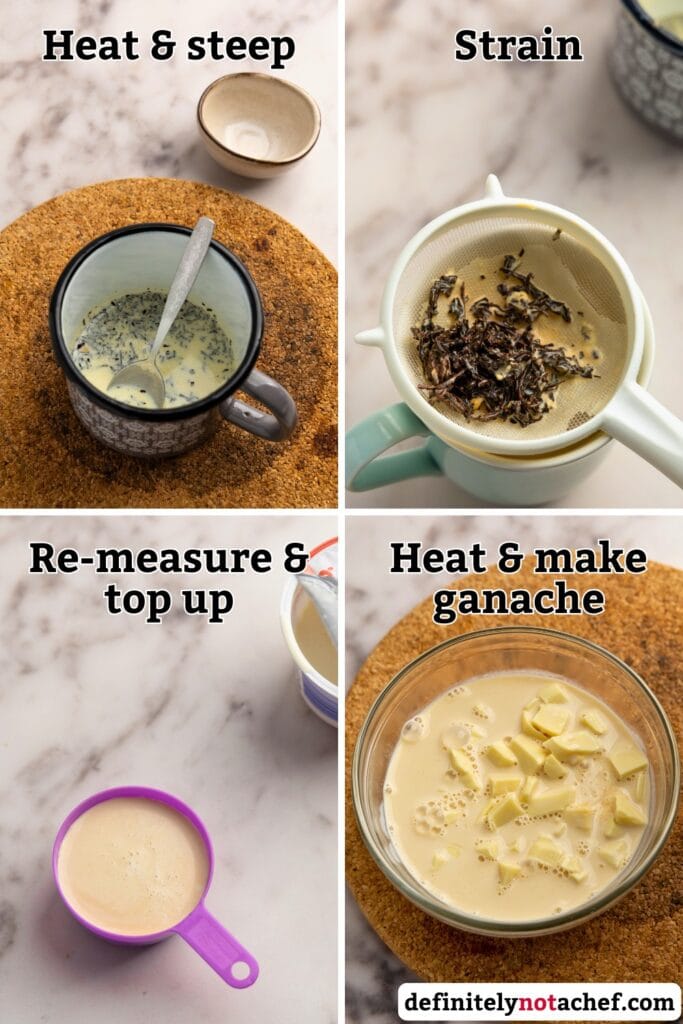
- Heat heavy cream. Warm to just below a simmer. No boiling—boiling can turn dairy harsh and reduce too fast.
- Add flavoring. Add your infusion ingredient to the cream and stir.
- Steep 15–30 minutes. Remove from heat and cover while it steeps. Delicate flavors (Earl Grey) will need 10–15 minutes, while strong spices (chai, cinnamon, clove) might need 20–30 minutes. Taste halfway.
- Strain. Remove solids and press gently, but don’t squeeze aggressively (that can push bitter notes into the cream).
- Re-measure and top up. Steeping always results in evaporation (less volume) and absorption (tea leaves and spices drink cream). So weigh or measure the finished cream, then top up with fresh cream until you return to the original amount. This way, your chocolate-to-cream ratio stays as intended.
- Make ganache.
Cooling & Reheating (Melting)
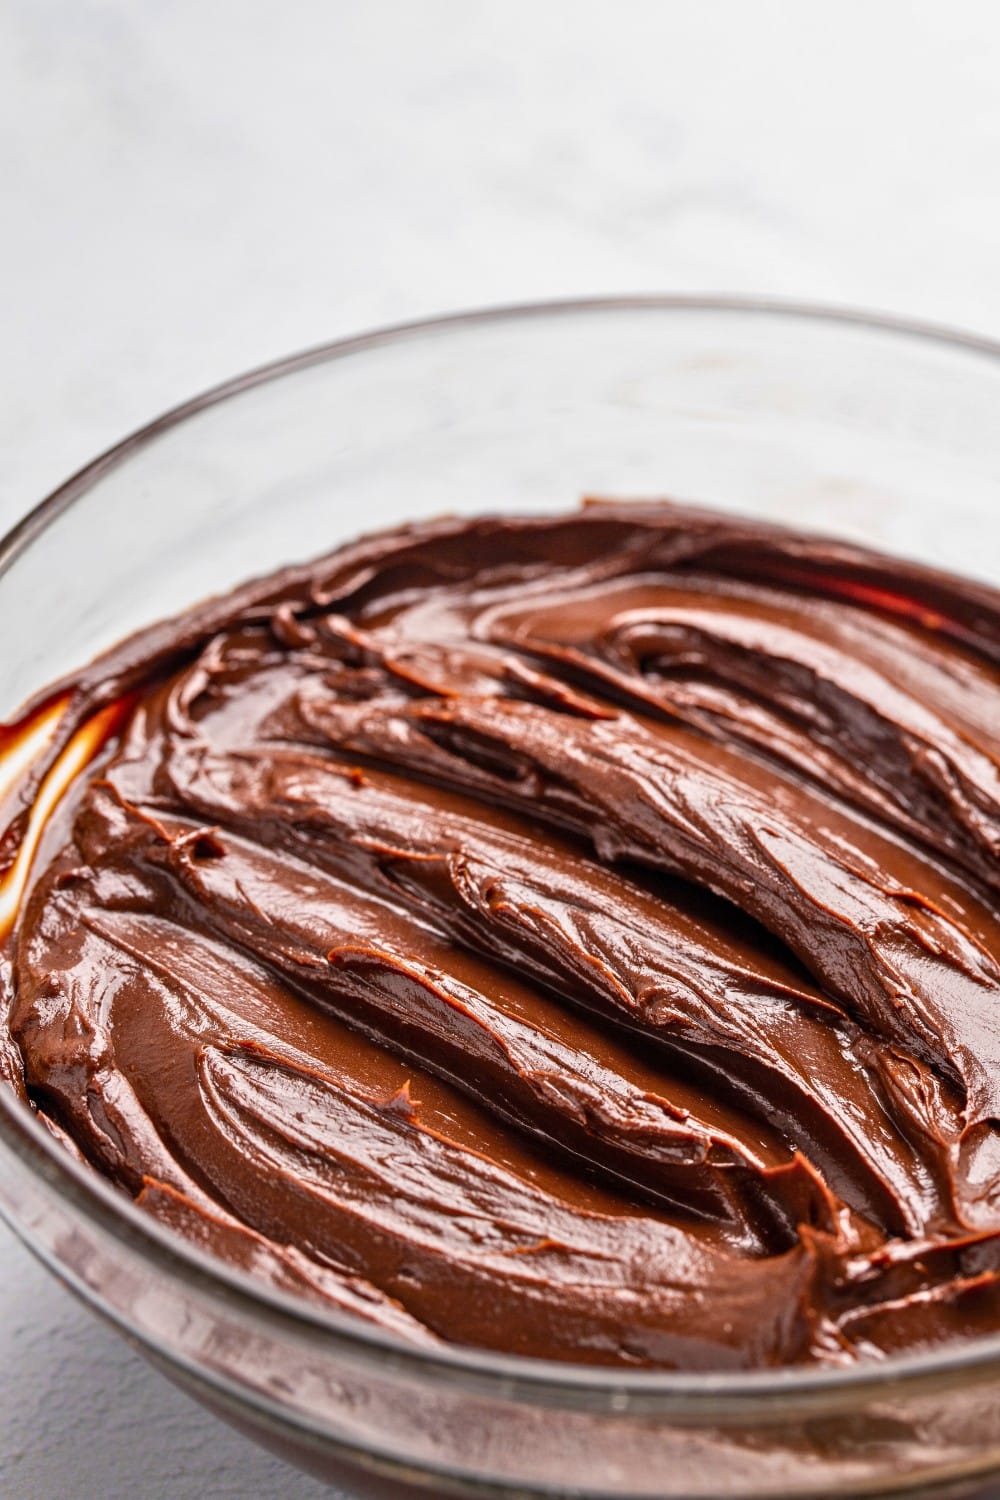
Ganache texture is temperature-dependent. It can be glossy and fluid, scoopable and pipeable, or firm enough to cut cleanly—all simply based on how warm or cool it is.
- Warm ganache = liquid. Perfect for drips and glaze, but too runny to sit neatly on top of eclairs.
- Cool ganache = thick / set. Ideal for piping, spreading, or whipping (there will be a separate guide on that at some point), but if you need to pour it over a cake or top eclairs, you’ll need to warm it back up to use it.
Understanding how to control temperature is as crucial as ratios.
Cooling
A controlled cool equals a stable, glossy finish.
- Slow cooling = most stable emulsion. The best approach is simply room temperature. Let ganache cool untouched until it reaches the texture you want—pourable, spreadable, or pipeable.
- Fast cooling (for when you’re in a hurry): cold water bath. Set your bowl of ganache into a larger bowl filled with cold tap water, and stir continuously (or with brief pauses). Avoid letting it sit still for too long, or the bottom layer will firm up faster than the top. This gives you control: stir → check → stir → check until it hits the exact consistency needed.
Refrigerate ganache only after it’s cooled to room temperature.
Reheating
A set ganache can always be brought back to a usable state, but only with gentle heat. Too much heat can split ganache into oily + grainy, so always rewarm gradually.
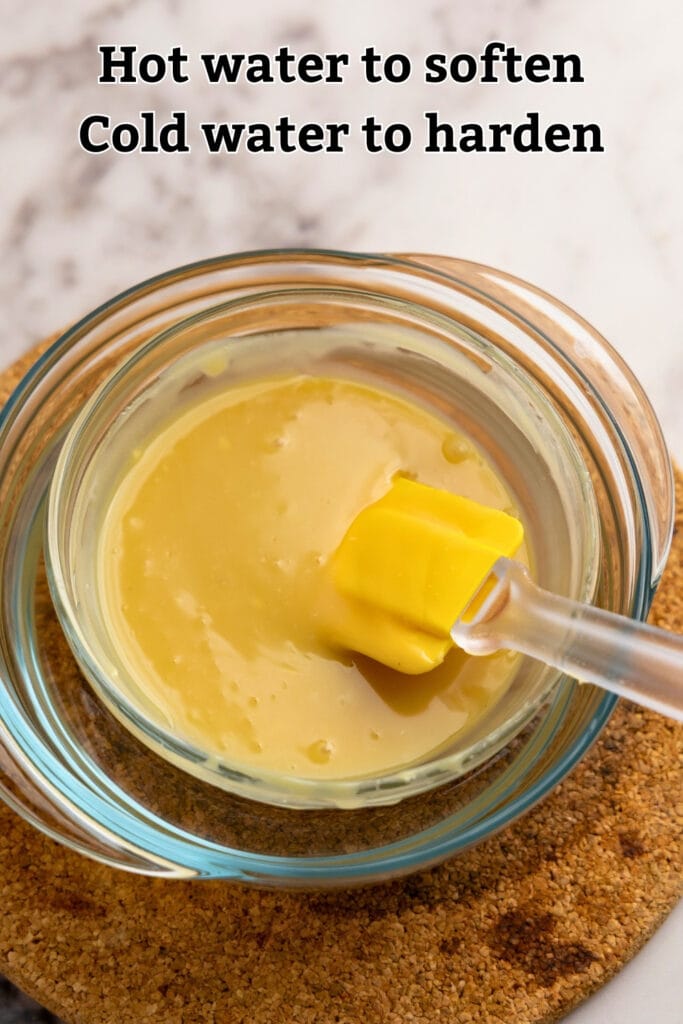
Water bath (for small amounts)
How to: Set the container in hot (not boiling) water for 2–3 minutes, then stir gently as it softens. Replace the water with fresh hot water if needed and repeat.
Double boiler (default method)
How to: Set the bowl of ganache over a pot of gently simmering water (the bowl should not touch the water). Let it warm slowly while stirring continuously until smooth and fully melted. Remove from heat as soon as it’s workable, or even slightly sooner, as the residual heat will melt any remaining bits.
Flavors
These ganache flavors are built on the same base principles outlined above, with adjusted ratios and techniques to account for chocolate type, infusions, and mix-ins.
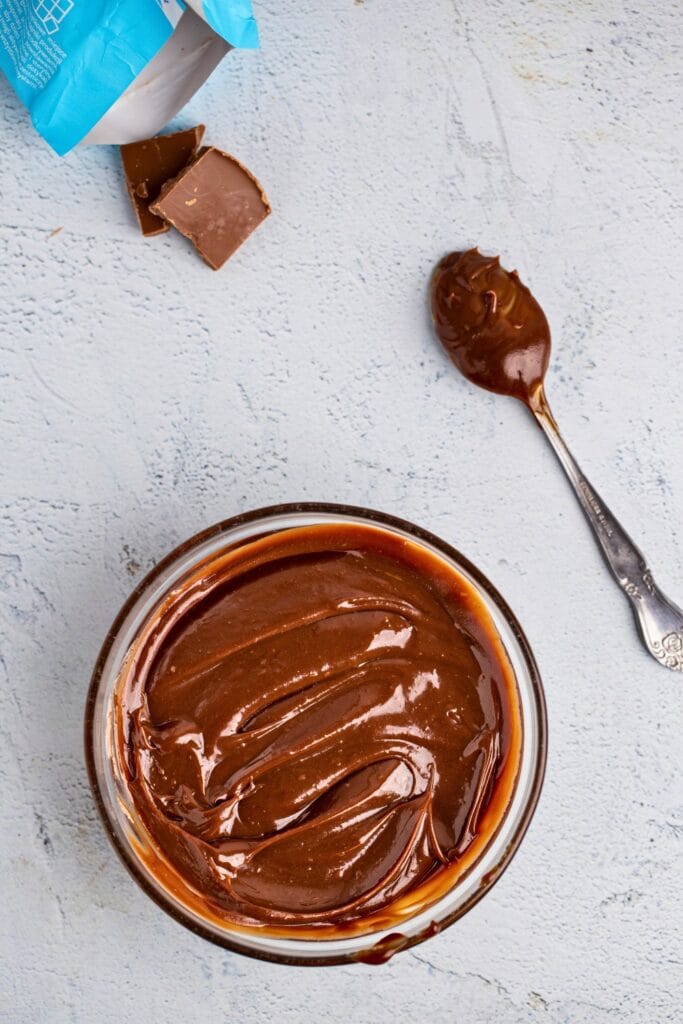
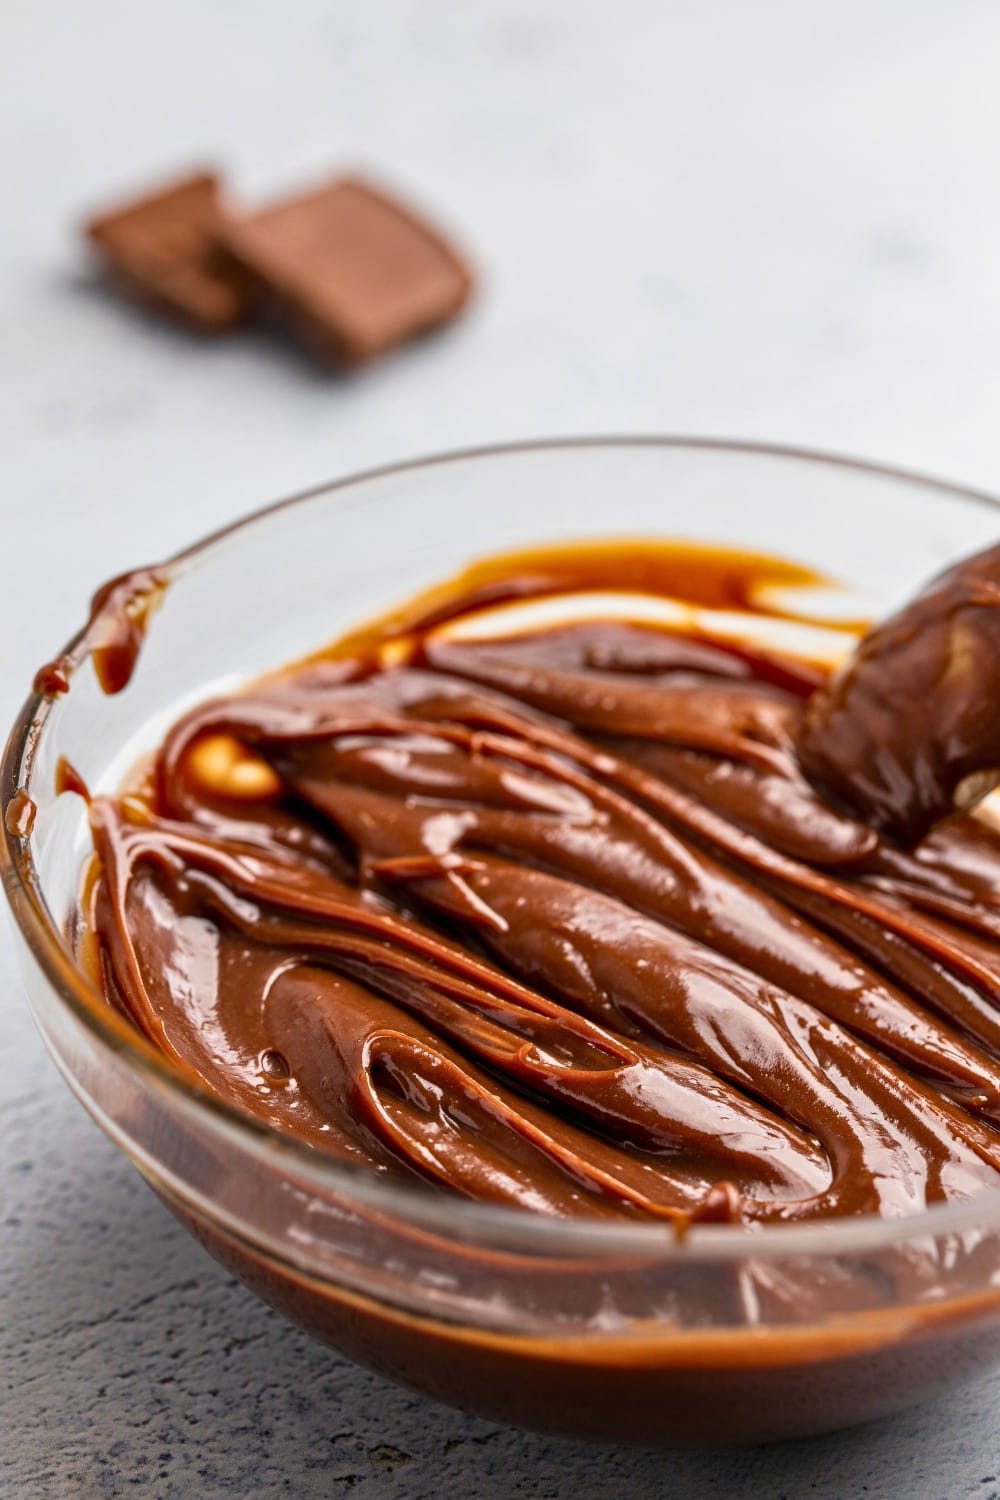
Dark Chocolate
This is the classic, all-purpose ganache: equal parts dark chocolate and cream for a smooth, glossy finish that pours beautifully when warm and sets semi-softly as it cools. Add a bit of butter at the end for extra shine and a slightly softer set.
Ingredients
- ⅓ cup heavy cream 80 g
- ½ cup dark chocolate chopped, 85 g
- 1 tablespoon unsalted butter 14 g, optional
Instructions
- Chop The Chocolate: Chop the chocolate finely; the smaller the pieces, the cleaner and more even the melt.½ cup dark chocolate
- Heat The Cream: Warm the cream just below boiling—look for tiny bubbles at the edges but avoid a rolling boil.⅓ cup heavy cream
- Combine And Rest: Pour the hot cream over the chopped chocolate, then do nothing for 2–3 minutes so the chocolate gently comes up to temperature.
- Stir To Emulsify: Stir with a spatula until smooth and fully combined; once smooth, you can optionally blend briefly for extra gloss and silkiness.
- Add Optional Butter: If using butter, add it while the ganache is still warm and stir until incorporated for added richness and shine.1 tablespoon unsalted butter
- Use Or Store: Use the ganache once it reaches your desired consistency, or let it cool to about room temperature and refrigerate in an airtight container.
Notes
- Add butter for a shinier ganache and a slightly softer set. Skip otherwise.
- Weigh ingredients on a kitchen scale rather than relying on volume if possible, aiming for a 1:1 chocolate to cream ratio.
- Use semisweet chocolate for a classic flavor or go with bittersweet for a darker, more bitter ganache.
Nutrition
Milk Chocolate
This 2:1 milk chocolate ganache compensates for milk chocolate’s higher sugar content, producing a smooth, stable ganache with a soft but controlled set.
Ingredients
- ¼ cup heavy cream 60 g
- ⅔ cup milk chocolate chopped, ~115 g
- 1 tablespoon unsalted butter 14 g, optional
Instructions
- Chop the Chocolate: Finely chop the milk chocolate into small, even pieces — the smaller they are, the cleaner and faster they’ll melt.⅔ cup milk chocolate
- Heat the Cream: Warm the heavy cream just below boiling, watching for tiny bubbles at the edges; do not let it reach a rolling boil.¼ cup heavy cream
- Pour Cream Over Chocolate: Pour the hot cream over the chopped chocolate and then do nothing for 2 to 3 minutes; this rest brings the chocolate up to temperature gently.
- Stir to Emulsify: Use a spatula to stir until the mixture becomes smooth and glossy; you can optionally blend briefly with an immersion blender for extra gloss and smoothness.
- Add Butter (Optional): If using butter, add the tablespoon while the ganache is still warm and stir until fully incorporated for extra richness and sheen.1 tablespoon unsalted butter
- Finish and Store: Use the ganache once it reaches the consistency you need, or let it cool to about room temperature and refrigerate in an airtight container for later.
Notes
- Add butter for a shinier finish and a slightly softer set.
- This uses a 2:1 chocolate-to-cream ratio (by weight) for an all-purpose ganache — weigh ingredients on a kitchen scale rather than relying on volume.
Nutrition
Brown Butter

Sweet, nutty brown butter meets melt-in-your-mouth milk chocolate in this rich, soft ganache.
With its caramel-like aroma and spreadable texture, it’s beginner-friendly and wonderful for drizzling over cakes, dipping eclairs, or filling cookies and macarons.
Orange
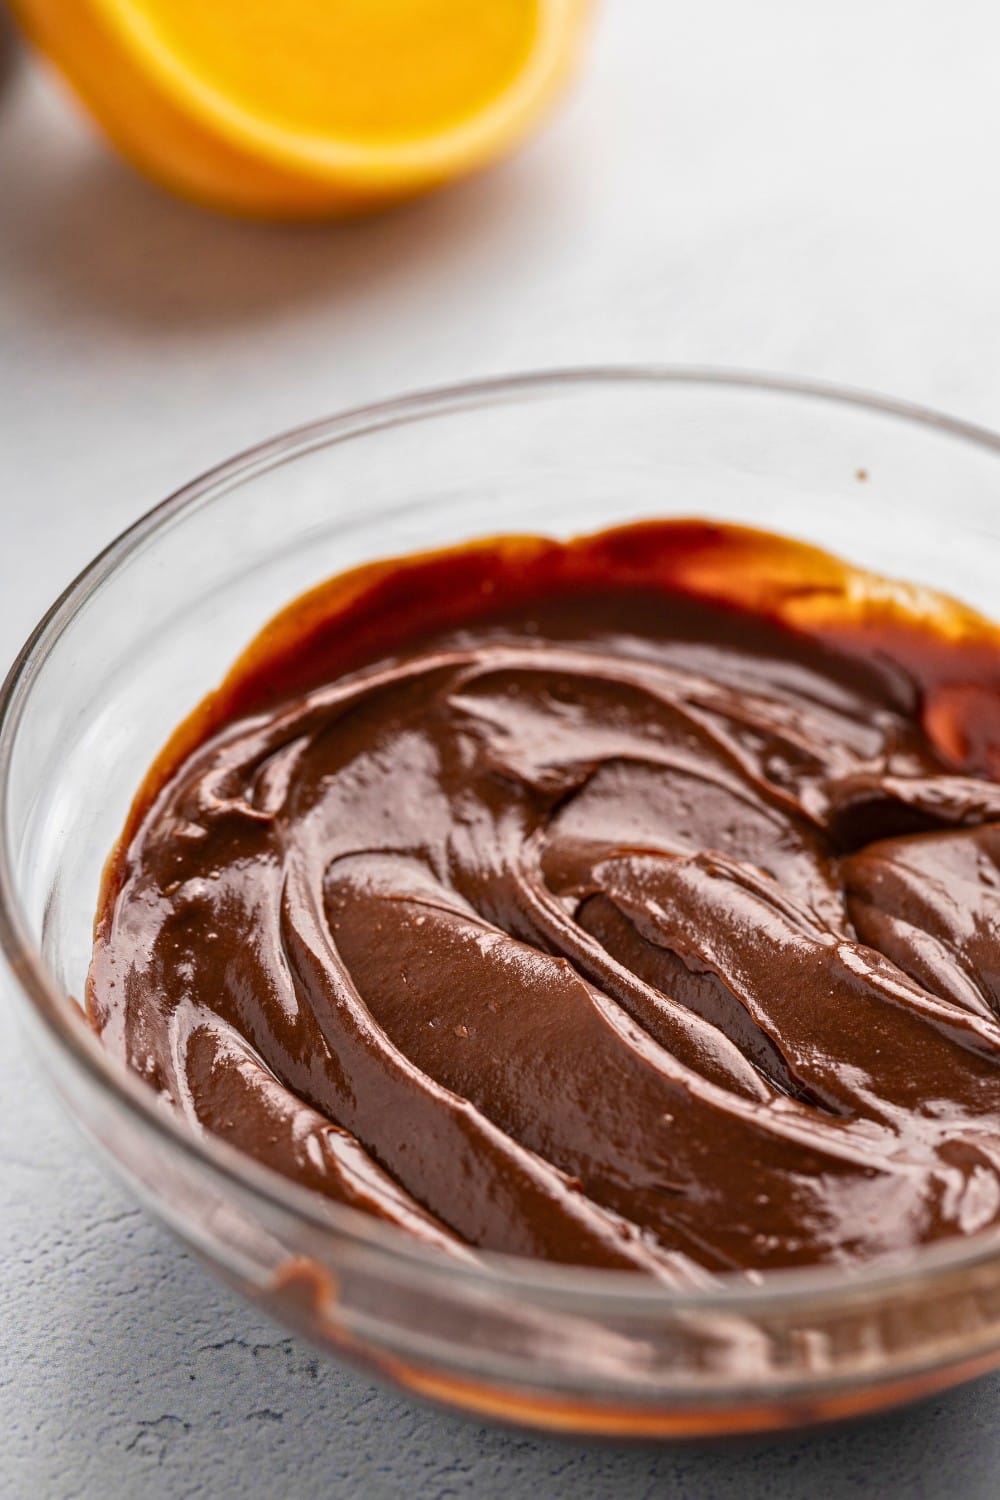
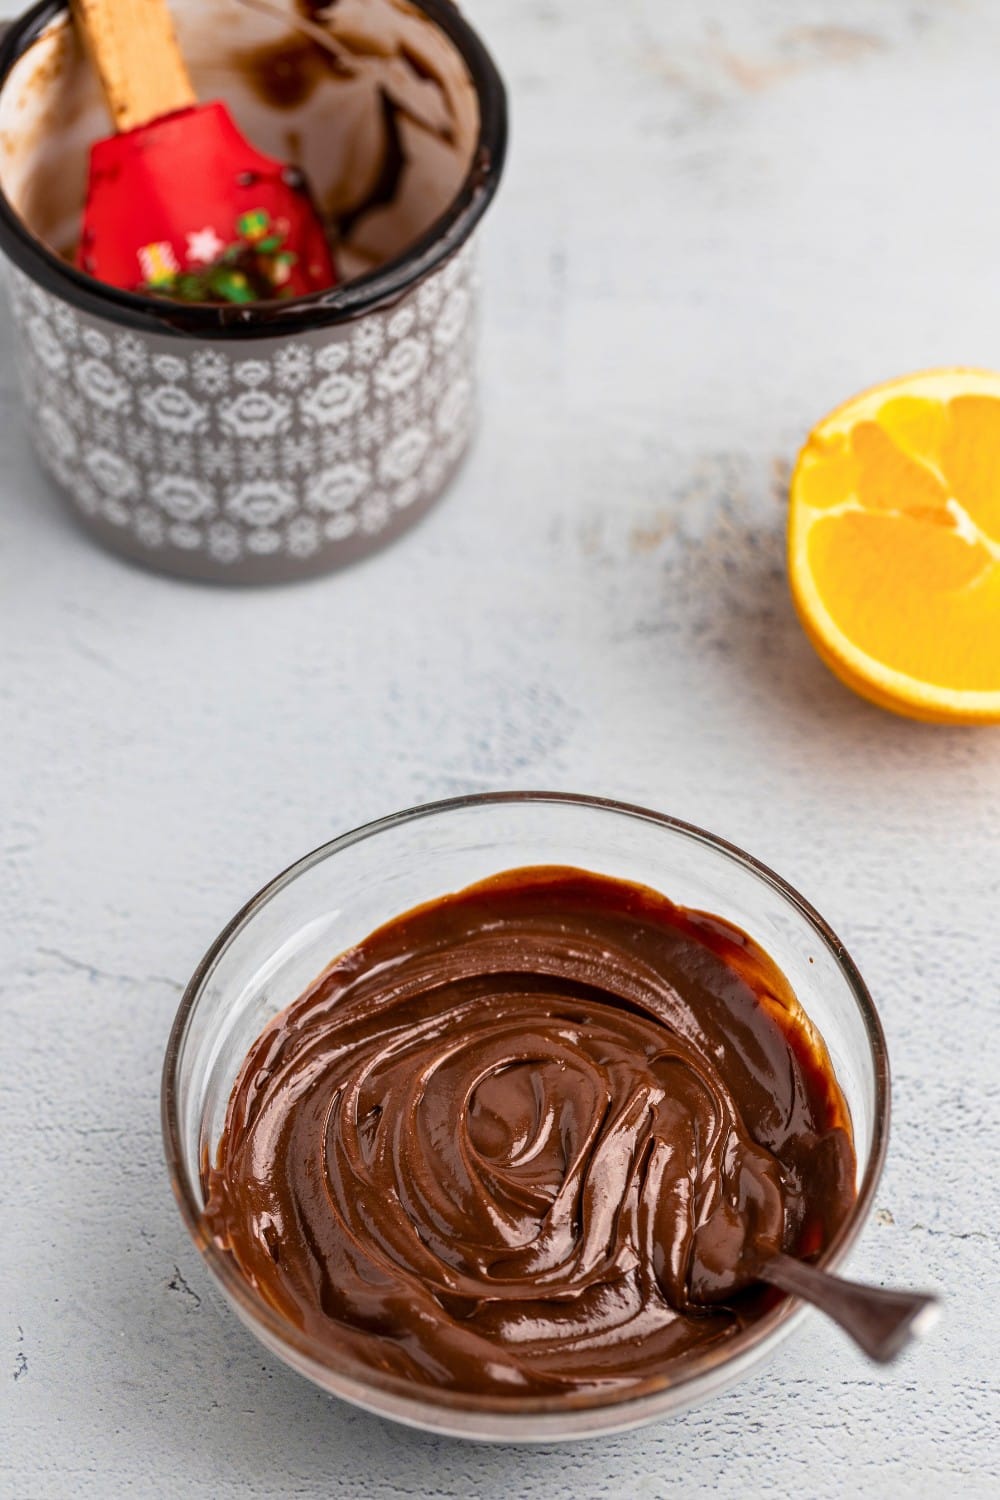
Orange ganache pairs chocolate with a gentle citrus note that stays subtle rather than candy-like. Using a mix of dark and milk chocolate keeps the flavor balanced, while infusing the cream with fresh orange zest adds aroma without making the ganache sharp or acidic.
This version is rich, smooth, and versatile, with the orange acting as a background flavor rather than the main event. It works well as a filling, topping, or glaze when you want chocolate first, with just a hint of orange coming through.
Ingredients
- 1/3 cup heavy cream 80 g; plus more to top up
- 1/3 cup milk chocolate 57 g
- 1/3 cup dark chocolate 57 g; 60-70% cocoa recommended
- orange zest from 1 medium orange
- pinch salt to taste
- 1 tablespoon unsalted butter 14 g; optional
Instructions
- Chop The Chocolate: Finely chop the milk and dark chocolate so the pieces are small — the smaller they are, the cleaner and faster they’ll melt.1/3 cup milk chocolate, 1/3 cup dark chocolate
- Infuse Cream: Put the heavy cream and the orange zest into a small pot and bring to a boil. Remove from heat and let the mixture sit for 15 minutes so the cream absorbs the orange flavor.1/3 cup heavy cream, orange zest
- Strain And Top Up: Strain the infused cream to remove the zest, then add fresh cream as needed to return the liquid to the original volume before heating.
- Warm The Cream: Gently warm the strained cream until it’s hot and just starting to bubble around the edges, then turn off the heat.
- Add The Chocolate: Pour the chopped chocolate into the hot cream and do nothing for 2–3 minutes — this lets the chocolate come up to temperature without stirring.
- Stir To Emulsify: Use a spatula to stir gently until the mixture becomes smooth and glossy. If tiny chocolate pieces remain, return the pot to the lowest heat and warm while stirring constantly until they melt. Remove from heat, add a pinch of salt, and stir briefly. For extra gloss and smoothness, you can optionally blend the ganache briefly.pinch salt
- Add Butter (Optional): While the ganache is still warm, add the butter and stir until fully incorporated for a silkier texture.1 tablespoon unsalted butter
- Taste And Adjust: Taste the ganache and add a little more salt if needed to balance the flavors.
- Use Or Store: Use the ganache once it reaches the consistency you need, or let it cool to about room temperature and refrigerate in an airtight container until ready to use.
Notes
- Stir in butter at the end if you want a shinier finish.
- When possible, use dark and milk chocolate from the same brand for consistent flavor and melting behavior.
- This recipe targets a 2:2:3 dark chocolate : milk chocolate : cream ratio by weight — use a kitchen scale rather than volume for accuracy.
- After stirring in the chocolate, you can carefully mix in 1 tablespoon hot orange juice to soften the ganache and add more orange flavor; alternatively lower heavy cream to 1/4 cup for a similar texture.
- Do not add orange juice to heavy cream at the start or it will curdle.
- Yields approximately 2/3 cup ganache.
Nutrition
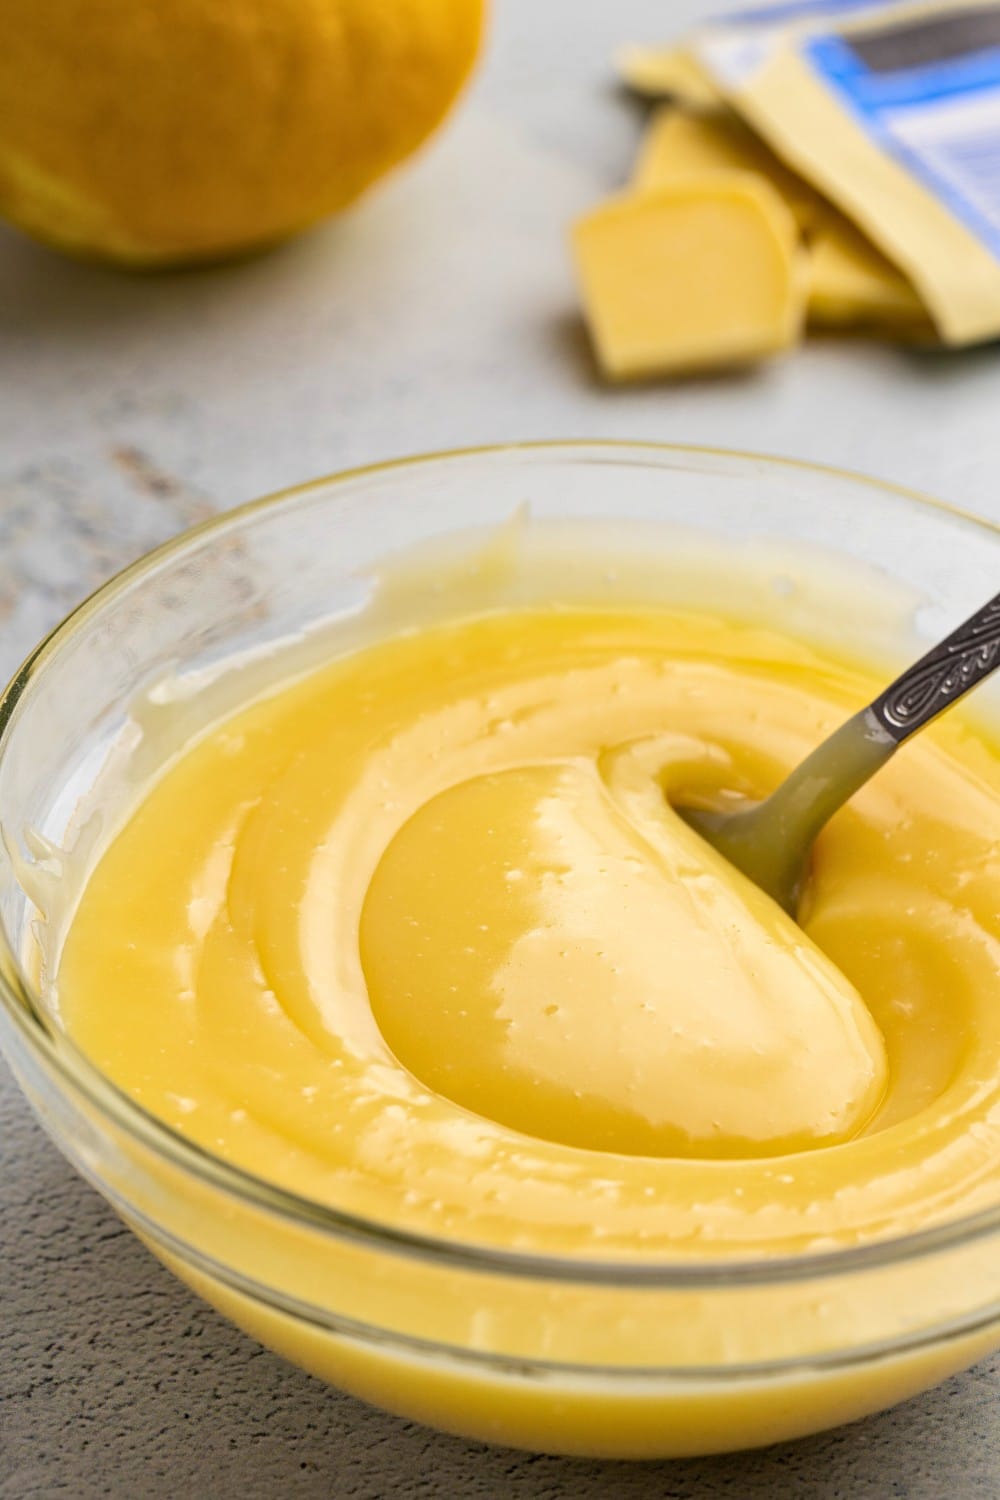
Lemon
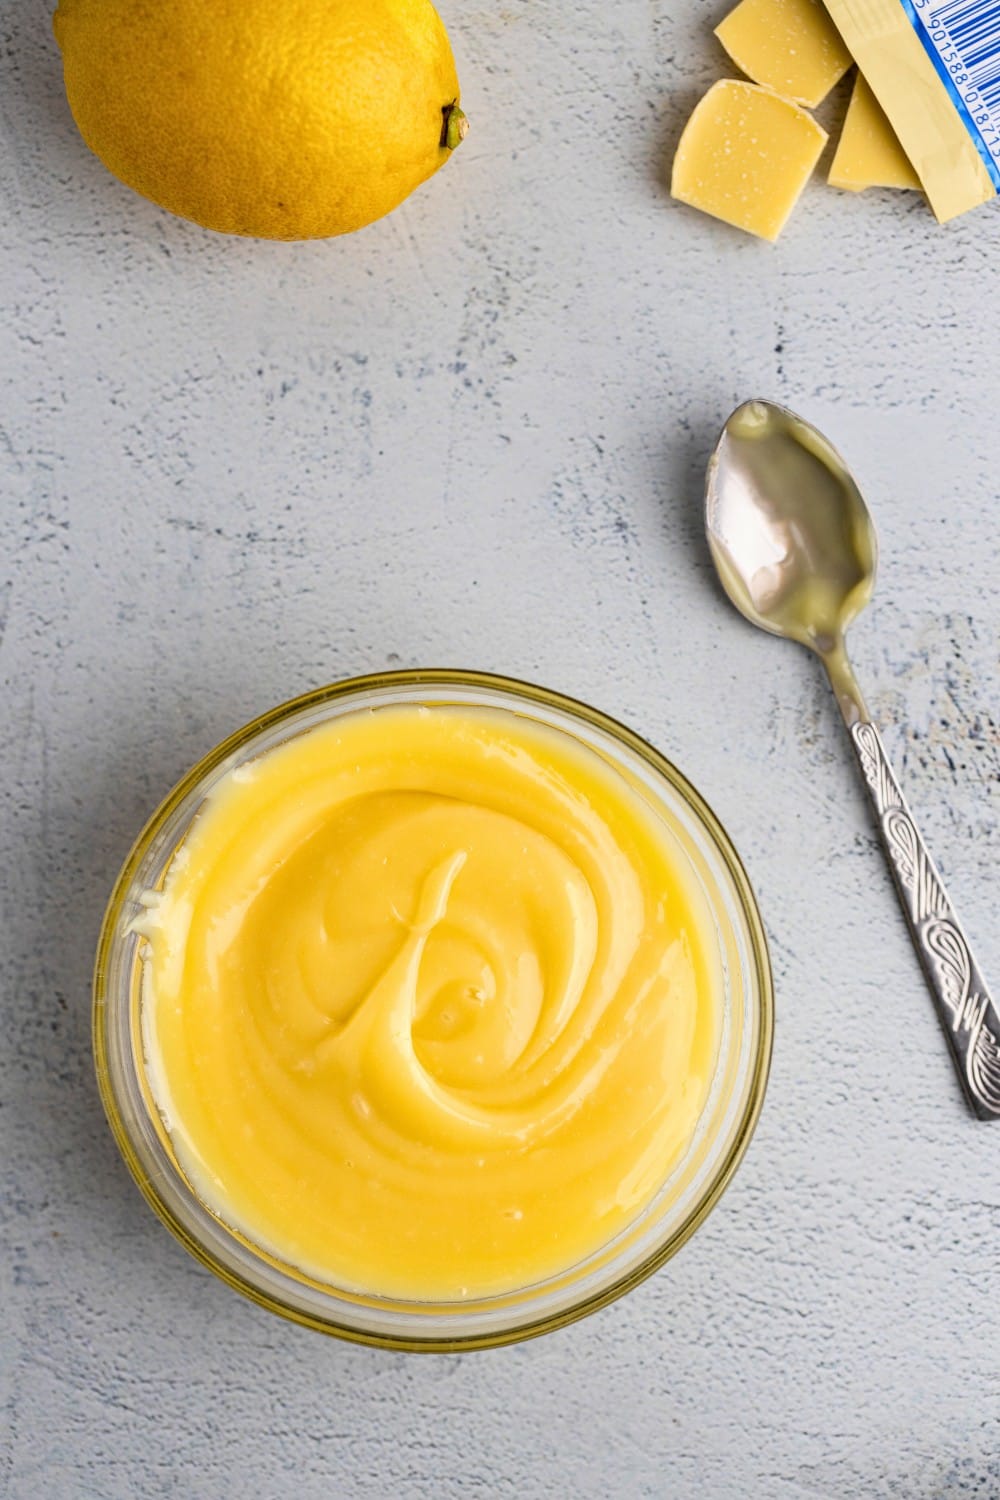
Bright, creamy lemon ganache uses white chocolate as a sweet, silky base with lemon zest and juice folded in for a fresh citrus twist. It’s smooth, tangy, and perfect when you want a citrusy ganache to finish your dessert or baked goods.
Ingredients
- 3 tablespoons heavy cream 45 g; plus more to top up
- 1 cup white chocolate 170 g
- lemon zest from 1 medium lemon
- 1 tablespoon lemon juice warmed up
- pinch salt to taste
Instructions
- Chop Chocolate Finely: Finely chop the white chocolate; the smaller the pieces, the cleaner the melt. Set the chopped chocolate aside.1 cup white chocolate
- Infuse Cream: Put the heavy cream and lemon zest into a pot and bring to a boil. Remove from the heat and let it sit for 15 minutes so the cream absorbs the lemon flavor.3 tablespoons heavy cream, lemon zest
- Strain And Top Up: If you prefer a clearer ganache, strain the infused cream. Top up with fresh heavy cream so the volume returns to what it was at the start.
- Warm Infused Cream: Gently warm the infused cream until it is hot and just bubbly around the edges, then turn off the heat.
- Add Chocolate: Pour the chopped chocolate into the warm cream and do nothing for 2–3 minutes. This waiting step lets the chocolate come up to temperature gently.
- Emulsify The Ganache: Stir with a spatula until the mixture is smooth and emulsified. If small chocolate pieces remain, place the pot over the lowest heat and warm while stirring constantly until they melt, then remove from heat.
- Add Lemon Juice: Pour in the slightly warmed lemon juice (warm or hot is fine; do not boil) and stir until fully incorporated.1 tablespoon lemon juice
- Finish And Blend: Add a pinch of salt and stir briefly. Once smooth, you can optionally blend briefly for extra gloss and silkiness.pinch salt
- Taste And Adjust: Taste the ganache and add more salt or a touch more warm lemon juice if needed.
- Store Or Use: Use the ganache once it reaches the desired consistency, or let it cool to about room temperature and refrigerate in an airtight container.
Notes
- We’re aiming here for the classic 3:1 white chocolate-to-cream ratio by weight (cream + lemon juice together). Weigh ingredients with a kitchen scale if possible rather than using volume.
- Do not add lemon juice to hot cream before stirring in the chocolate — the cream will curdle and you’ll end up with a lemon posset.
- For a stronger lemon flavor, double the lemon juice and reduce heavy cream by 1 tbsp.
- Yields about 2/3 cup ganache.
Nutrition
Earl Grey

Floral, citrusy, and elegantly aromatic, this Earl Grey ganache infuses white chocolate with fragrant tea for a refined flavor that works beautifully as a pour, glaze, or filling.
It’s surprisingly simple to make yet delivers a distinctive twist on traditional ganache.
Peanut Butter

Rich, creamy, and peanutty—this ganache combines white chocolate with smooth peanut butter for a sweet-and-salty finish that’s perfect on cakes, eclairs, macarons, and so on.
Easy to make and irresistibly versatile, it brings a nutty twist to classic ganache.
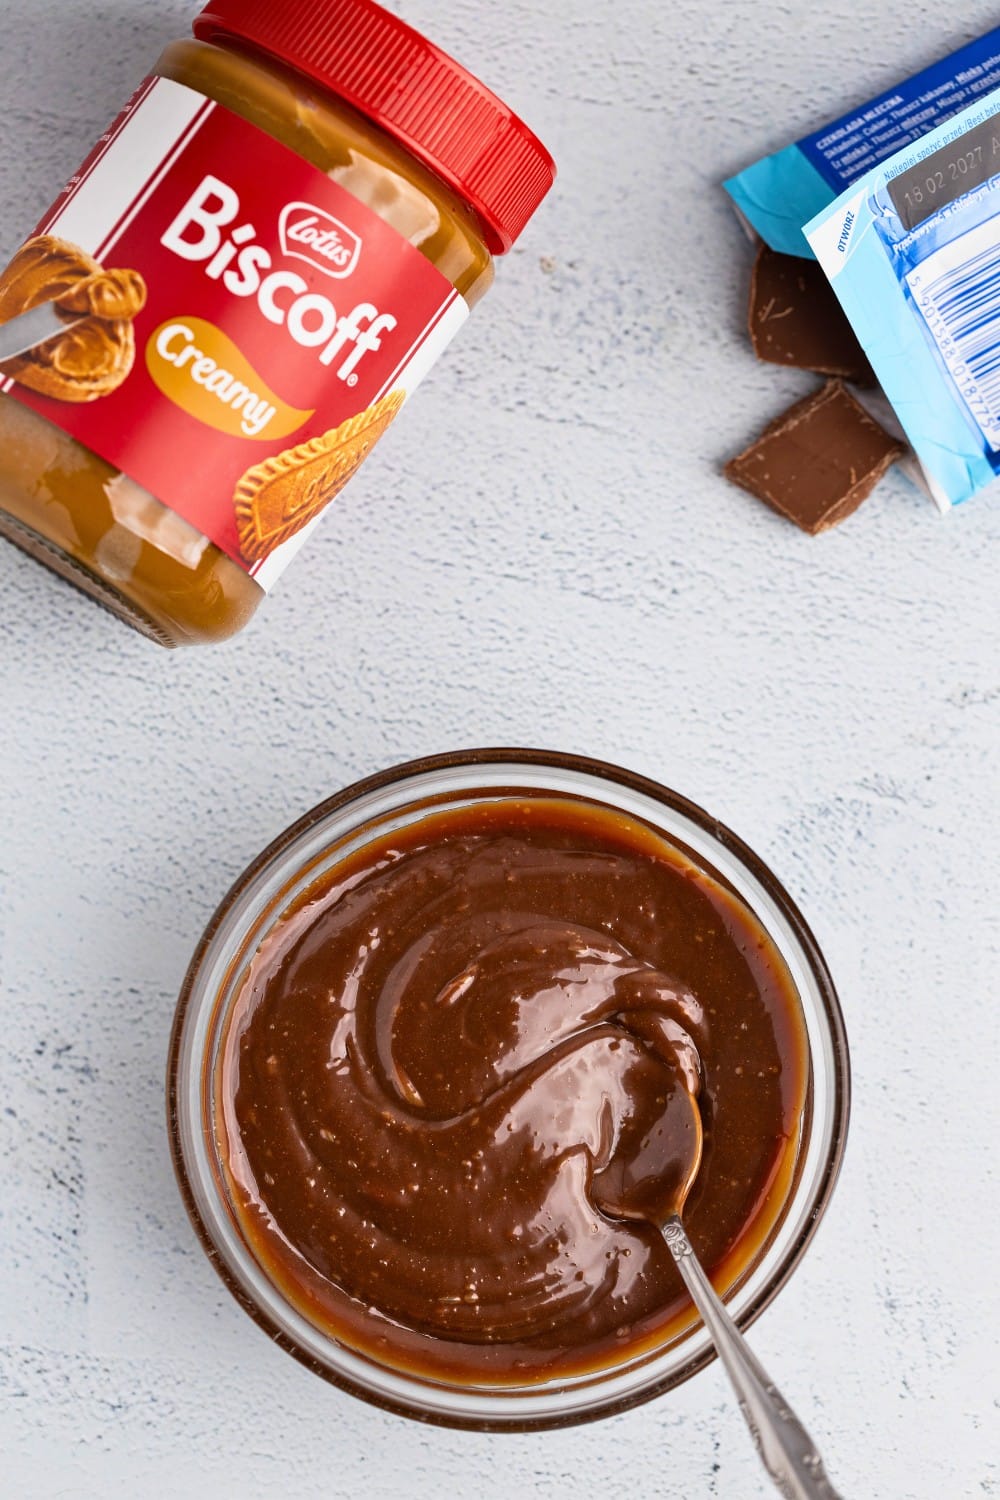
Biscoff Milk Chocolate
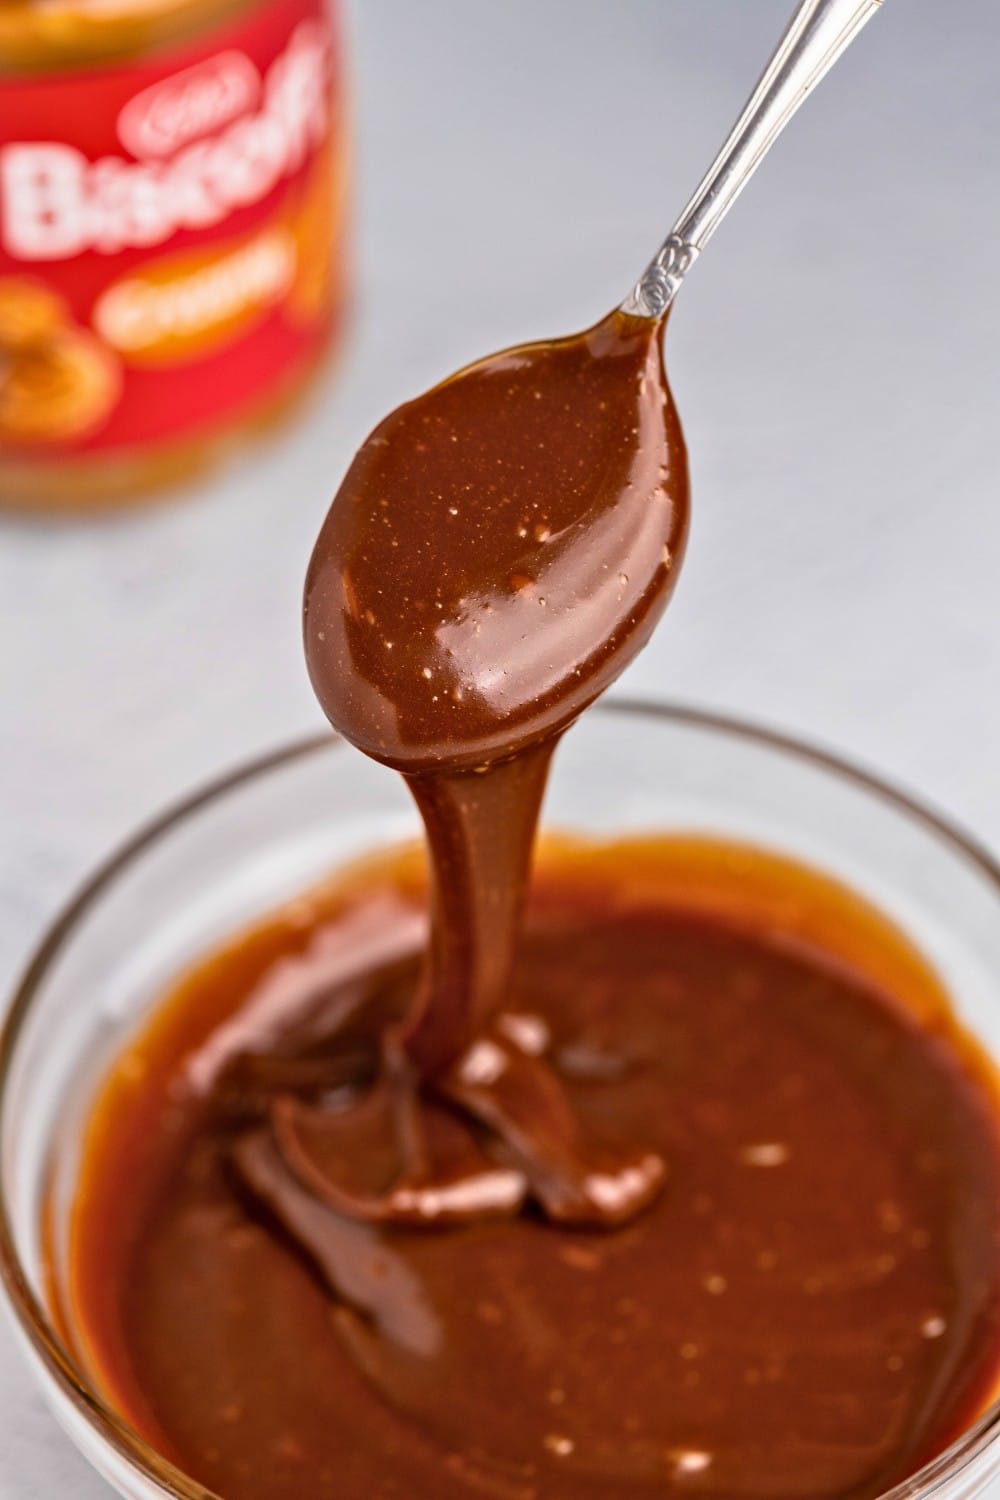
Biscoff milk chocolate ganache is for anyone who really wants that caramelized, spiced Biscoff flavor to come through — not just a hint of it. By folding a generous amount of Biscoff spread into a milk chocolate ganache, you get something rich, smooth, and unmistakably Biscoff-forward.
This isn’t a classic pourable ganache. It sets softly, starts out fairly thick, and works best as a spread, filling, or spoonable topping. If you love Biscoff and want a ganache where the flavor actually shows up, this one delivers.
Ingredients
- ¼ cup heavy cream 60 g
- ⅔ cup milk chocolate chopped, 115 g
- ½ cup Biscoff spread 120 g
- 1 tablespoon unsalted butter 14 g, optional
- pinch salt to taste
Instructions
- Chop the Chocolate: Finely chop the milk chocolate into small, even pieces — the smaller the pieces, the cleaner and faster they’ll melt.⅔ cup milk chocolate
- Warm Cream and Biscoff: Set up a double boiler (a pot with water and a heatproof bowl that doesn’t touch the water). Add the heavy cream and Biscoff spread, start over medium heat, then lower to low once the water boils. Warm until the cream is hot and the Biscoff softens, stir to combine, and turn off the heat.¼ cup heavy cream, ½ cup Biscoff spread
- Add Chopped Chocolate: Add the chopped chocolate to the warm cream-Biscoff mixture and then do nothing for 2–3 minutes so the chocolate gently comes up to temperature.
- Emulsify and Smooth: Stir with a spatula to melt and emulsify the mixture until smooth. If small chocolate bits remain, return the bowl to the double boiler on low for a few minutes while stirring. Add a pinch of salt and stir briefly. For extra gloss and silkiness, optionally blend briefly once smooth.pinch salt
- Add Optional Butter: If using, add the butter while the ganache is still warm and stir until fully incorporated for extra richness and shine.1 tablespoon unsalted butter
- Taste and Adjust: Taste the ganache and add more salt if needed to balance the sweetness.
- Cool and Store: Use the ganache once it reaches your desired consistency. To save, let it cool to about room temperature then refrigerate in an airtight container.
Notes
- Bbutter if you want a shinier finish.
- Because it uses a lot of Biscoff spread, the ganache starts thick and sets quite softly. It won’t flow like a classic chocolate ganache, so pouring may not give a smooth, even layer without spreading.
- Use a kitchen scale for best results. If multiplying, follow the 2:2:1 Biscoff spread : milk chocolate : cream ratio by weight.
Nutrition
Ganache Troubleshooting
- Ganache seized (dark or milk chocolate only). Cause: Temperature shock or contact with water. Fix: Add boiling water, 1 teaspoon at a time, whisking vigorously between additions until the ganache turns glossy again. Note: Water dilutes chocolate, so the ganache likely won’t set properly afterward. Treat it as chocolate sauce, not glaze or filling.
- Ganache split or oily. Cause: Overheating or broken emulsion. Fix: Warm very gently, then immersion blend to re-emulsify.
- Small grains or specks visible. Cause: Chocolate pieces didn’t fully melt. Fix: Warm gently if needed, then immersion blend until smooth.
- Grainy texture. Cause: Over-mixing or excessive heat. Fix: Warm gently and immersion blend to smooth it out.
- Too runny after cooling. Cause: Too much cream for the chocolate used. Fix: Warm gently, then stir in more melted chocolate.
- Too stiff after cooling. Cause: Too much chocolate for the cream used. Fix: Warm gently, then stir in more warm heavy cream.
Ganache FAQ
How to Store Ganache?
Store ganache in an airtight container in the fridge. Properly stored, it keeps well for 3–4 days.
Ganache will firm up when cold—that’s normal. Before using it again, reheat gently (water bath or double boiler, as explained in the section on cooling and reheating) until it reaches the texture you need.
Avoid reheating straight in the microwave unless you do very short bursts and stir in between, as it’s easy to overheat and split.