
How to Temper Chocolate [Dark, Milk, White]
Shiny, snappy chocolate? It’s all about a little temperature magic.
Tempering chocolate is an essential technique for creating confections that not only taste great but also look and feel like they came straight from a gourmet shop.
By carefully controlling the temperature of your chocolate, you ensure a melt-in-your-mouth texture, a firm snap, and a beautiful glossy finish.
What is Tempered Chocolate and What Is Tempering
Tempered chocolate is everything you’d expect from a quality chocolate bar. It’s smooth, glossy, and has that signature chocolate snap when you break it.
Tempering chocolate is a process of controlled heating and cooling that stabilizes the cocoa butter crystals into a structure that makes shiny chocolate with a crisp snap.
That’s a mouthful. But in simple terms, tempering chocolate is about encouraging the cocoa butter fat in melted chocolate to form a specific type of crystal when it sets (out of six possibilities).
If we leave melted chocolate as-is, it’ll form five different types of crystals, likely resulting in dull and soft chocolate. But if we carefully control the temperature and stir the chocolate, we can reliably encourage the formation of beta crystals (the fifth type) that make the chocolate we all know and love.
(Here’s a link if you want to read more about the underlying science.)
Here’s a simple breakdown of the differences between not-tempered and tempered chocolate:
| Not Tempered | Tempered | |
|---|---|---|
| Appearance | Dull, streaky | Smooth and shiny |
| Texture | Crumbly or soft | Has a crisp chocolate snap |
| Mouthfeel | Often has a greasy aftertaste | Smooth melt |
When Do You Need Tempered Chocolate
The easiest answer is that you need tempered chocolate whenever you want it shiny and snappy.
That means you need tempered chocolate for the following:
- chocolate candies
- truffles
- beautiful cake decorations
- custom chocolate bars
- molding (say, making chocolate shells for madeleines)
- snappy coatings
For other uses, like glazes, ganache, or batters (think brownie batter or cookie batter), and so on, regular melted chocolate is perfectly fine.
Tools & Equipment
You don’t need much to temper chocolate, but there are a few essentials:
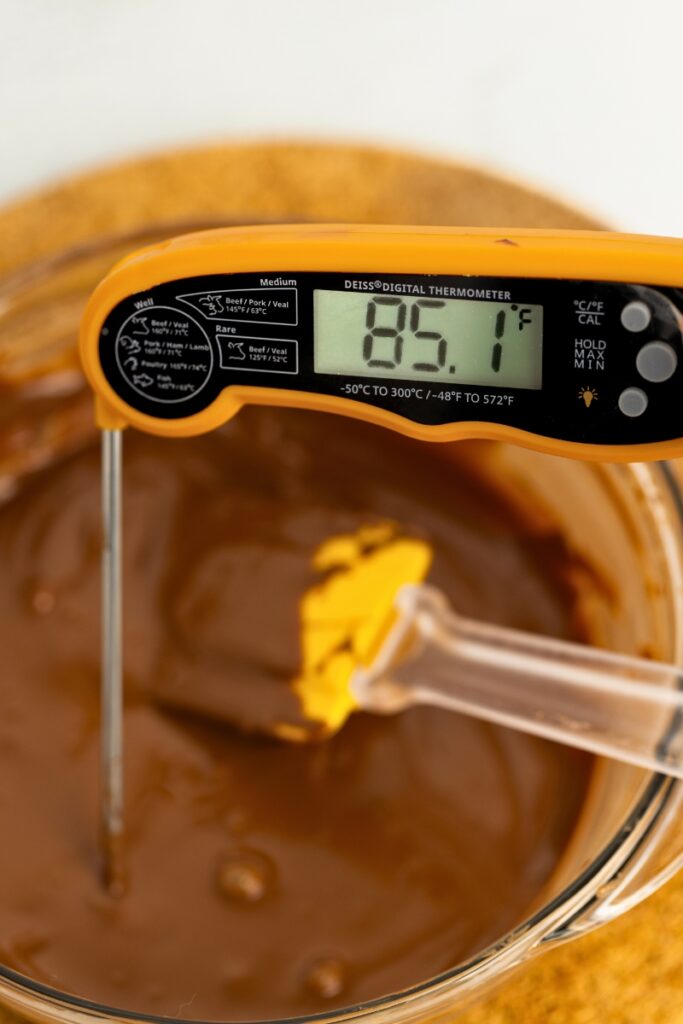
- Food thermometer. A thermometer is necessary because you must bring chocolate to a certain temperature to temper it. I recommend an instant-read food thermometer because it’s accurate and fairly cheap. An infrared thermometer looks cool, but a quality one costs much more, and you probably don’t really need it.
- Something to melt the chocolate. A microwave is a popular option, but I like to stick to the good old-fashioned double boiler. Here’s a tutorial on how to set up a double boiler using the tools you already have.
- Silicone spatula. Silicone spatulas are perfect because they’re flexible enough to scrape all the chocolate from the bottom and sides of the bowl while stirring. Anything else that can do the job is perfectly fine, too.
Got those handy? It’s time to pick the chocolate.
Choosing Your Chocolate
When it comes to tempering, not all chocolate is created equal. Here’s what you need to know:
- Couverture chocolate is best. Couverture chocolate contains more cocoa butter than regular eating chocolate, which is why it melts more easily, has more sheen, and offers a better “snap” when broken. All around, it’s easier to work with, and that’s why professionals often recommend it for tempering.
- Real chocolate works fine. Real chocolate has cocoa butter in the ingredients list and doesn’t contain vegetable oils. If your chocolate checks those boxes, you’re good to go. If you’re unsure which brand to trust, you can’t go wrong with renowned chocolate makers like Ghirardelli, Valrhona, Lindt, Guittard, and more. Not sure if yours is okay? Check the label and look for vegetable oils.
- Imitation or compound chocolate is a no-go. Sometimes labeled as coating chocolate or candy melts, these contain extra vegetable oils and won’t temper the same way. They’re great if you want to practice decorating, but they won’t give you the snap or sheen we’re looking for in tempered chocolate. As a rule of thumb, if the chocolate is cheap compared to other bars, it’s probably not real chocolate.
Got your tools and chocolate ready? Let’s get into tempering.
Step-by-Step: How to Temper Chocolate
The process of tempering chocolate is the same for dark, milk, and white chocolate. The only difference is that the temperature ranges you need to bring the chocolate to vary depending on the type. To simplify things, I’ve included all the temperatures in a table in the next section.
Now, the whole process of tempering chocolate isn’t that complicated, but there are a lot of tiny details to keep in mind. Don’t worry, though—after a couple of tempering sessions, most of that will become second nature.
Here are the steps to temper chocolate:
- Prep. If you’re working with a chocolate bar, chop it into tiny pieces. The smaller the pieces, the more easily they’ll melt. Keep in mind that milk chocolate melts more quickly than dark, and white chocolate is the easiest to melt, so while a rough chop might be okay for white chocolate, you’ll have to put more effort into chopping dark chocolate. If you’re using couverture chocolate, it often comes in discs or callets, so that part’s done for you.

- Prep double boiler. Set up a double boiler by placing a heatproof bowl over a saucepan with about 1 inch of water. Make sure the water doesn’t touch the bottom of the bowl. Set it over medium heat, and add about 2/3 of your chopped chocolate into the bowl. Reserve the rest. Lower the heat to a minimum once the water starts to boil.

- Melt the chocolate. Stir the chocolate every minute or so with a silicone spatula. When it begins to melt, stir more frequently. Keep an eye on the temperature so it doesn’t exceed the melting temperature. If it starts to get close to that temperature, turn off the heat or lift the bowl from the double boiler briefly to cool it slightly. When about 90 percent of the chocolate has melted, turn off the heat, remove the bowl from the double boiler, and wipe the bottom dry.

- Seed. Stir until the remaining melted bits disappear, then add about 2/3 of the unmelted chocolate you set aside. This process is called seeding, as you add tempered chocolate to help your melted chocolate form the same type of crystals. Keep stirring until everything melts. Check the temperature. If it’s above 95°F (or 35°C), add half of the remaining chocolate and stir it in. If it’s still above 95°F, stir in the other half.


- Temper. Now, it’s time to bring your chocolate down to the tempering temperature. The easiest way is to submerge the bowl in cold tap water (in a larger bowl or soup plate) and keep stirring, making sure to scrape the bottom and sides. Check the temperature often. When it enters the tempering temperature range, remove it from the cold water immediately, wipe it dry, and stir once or twice. At this point, the chocolate is tempered; all that’s left is to warm it slightly so it’s easier to pour.

- Warm up. Bring your chocolate to its working temperature so it’s more fluid. You can submerge the bowl in warm water (either warm tap water or water from the double boiler) and stir, scraping the bottom and sides, or place the bowl back on top of the double boiler over low heat for a minute or two. Keep checking the temperature. When it reaches the working range, remove it from the heat, wipe it dry, and stir again. Your chocolate is now ready to use. If you accidentally exceed the working temperature, go back to the seeding step and repeat.
- (Optional) Test for temper. To double-check if your chocolate is tempered, dip a knife or offset spatula in the chocolate, then stick it in the fridge for 2 to 3 minutes. If it sets firm and glossy without streaks, you’re good to go.
- Use. Pour it into chocolate molds, madeleine molds, make decorations, or do anything else you want with tempered chocolate.
Tempering Temperatures for Dark, Milk, and White Chocolate
| Melting Temperature | Tempering Temperature | Working Temperature | |
|---|---|---|---|
| Dark Chocolate | 122°F (50°C) – 131°F (55°C) | 82°F (28°C) – 84°F (29°C) | 88°F (31°C) – 90°F (32°C) |
| Milk Chocolate | 113°F (45°C) – 122°F (50°C) | 81°F (27°C) – 82°F (28°C) | 84°F (29°C) – 86°F (30°C) |
| White Chocolate | 113°F (45°C) – 122°F (50°C) | 79°F (26°C) – 81°F (27°C) | 82°F (28°C) – 84°F (29°C) |
Check the manufacturer’s notes: Each brand can vary slightly in cocoa butter content and viscosity, so if the manufacturer provides recommended tempering ranges, follow those instead of the general ones above.
(I took the temperatures above from the Valrhona site, though you can find similar numbers in any book or video on tempering.)
Tips
- Melt chocolate in the microwave. If you have a microwave, you can use it to melt chocolate instead of a double boiler. Heat it in 15- to 20-second increments at 50% power, stirring in between. Stop when the chocolate is about 85% melted and continue from the seeding step.
- Take your time. If you’re new to tempering chocolate, go slow, watch the temperature carefully, and make sure you dot all the i’s and cross all the t’s. Once you get the hang of it, you can cut corners.
- Go with eating chocolate first. If you’re testing the waters, don’t invest in couverture chocolate right away. While it’s easier to work with, it’s more expensive and usually sold in larger quantities. Instead, buy a quality bar of real chocolate and give it a shot. If you enjoy tempering, that’s when you can upgrade to Callebaut drops.
- Keep stirring. Once the chocolate melts, stir it almost constantly. The only exceptions might be when you check the temperature or prepare a cold or warm water bath. If the chocolate sits undisturbed for too long, it might not temper correctly, even if it’s within the right temperature range.
- Mind the environment. If it’s a scorching summer day and you don’t have AC, you’ll need to use cold water (and perhaps a few ice cubes) to help bring the chocolate down to tempering temperature. Then you’ll have to refrigerate it to set. You’ll also need a cool place to store your finished chocolate so it doesn’t melt or soften.
- Adjust for amount. A small amount of chocolate changes temperature more easily than a larger batch. This might seem obvious, but it’s easy to forget when you’re used to working with one amount and then suddenly using another. Overheating or cooling too much can force you to start over.
- Couverture chocolate melts more easily than eating chocolate. During the seeding step, keep in mind which type of chocolate you’re adding. Once the chocolate’s temperature dips below 93°F (34°C), melting regular chocolate slows significantly, while couverture discs can still melt pretty easily.
How to Store Tempered Chocolate
Keep any tempered chocolate decorations away from direct sunlight and in a cool, dry place below 70°F / 21°C.
Storing it in the 60-65°F (15-18°C) range is ideal, but regular room temperature that’s slightly above 70°F / 21°C is still better than using the fridge. Extended refrigeration often causes chocolate bloom—a dull, grayish, or white streak on the surface.
A short chill, like half an hour, to help the chocolate set is okay. A quick 10-minute freeze to release the chocolate from a mold is fine, too. But prolonged cold storage can likely ruin your hard work.
As for leftover tempered chocolate, let it set in a bowl, then chop it up (if needed) and store it in an airtight container at room temperature. Use it in your next tempering session.
Common Issues (and How to Fix Them)
Slightly Grainy Texture After Melting
- Why it happens? Cocoa butter and cocoa solids separated, often because the chocolate was heated above the recommended maximum melting temperature.
- Possible fix? Immediately remove it from heat and stir in small pieces of tempered chocolate (real or couverture). It might come back together, but there’s no guarantee.
- Alternative solution. If seeding doesn’t help, try adding a bit of neutral-flavored oil, then use that chocolate for coating. Please note that once you add oil, it won’t temper properly anymore.
- How to avoid? Heat the chocolate more gently and monitor its temperature closely.
Soft Snap and Dull Finish
- Why it happens? The chocolate never properly formed the right cocoa butter crystals, possibly because it didn’t reach the correct temperature range or wasn’t stirred enough. Alternatively, your chocolate might not be “real” chocolate that contains cocoa butter.
- Possible fix? If it’s a decoration you can melt down, do that and start the tempering process over, adding unmelted chocolate during seeding. If it’s already attached to something (like a madeleine shell), there’s not much you can do.
- How to avoid? Keep stirring, ensure the chocolate reaches the correct temperature ranges, use a calibrated thermometer, and make sure the chocolate contains cocoa butter.
Chocolate Becomes a Thick, Grainy, Lumpy Mass
First time seeing this? That’s what chocolate that has seized looks like.
- Why it happens? A small amount of moisture (like steam or water droplets) contacted the chocolate, causing the sugar to clump.
- Possible fix? Stir in boiling water 1 tablespoon at a time until the chocolate smooths out. After adding water, it won’t temper properly, but you can use it like a ganache or chocolate sauce. If you need tempered chocolate, you’ll have to start fresh.
- How to avoid? Keep all utensils dry and make sure no steam from your double boiler comes into contact with the chocolate. If your kitchen is super humid, you might need a dehumidifier to help.

This post may contain affiliate links. Read our privacy policy.
Equipment
- Food thermometer
Ingredients
- 1 Chocolate Bar
Instructions
- Prep. Chop chocolate into small pieces for even melting. No chopping needed if using couverture.1 Chocolate Bar
- Set up double boiler. Place a heatproof bowl over a saucepan with 1 inch of simmering water (not touching the bowl). Add 2/3 of the chocolate and lower heat to a minimum.
- Melt. Stir frequently until about 90% of the chocolate is melted. Remove from heat and dry the bowl’s bottom.
- Seed. Stir until fully melted, then add 2/3 of the reserved chocolate. Stir until melted. Check the temperature and if above 95°F (35°C), add half of the leftover chocolate. Stir until melted and repeat with the other half if temperature still above 95°F (35°C).
- Cool to tempering range. Stir while cooling the chocolate in a cold water bath, then remove once it reaches the tempering temperature. Dry the bowl and stir.
- Warm to working range. Gently warm in a warm water bath or in a double boiler over low heat, stirring, until it reaches the working temperature.
- (Optional) Test. Dip a knife or offset spatula in the chocolate and chill for 2–3 minutes. If it sets glossy and firm, it’s tempered.
- Use. Pour into molds, coat desserts, or make decorations.