Polish Apple Cake (Szarlotka)
Here’s a traditional Polish Apple Cake (Szarlotka), a beloved apple cake known for its simplicity and delightful flavors.

Should We Call It “Polish Apple Cake” or “Polish Apple Pie”?
Online, some people refer to it as a cake, while others call it a pie. Ingredient-wise, it’s closer to a pie since the base uses ingredients typical of pie crusts. The main differences lie in the amount of water used (Polish apple pie uses little to none), the flour-to-fat ratio, and the inclusion of baking powder.
Regarding the recipe, there’s no pre-baking required, and we aim for the bottom to rise slightly. This simplifies the whole process, making it a great option for beginners.
Okay, enough preamble; let’s dive into the recipe.
Recipe At a Glance
- Simple, Flexible Ingredients. Szarlotka uses only everyday ingredients like all-purpose flour, butter, or sugar. Choose from sweet and sour apples to get the taste just right, and play around with cinnamon or lemon juice for a personal twist.
- Straight-to-the-Oven Preparation. No fuss here – just mix, knead, prep your apples, and assemble. No pre-baking – this recipe’s all about keeping it simple.
- Your Cake, Your Way. Top it off your style: go traditional with flat dough circles or get adventurous with a crispy, grated dough layer.
If you’re making Polish Apple Charlotte for the first time, read the ingredients notes, step-by-step instructions, and tips. If you’re a veteran, feel free to jump to the recipe card.
Ingredients Notes and Substitutes
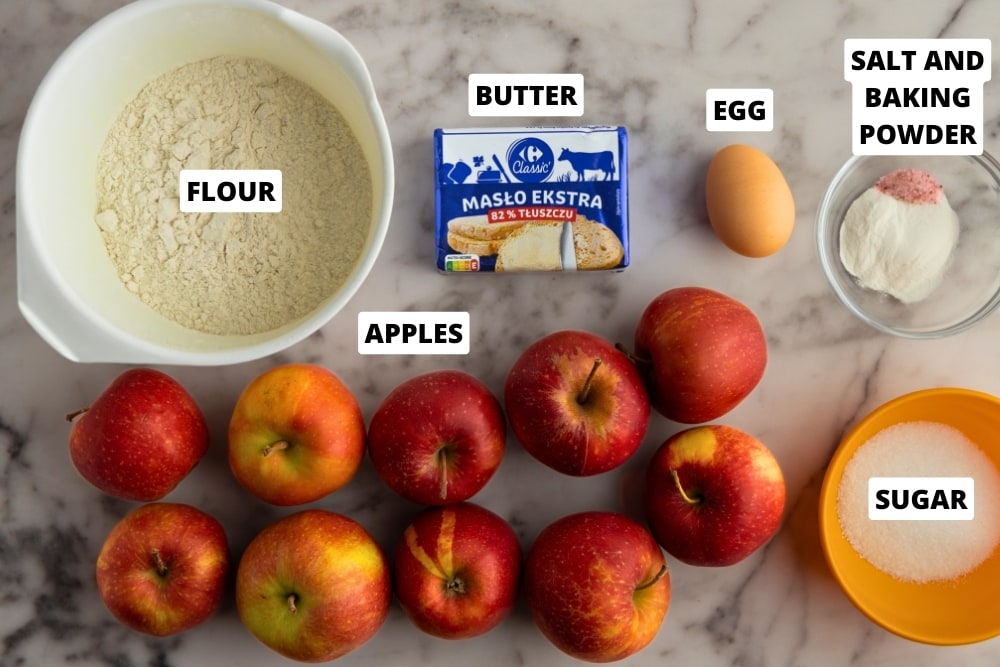
- All-purpose flour. Use your regular all-purpose flour for the cake.
- Egg. You can use two eggs if you’re short on butter, i.e., substitute ~1.75 oz of butter with one medium egg. This makes the dough more difficult to knead, but the result is just as good.
- Unsalted butter.
- Salt. Regular table salt is perfectly fine.
- Baking powder.
- Sugar. White sugar is best, but powdered or brown sugar work okay. The latter will alter the flavor a bit, though.
- Apples. A mix of sweet and sour apples is the best option. But, if you’re only working with one type, you can always adjust the flavor by adding some sugar or lemon juice.
- (Optional) Cinnamon. A classic spice for apples. I recommend adding it, but the cake still tastes great if you omit it.
- (Optional) Lemon juice. Lime juice or apple cider vinegar also work well to adjust the flavor of the apples.
- (Optional) Powdered sugar for dusting.
How to Make Polish Apple Charlotte
- Prep bowl. Pour the wheat flour, sugar, salt, and baking powder into a large bowl and mix them together.
- Add fat. Cut the butter (straight from the fridge) into small pieces and add the cut butter and egg to the bowl.
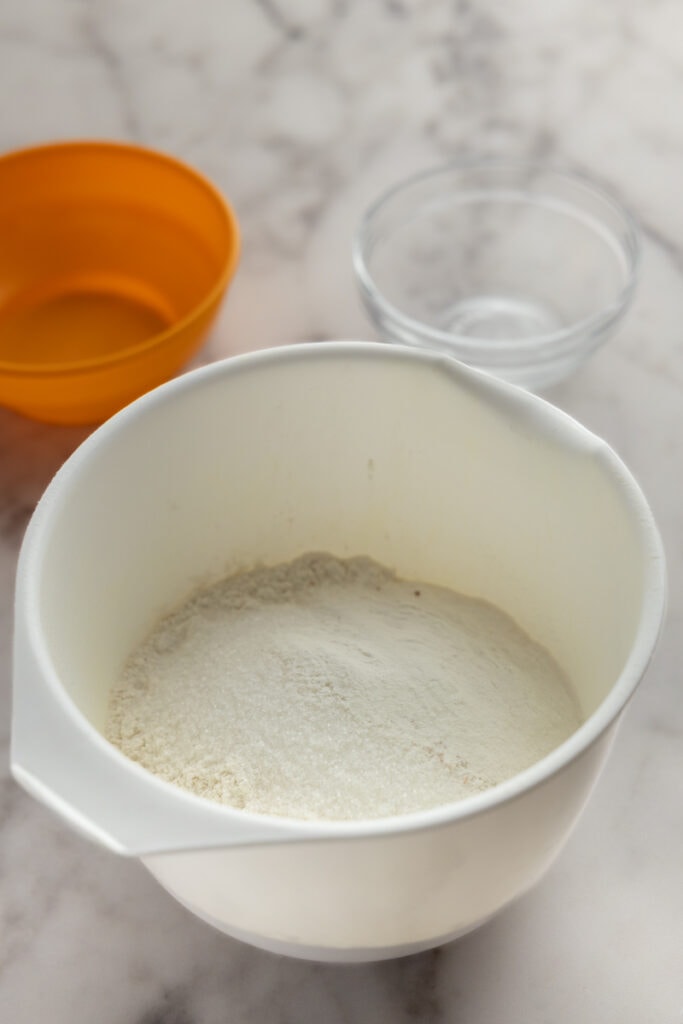 Mix wheat flour, sugar, salt, and baking powder
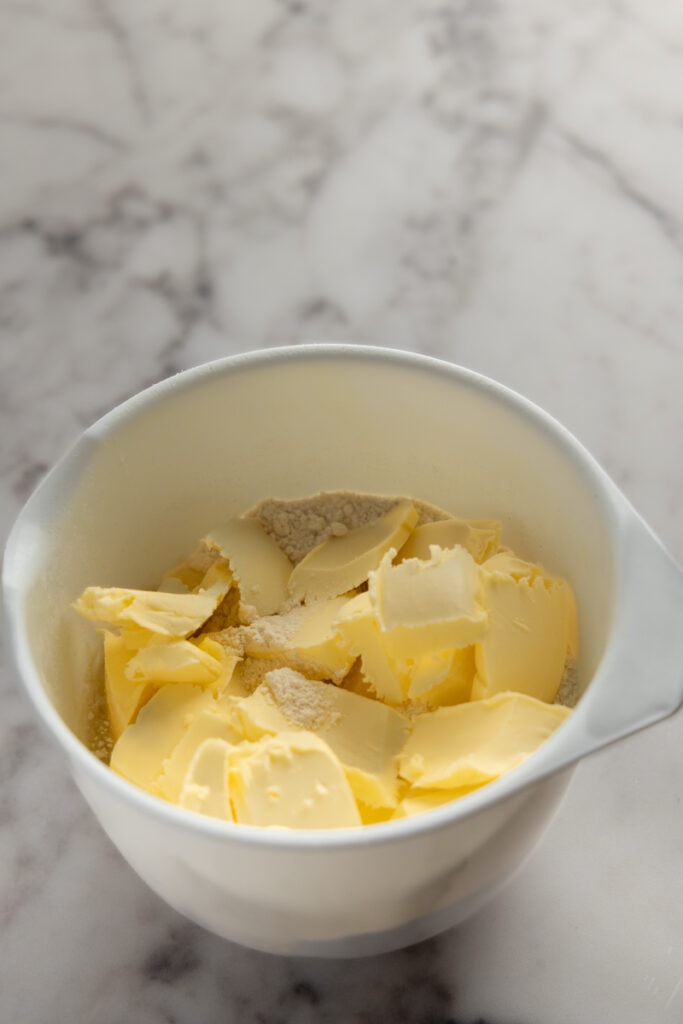 Add sliced butter
- Knead. Knead the dough by hand for about 7 to 10 minutes. Initially, the dough may not come together, but after 1 to 2 minutes, you should notice small balls and lumps forming. Continue kneading until you have a large, elastic dough ball, making sure all the flour is incorporated. Work quickly during kneading – you don’t want the butter to start melting. Alternatively, you can use a stand mixer with a dough hook to knead the dough.
- Wrap. Wrap the dough in foil and chill it in the fridge. Let the dough sit in the fridge for about an hour before taking it out, giving you enough time to prep the apples and do some cleanup.
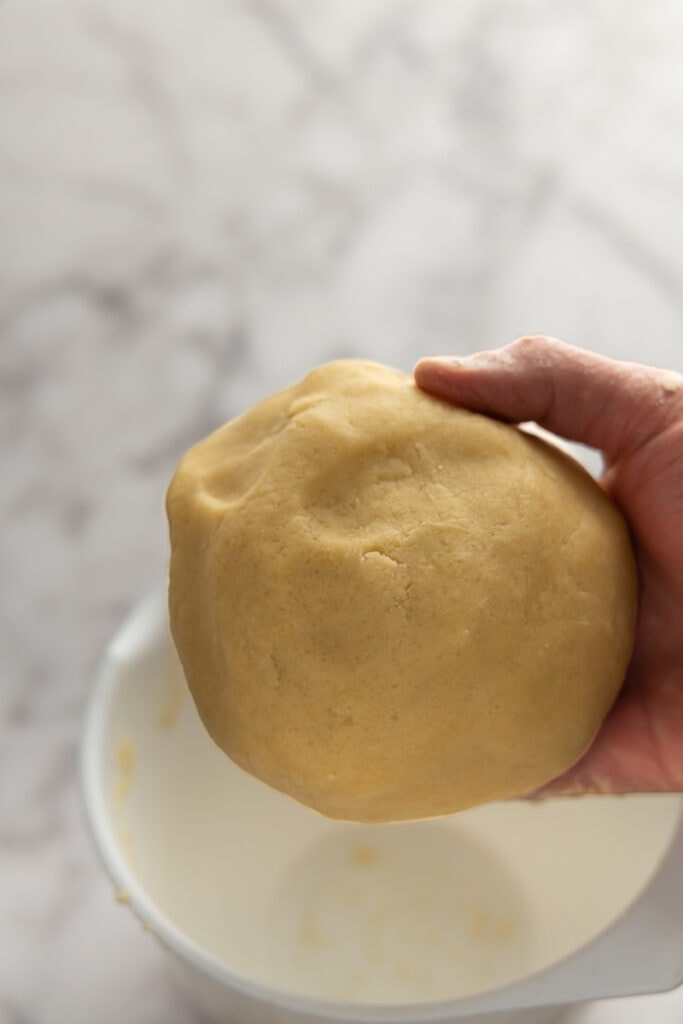 Knead to form a dough ball
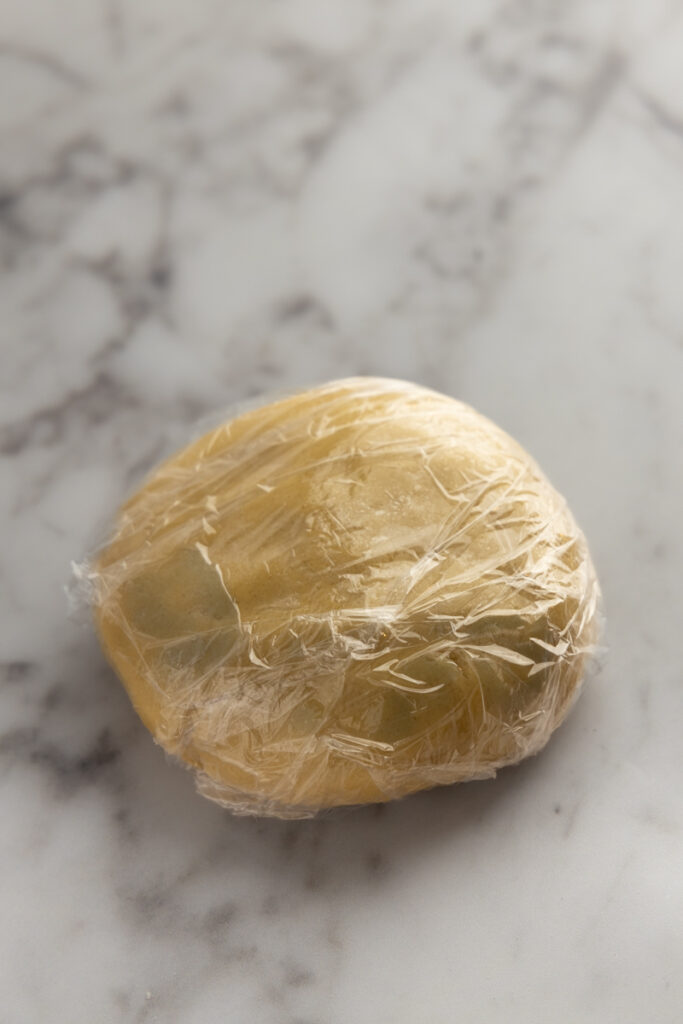 Wrap and chill
- Prep apples. Wash, peel, and grate the apples using the large holes of a box grater. Squeeze the juice from the grated apples using a strainer or squeeze them with your hands. I typically get about a cup of fresh apple juice (which is delicious!).
- (Optional) Season the apples. Add 2 teaspoons of sugar, 1 tablespoon of lemon juice, 1/3 teaspoon of salt, and 1 teaspoon of cinnamon. Mix well, taste, and adjust if needed.
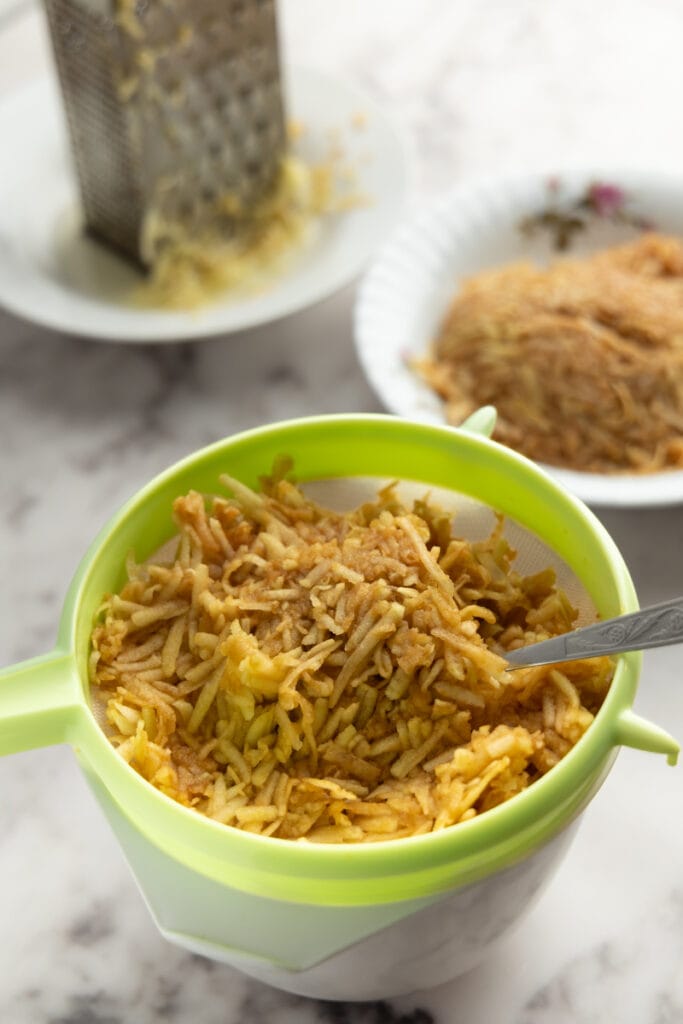 Strain grated apples
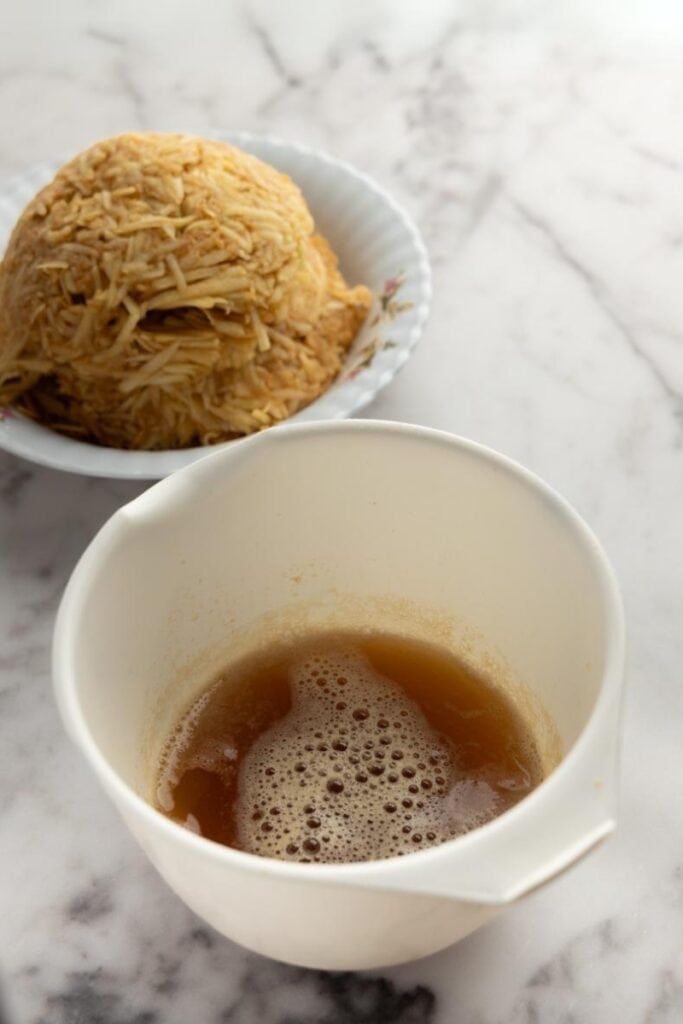 Squeeze out the juice
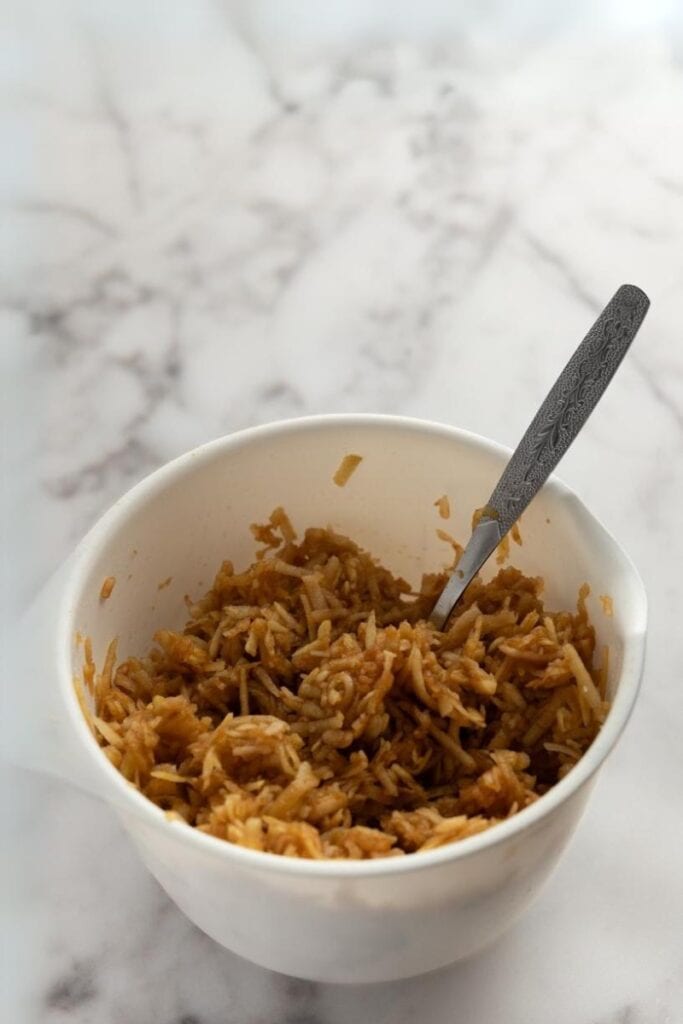 Season and mix
- Preheat. Start preheating the oven to 360°F (or 180°C).
- Divide dough. Remove the dough from the fridge and divide it into two parts: one-third and two-thirds. Wrap the smaller portion of the dough and put it back in the fridge.
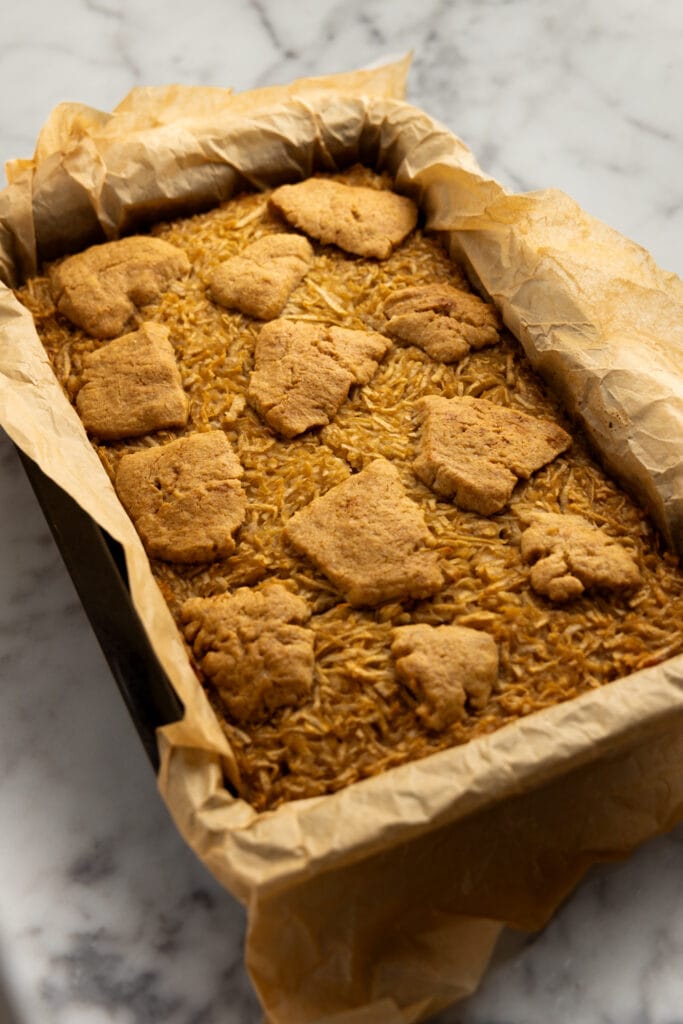
- Prep the base. Line a baking pan with parchment paper. Slice the larger portion of the dough into 1/5-inch slices and arrange the slices on the pan to cover the bottom. Press the slices with your hands to spread the dough evenly across the entire bottom of the tray.
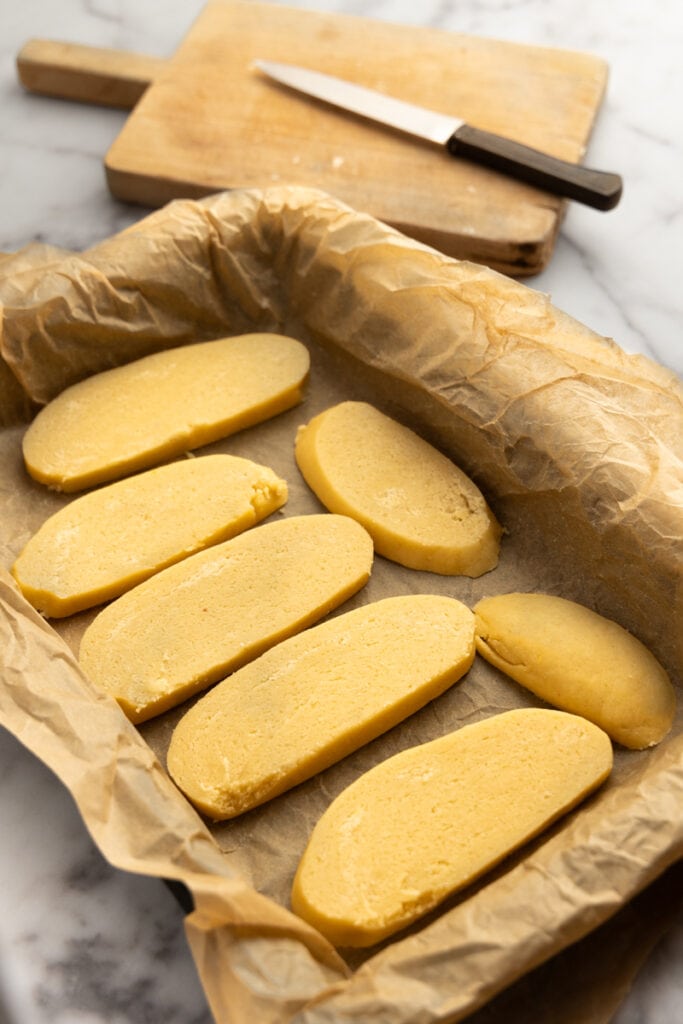 Slice dough into 1/5-inch pieces
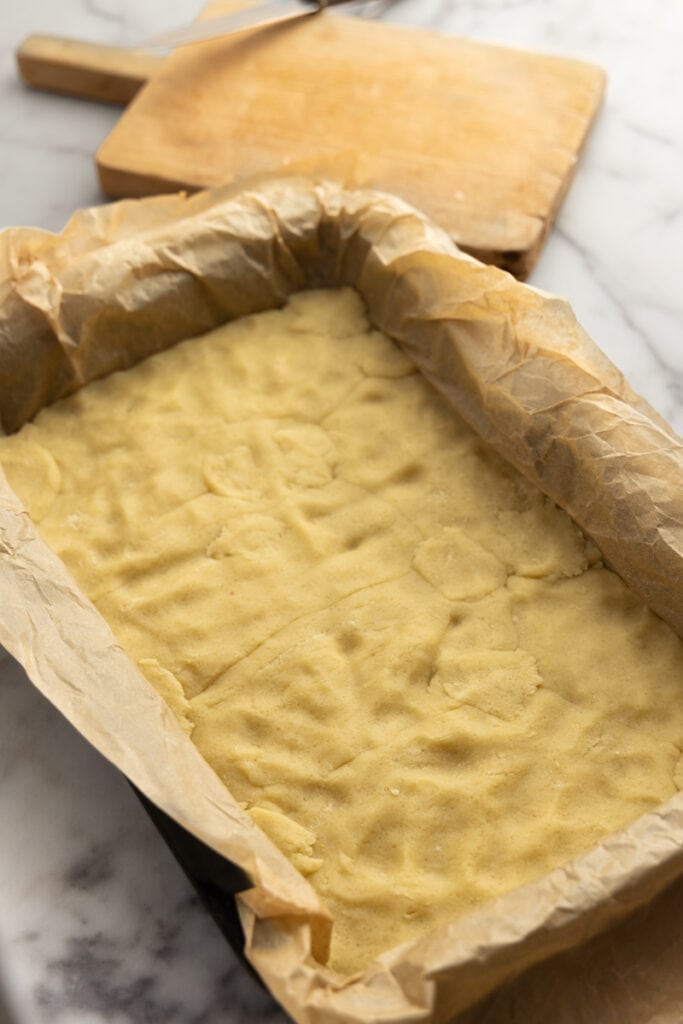 Press evenly to form a base
- Add apples. Spread the seasoned apples evenly over the pressed dough.
- Prep the top. Cut the remaining one-third of the dough from the fridge into slices thinner than those used for the bottom. Alternatively, tear small dough balls with your hands, then flatten them. Arrange these pieces of dough over the apples, creating small islands of dough and pressing them into the apples.
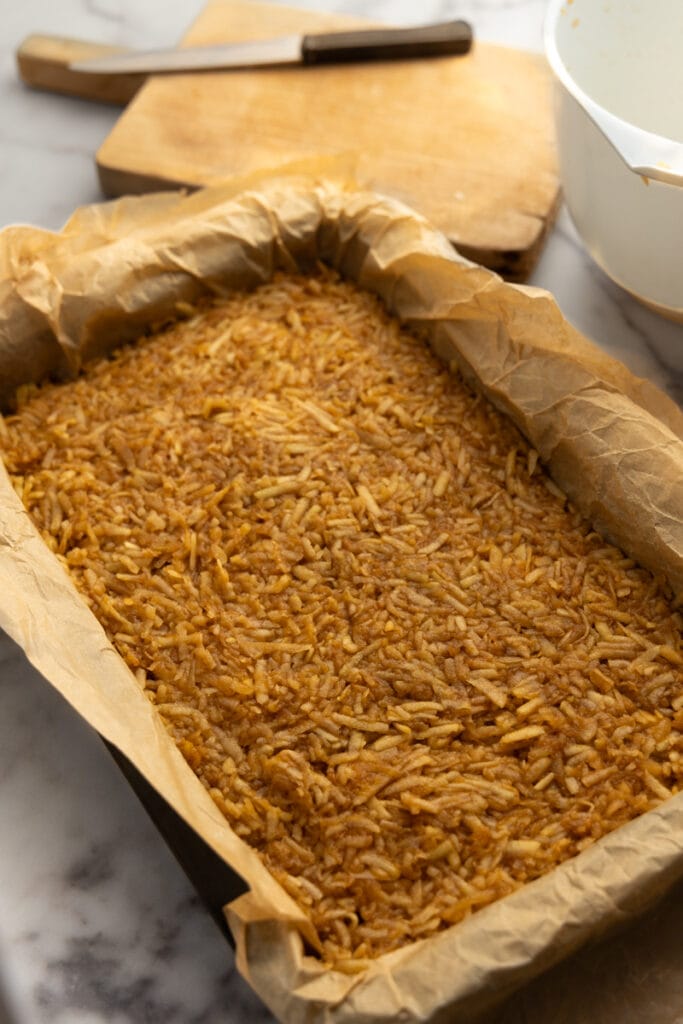 Spread the seasoned apples
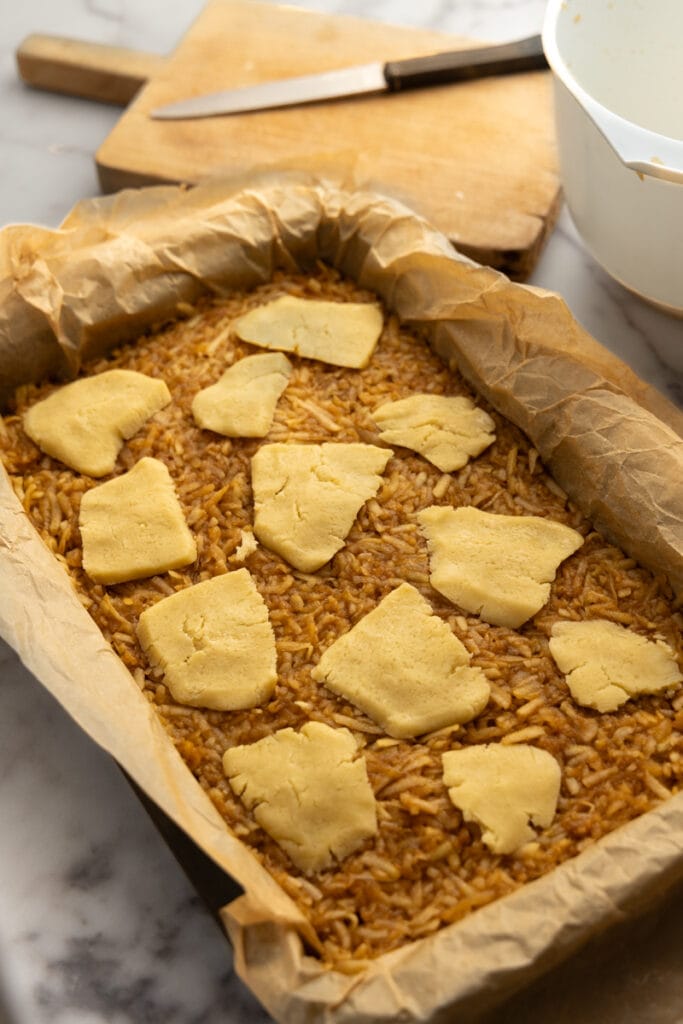 Top with thin flattened dough
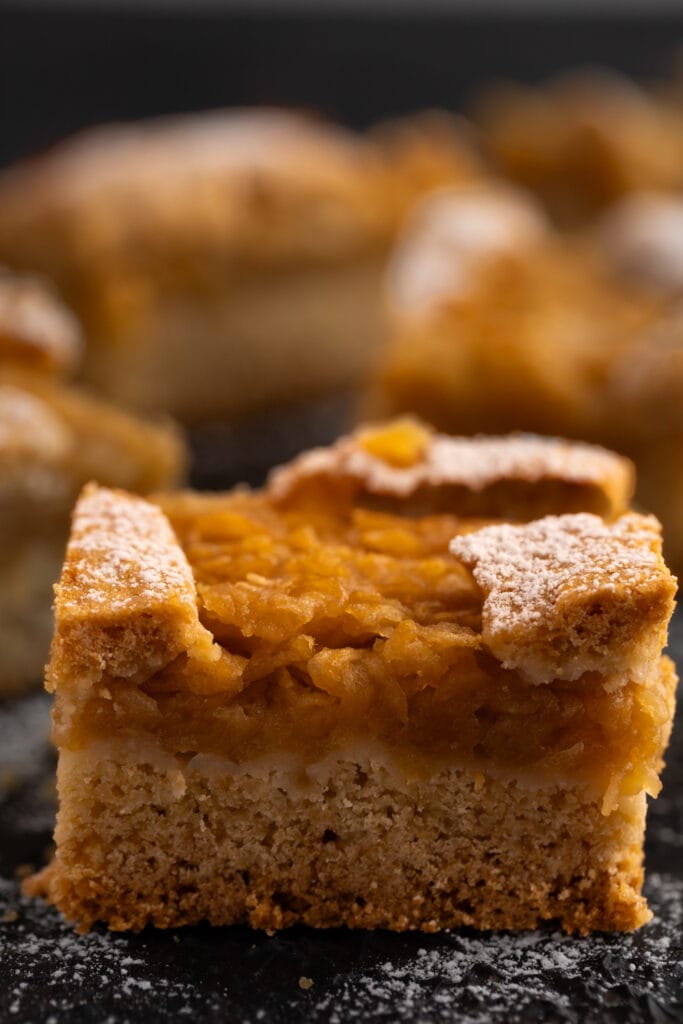
- Bake. Put the pan into the preheated oven and bake for one hour at the middle level of the oven. After approximately 50 minutes of baking, check the color of the cake. If the top dough gets too brown and risks burning, switch the oven to heat from the bottom to prevent the top from burning while allowing the bottom to finish cooking.
- Rest. Let the Szarlotka rest at room temperature until it’s no longer hot, then refrigerate it. It’s best served after a few hours of refrigeration.

Tips for Making Polish Apple Cake
This recipe is fairly straightforward, but here are a couple of tips you might find useful:
- Adding Water to Dough: If the dough isn’t absorbing all the flour during kneading, add one tablespoon of cold water to help incorporate the remaining flour. A little goes a long way here. Don’t add more water – it’s not a pie dough, even though it’s quite similar.
- Patch Holes in Dough: If there are any holes in the base of the cake that are difficult to fill, take another piece of dough from the fridge, tear it, and use it to patch the holes. This ensures an even and sealed bottom.
- Choosing Apples: Use a mix of sweet and sour apples for the best flavor. Add more lemon juice to increase acidity if only sweet apples are available. Conversely, a bit of extra sugar should suffice to balance the taste if you only have sour apples.
- Balancing Sourness: If you find the cake a bit too tart, sprinkle powdered sugar over it to compensate.
- Give Time After Baking: This cake is super crumbly right after baking, and cutting it too soon can be challenging. Let it sit in a cold place for 2 to 3 hours, or better yet, refrigerate overnight before serving. It’s much easier to slice the next day.
- Adjust Portions for a Smaller Pan: This recipe is ideally suited for a 9-inch square pan or a 7×11-inch rectangular one. If using a smaller pan, divide the dough into two equal parts. Use one half for the base and the other half to top the apples. Increase the baking time by 2-3 minutes to ensure the cake is thoroughly cooked.
- Try Different Apple Prep: Instead of grating the apples, you can slice them, cook them for 10 minutes on a non-stick skillet, and season them the same way we prep apples for apple pierogi.

Variations
There are at least two popular methods for creating the top layer of Szarlotka cake. The first method, as described in the recipe above, involves placing flat dough circles atop the apples. Here’s the second option:
- Frozen Grated Dough Top. After making the dough, immediately divide it into one-third and two-thirds, wrap both portions separately, and place the smaller portion in the freezer. After preparing the base and apples, take the frozen portion and grate it over the apples using the large holes of a box grater. This creates a thin, crispy top layer for the cake, giving it a bit more crunch.

Storage
Let the cake cool down at room temperature, then seal it tightly and refrigerate it for 3 to 4 days.
A baking pan with a lid works best for this. Alternatively, you can cut the cake into several large chunks, transfer them into airtight containers, and then place them in the fridge. You can also wrap the cake in plastic wrap or aluminum foil.
If you need to store the cake longer, you can freeze it when it’s tightly wrapped. That said, it may become soggy once defrosted.

This post may contain affiliate links. Read our privacy policy.
Equipment
- 9-inch square or a 7×11-inch rectangular baking pan
Ingredients
- 2 and 1/2 cups all-purpose flour 300g
- 1 egg
- 7 oz unsalted butter that’s 1 and 3/4 of a typical stick of butter or ~200 g
- 1/3 teaspoons of salt
- 2 teaspoons of baking powder
- 3 oz sugar ~85g
- 3 and 1/2 pounds apples 1 and 1/2 kg
- Cinnamon optional
- Lemon juice optional
Instructions
- Mix Dry Ingredients: Combine flour, sugar, salt, and baking powder in a large bowl.2 and 1/2 cups all-purpose flour, 1/3 teaspoons of salt, 3 oz sugar, 2 teaspoons of baking powder
- Add Butter and Egg: Cut cold butter into small pieces and mix it with an egg into the dry ingredients.1 egg, 7 oz unsalted butter
- Knead Dough: Knead for 7-10 minutes until it forms an elastic ball. Use a stand mixer with a dough hook as an alternative.
- Chill Dough: Wrap the dough in foil and refrigerate for about an hour.
- Prepare Apples: Wash, peel, and grate apples. Squeeze out the juice.3 and 1/2 pounds apples
- (Optional) Season Apples: Mix in sugar, lemon juice, salt, and cinnamon to the grated apples.Lemon juice, Cinnamon
- Preheat Oven: Set your oven to 360°F (180°C).
- Divide Dough: Split dough into one-third and two-thirds. Return the smaller portion to the fridge.
- Form Base: Line a baking pan with paper, slice larger dough portion and cover the pan bottom.
- Layer Apples: Spread seasoned apples over the dough base.
- Top Layer: Use the remaining dough to cover the apples in thin slices or small flattened balls.
- Bake: Cook in the oven for one hour, adjusting heat if necessary to avoid over-browning.
- Cool and Serve: Let the cake cool at room temperature, then refrigerate. Best served after a few hours or overnight.