Raspberry Cream Puffs
Try my raspberry cream puffs, where each puff is topped with a crunchy streusel, filled with a light and zesty raspberry curd mixed with whipped cream, and finished with a fresh raspberry. They’re stunning to look at, a joy to eat, and simpler to make than you might think!

Recipe At a Glance
There are endless ways to make raspberry cream puffs. Mine involves topping the puffs with streusel topping (à la Choux au Craquelin), filling them with raspberry curd lightened with whipped cream, and topping them with a bit of the filling and fresh raspberries.
These puffs look gorgeous, taste brilliant, and don’t require much skill in the kitchen.
The downside? The whole endeavor takes at least three hours.
That said, there are ways to simplify the recipe or prepare some parts the day before, making these easier to puff off on a busy day. I cover those after the step-by-step section.
Making these raspberry cream puffs for the first time? Read the ingredients notes, step-by-step instructions, and tips. If it’s not your first rodeo, feel free to jump to the recipe card.

Ingredients Notes and Substitutes
Choux Pastry
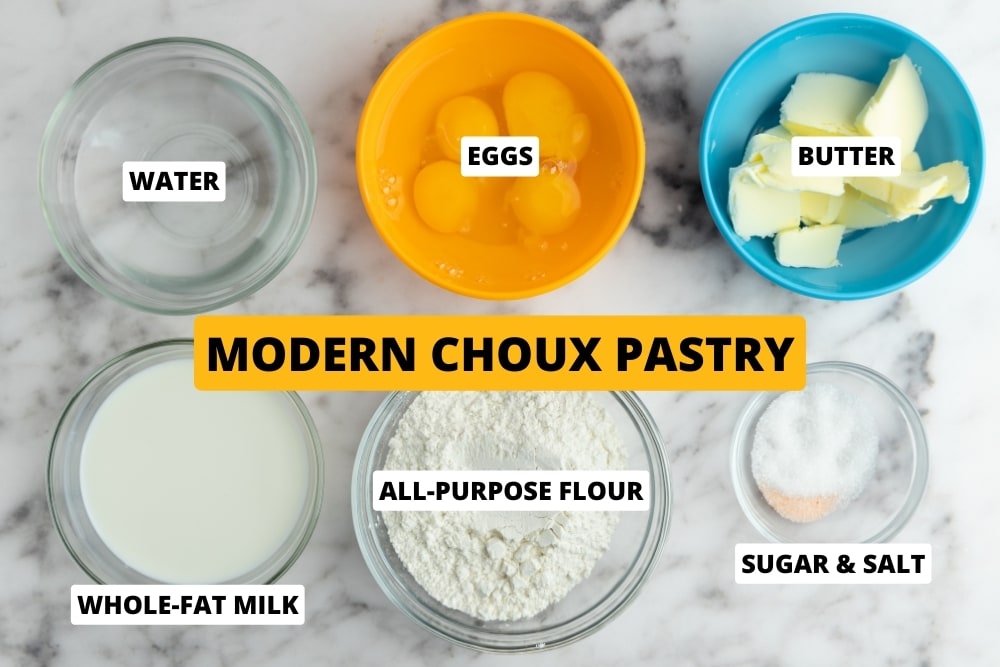
- Water and milk. Full-fat milk works best, but skim should work in a pinch. I wouldn’t experiment with vegan milk, as it might alter the flavor of the choux. It’s better to use just water instead.
- All-purpose flour.
- Unsalted butter.
- Eggs.
- Salt and sugar. Sugar alternatives are perfectly fine.
Crumb Topping
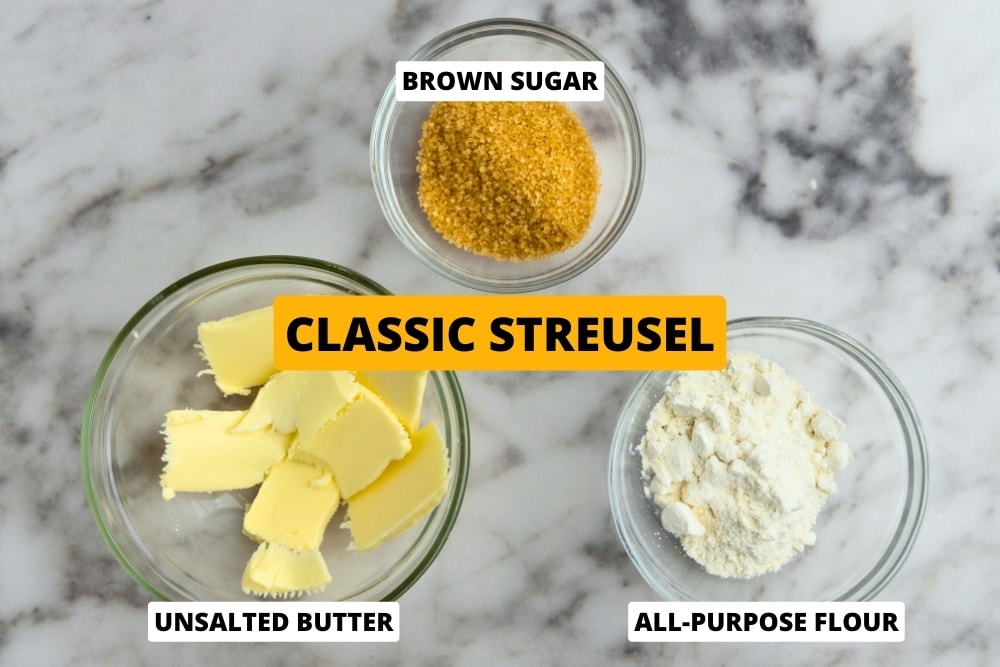
- Unsalted butter.
- All-purpose flour.
- Brown sugar. You can use white sugar instead of brown sugar.
- Red food dye. Great if you want to make your puffs look impressive, but totally optional.
Raspberry Filling

This filling is like Cream Diplomat, except we use raspberry curd instead of raspberry pastry cream as the flavor base. The idea is the same.
- Raspberries. Both fresh and frozen raspberries work well for this recipe. For convenience, you can use ready-made raspberry puree—just ensure it’s unsweetened or adjust the sugar accordingly if it is sweetened.
- Lemon. Lemon juice and zest help bring out the flavor of the raspberries.
- Sugar. Regular white sugar works best.
- Eggs. These are crucial for thickening the curd. We use a combination of whole eggs and additional yolks to ensure a rich, creamy texture.
- Unsalted butter. Butter adds richness and helps thicken the curd.
- Butter: Use unsalted full-fat butter.
- Heavy cream: Choose the one you use for whipping.
- Gelatin: I use powdered gelatin, but feel free to use leaves if you like.
How to Make Raspberry Cream Puffs
Here’s a high-level overview:
- Prep the streusel so that it’s ready for the choux pastry.
- Make the raspberry curd, so it has time to chill before we combine it with whipped cream and pipe it inside our puffs.
- Prep the choux pastry, combine it with the streusel we made earlier, and bake the puffs.
- Once the puffs cool and the curd is warm but not hot, we whip the heavy cream, combine it with the curd, and pipe the puffs.
Let’s get into the details.
Step 1: Make Crumb Topping
(For more detailed information and tips on crumb topping, check out my article on streusel topping.)
- Warm Up Butter: Take the butter out, chop it into cubes, and let it sit at room temperature for about an hour. We want it nice and soft. Skip this step if you’re in a hurry.
- Mix Dry Ingredients: Grab a medium bowl and mix your sugar and flour.
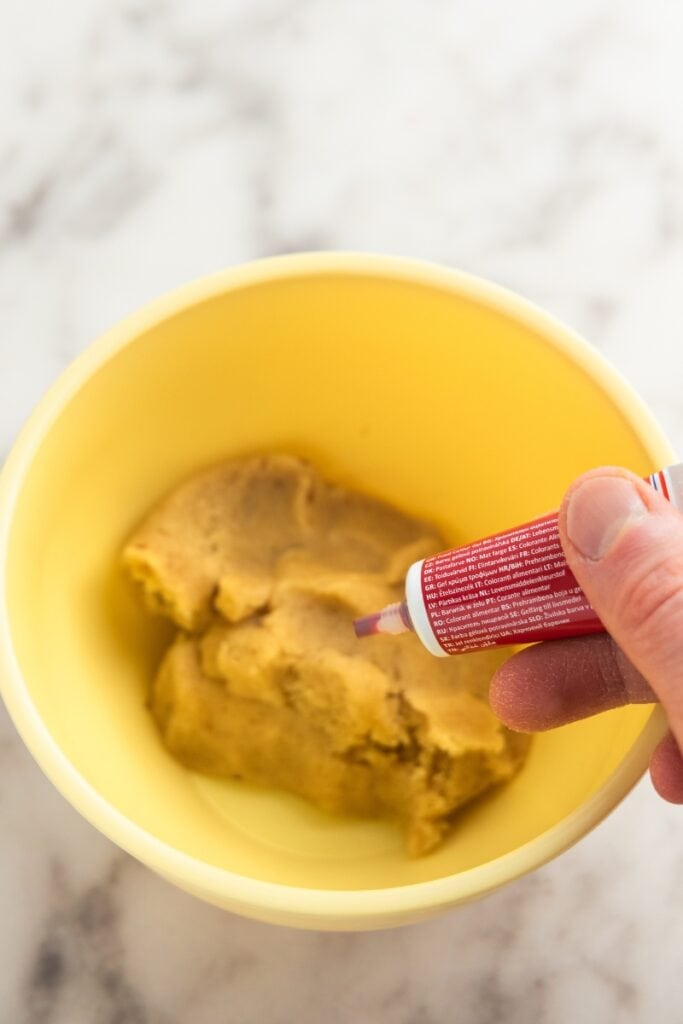
- Add Butter: Add that room-temperature butter to the mix and mix the ingredients using a fork until you achieve a homogeneous mass. A mixer will also do the trick.
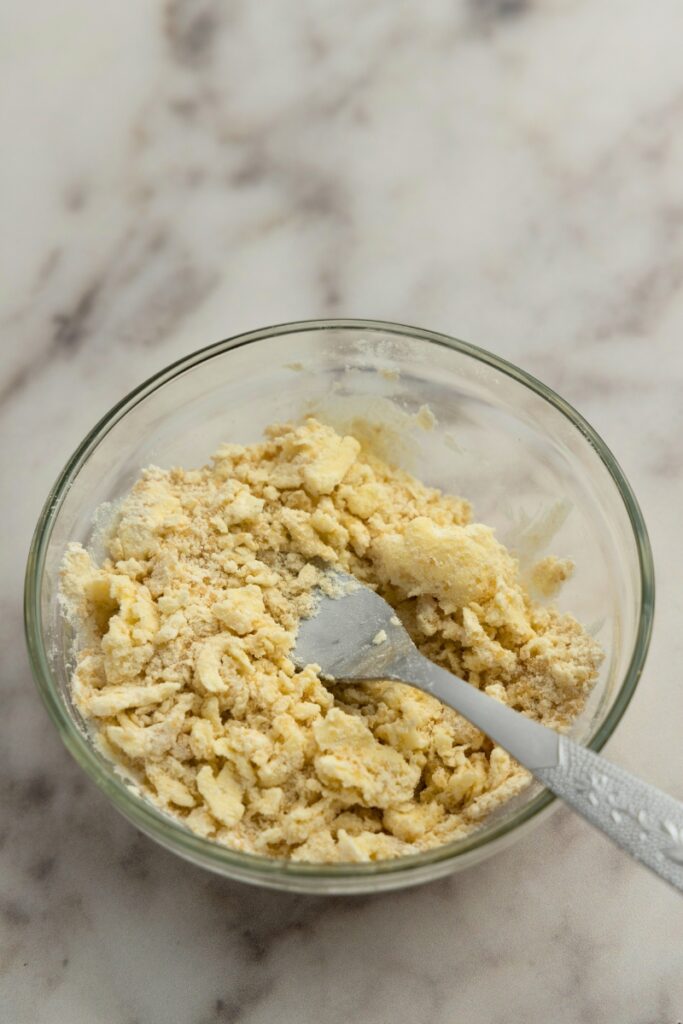 Add ingredients to bowl
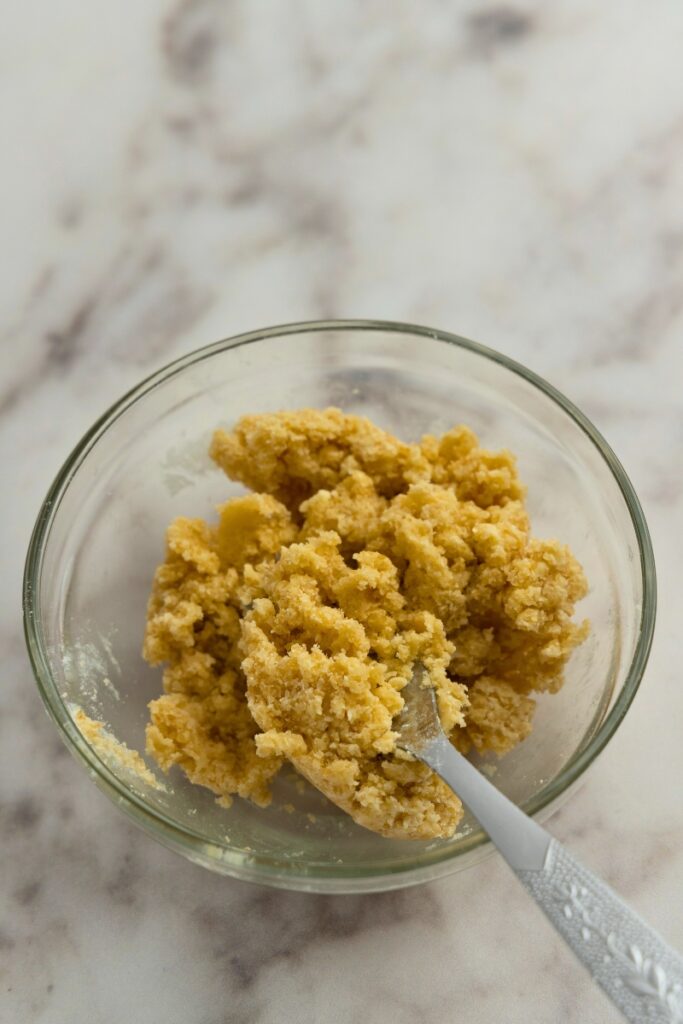 Mix with fork
 Form a dough like this
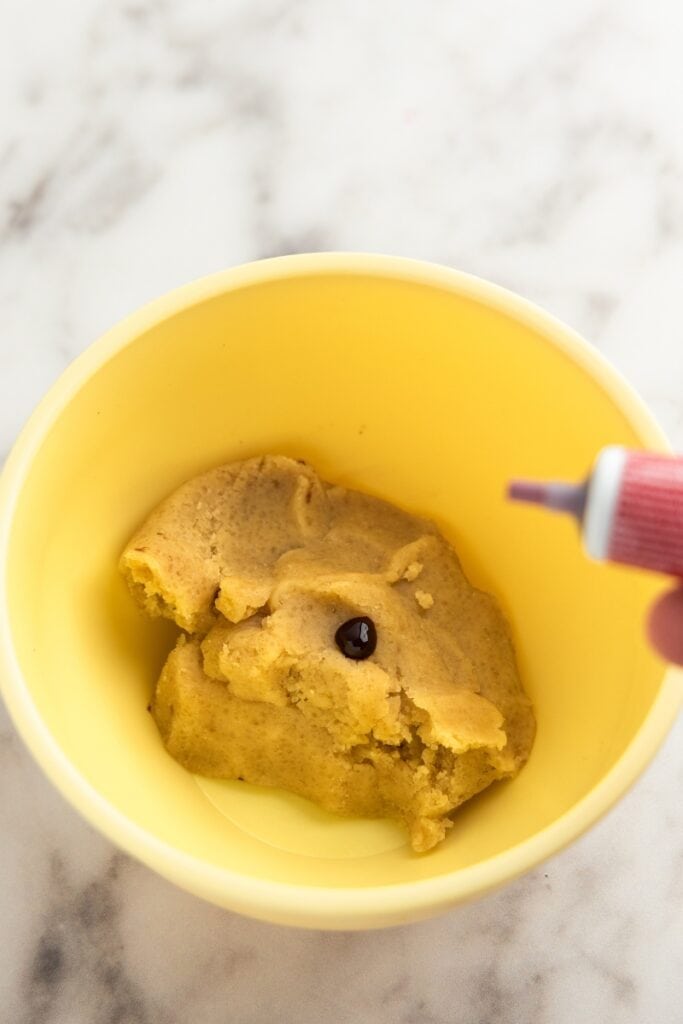
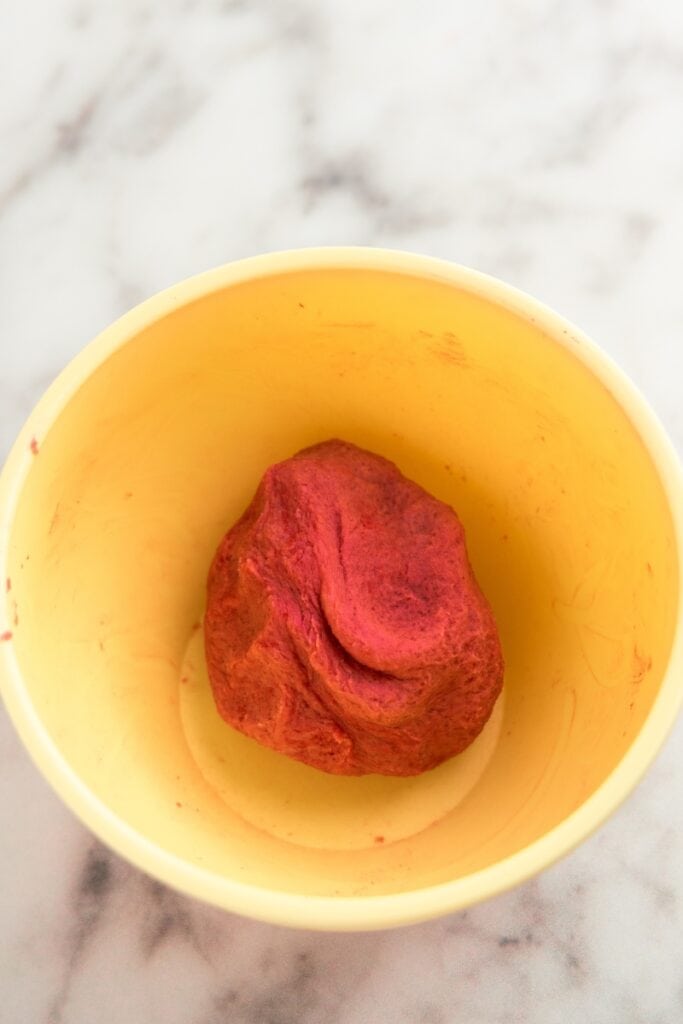
- Add Food Dye: If using, add the food dye and stir it until well incorporated. Start with a bit and add more if needed. Use gloves if you’re incorporating the dye using your hands (which is probably the best way).

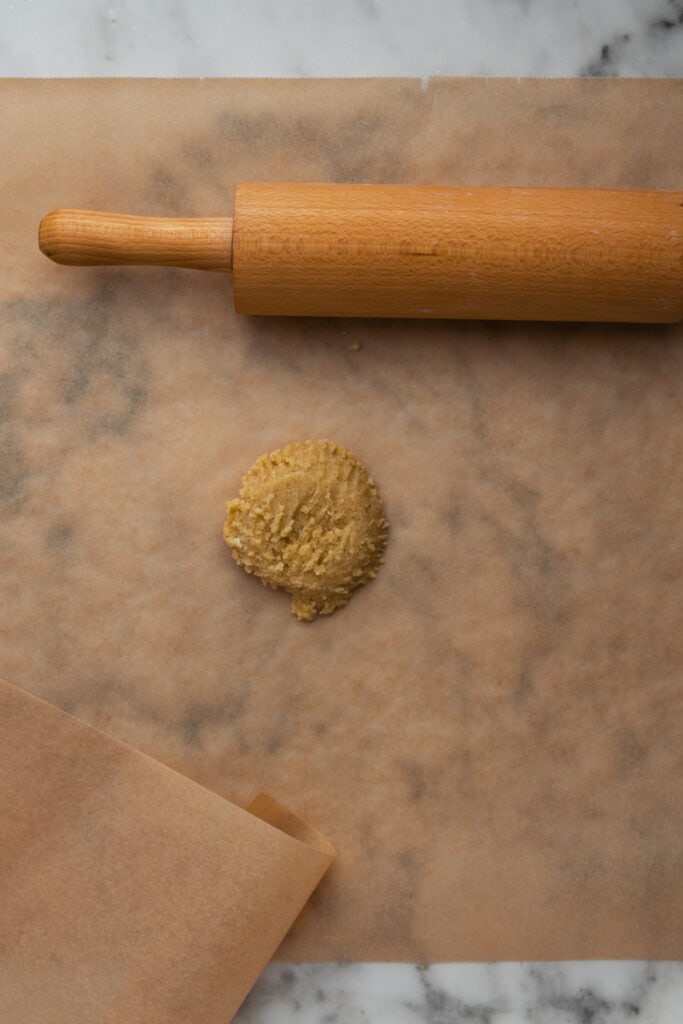
- Roll Out: Sandwich your dough between two sheets of parchment paper or silicone mats, and roll it out thin – aiming for about 1/10 inch or 2 to 3mm thick. When it starts getting tough to roll, peel off the top layer, place it on your work surface, and then flip the dough over onto it. Finish by peeling off and placing the other layer back. Repeat whenever it gets hard to roll.
 Place dough on a parchment
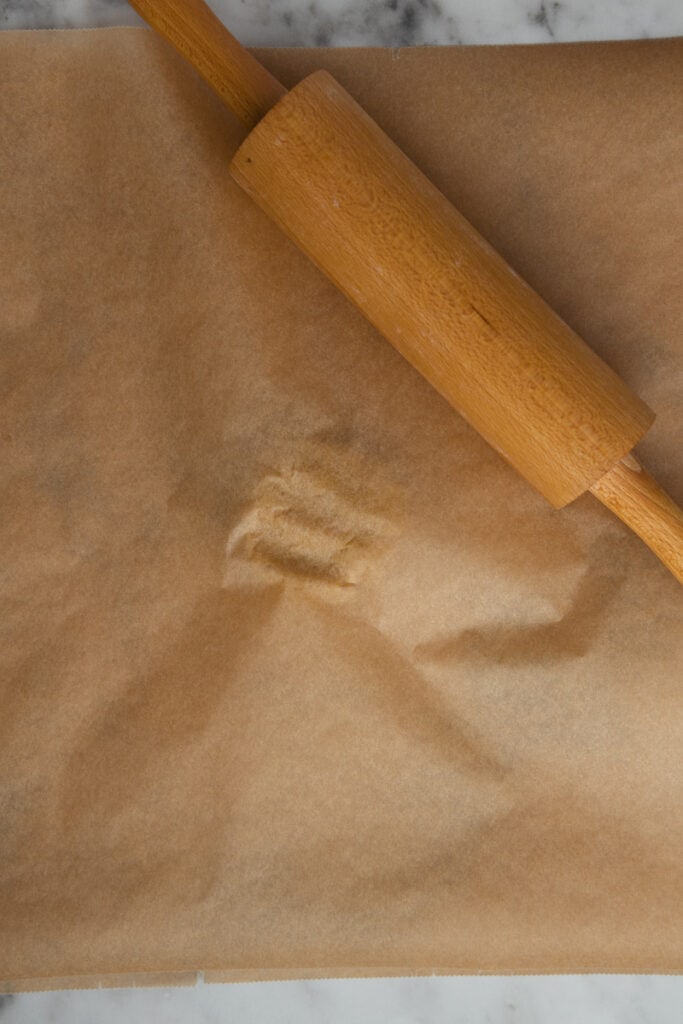 Cover with another sheet
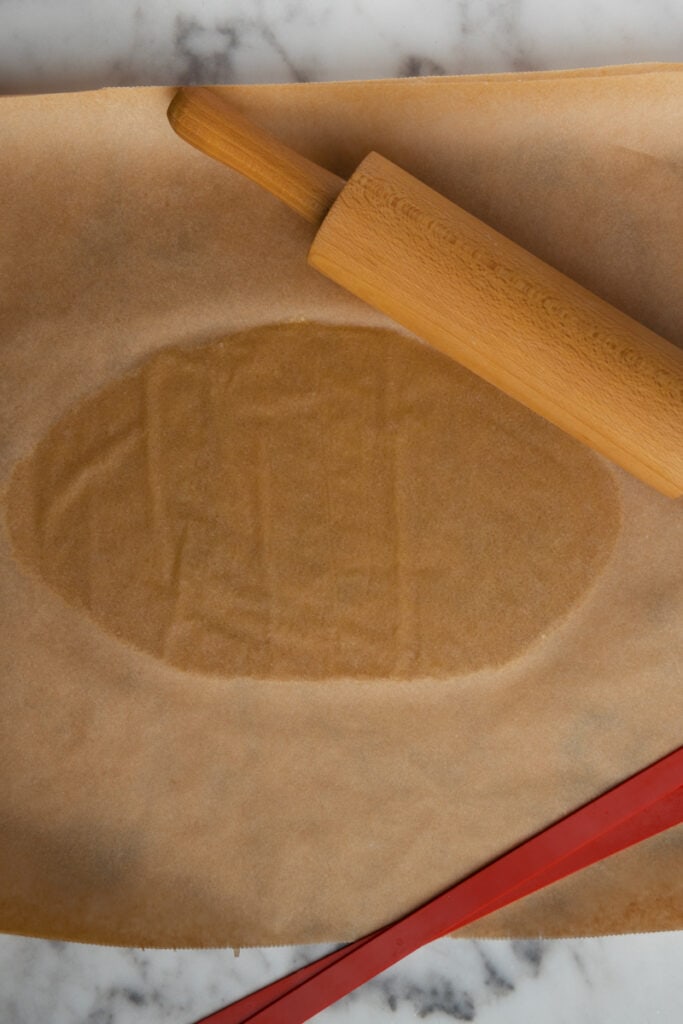 Roll it out thin
- Refrigerate: Pop the rolled-out dough, still between the sheets, in the fridge for about 30 minutes. That’s when you can start working on choux pastry. For best results, place the rolled-out dough on something that will retain a low temperature for longer, like a cutting board.
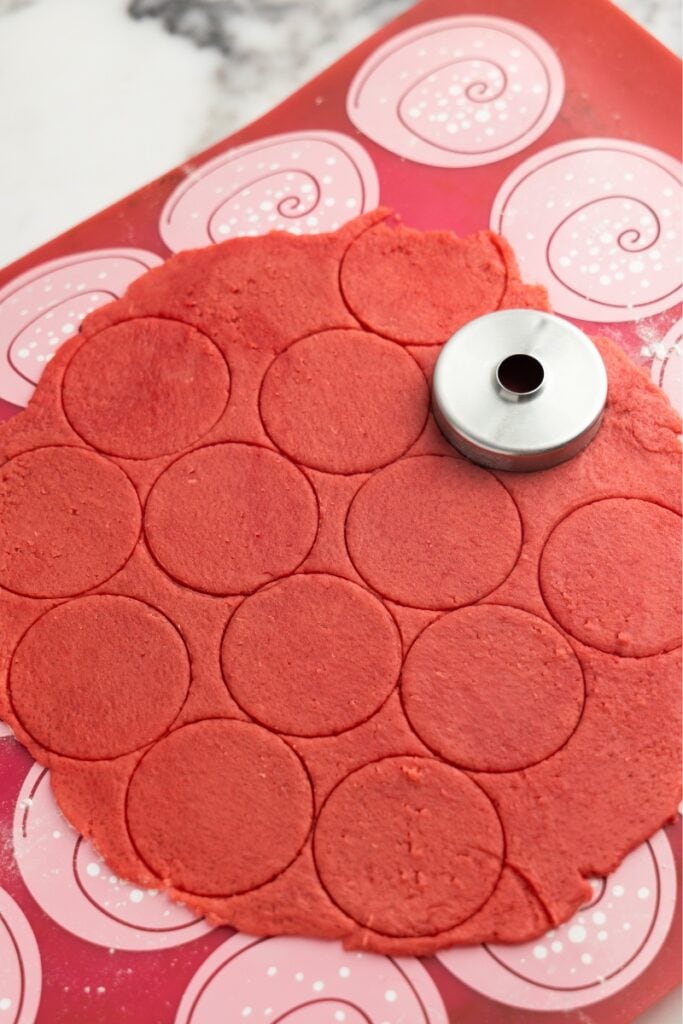
- Cut: Once the dough is nice and cold, cut it into disks minimally larger than your puffs (about 2 inches). Once all the necessary shapes are cut out, gather the remaining streusel scraps using a pairing knife or an offset spatula, form them into a ball, and roll it out or freeze for next time. Be quick here because the dough softens fast.
- Refrigerate: Put the cut streusel into the fridge, where it’ll wait until your choux pastry is ready and piped. You can prepare the streusel the day before you need it and leave it overnight in the fridge, or do it even sooner and freeze the disks.

Step 2: Make Raspberry Curd
(Check out my raspberry curd for tips on making the curd.)
- Bloom Gelatin: Whisk gelatin with water in a small bowl and let the mixture sit on the counter.
- Puree Raspberries: For fresh raspberries, use a hand blender to create a puree. If using frozen berries, cook them gently on the stove with a couple of tablespoons of water to prevent burning until completely soft. Strain the raspberries through a fine mesh to remove all seeds, pressing and scraping to extract as much puree as possible.
 Frozen raspberries after cooking
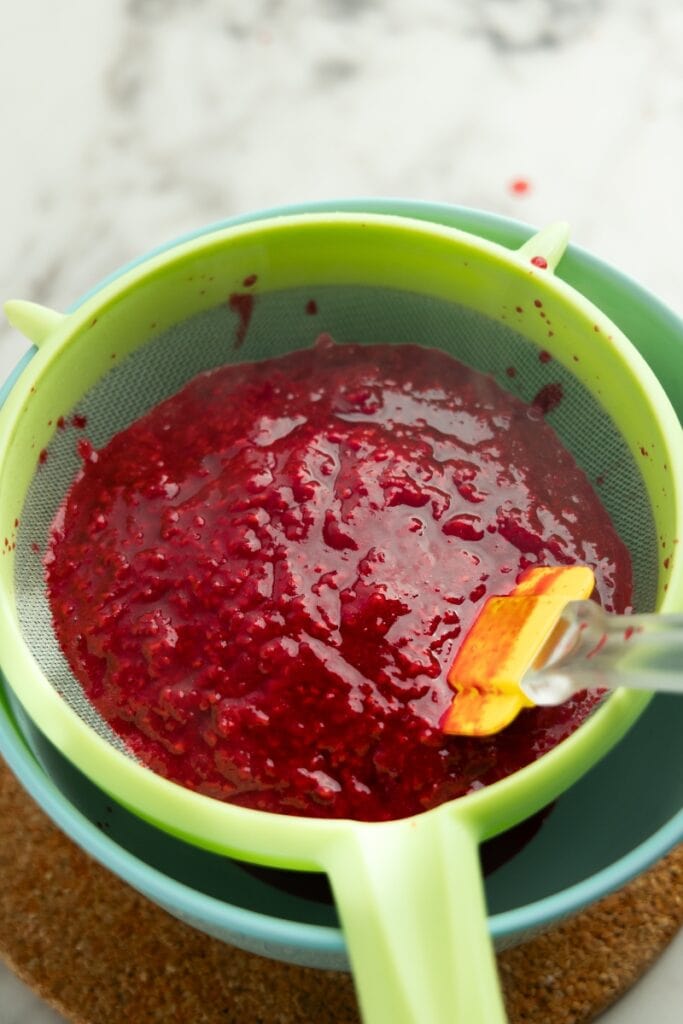 Strain raspberries to remove the seeds
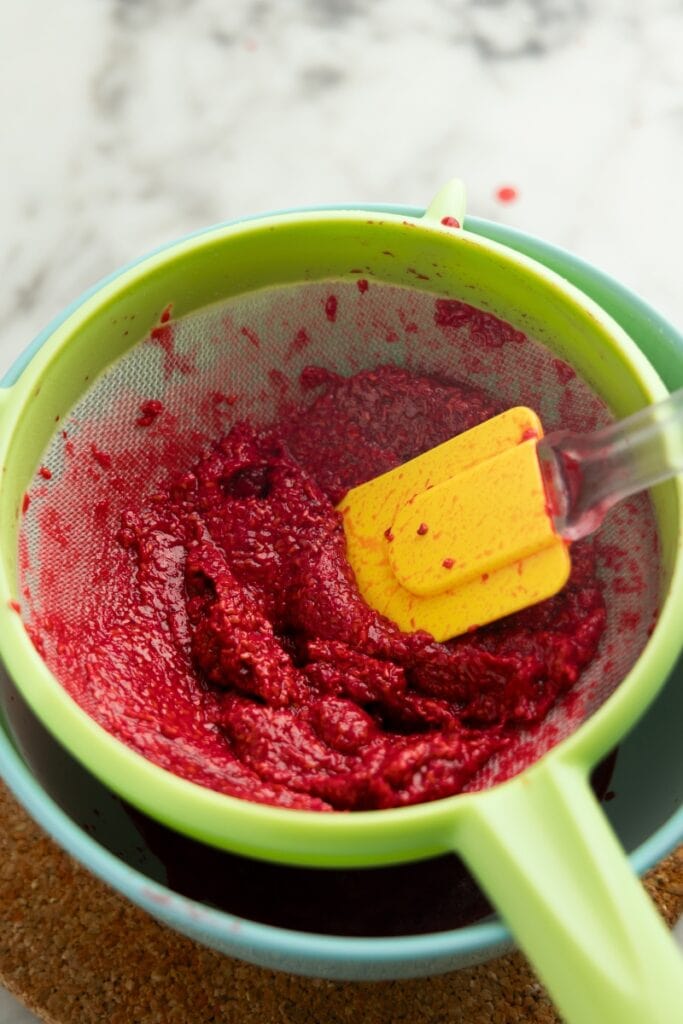 Scrape and press to extract all the puree
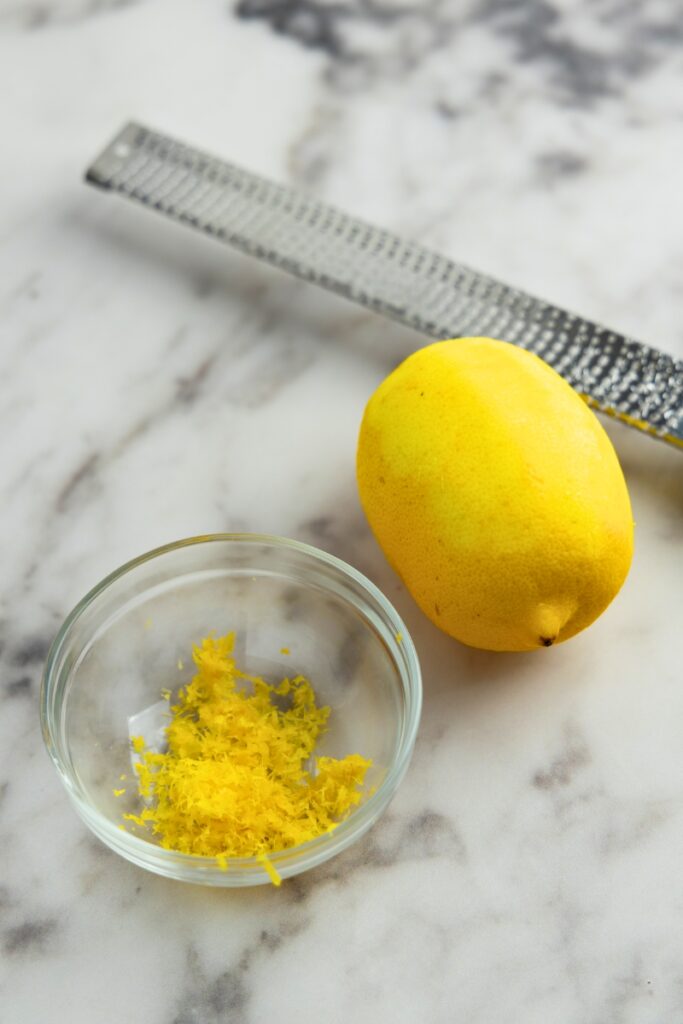
- Prep Lemon: Wash the lemon under running water to remove any residues. For extra precaution against pesticides on commercial lemons, soak the lemon for 15 minutes in 2 cups of water mixed with a tablespoon of baking soda.
- Zest: Gently peel off the zest from the lemon quarter using a microplane, a zester, or the fine holes on your box grater, avoiding discolored or blemished areas. Chop the zest if it’s in long strips.
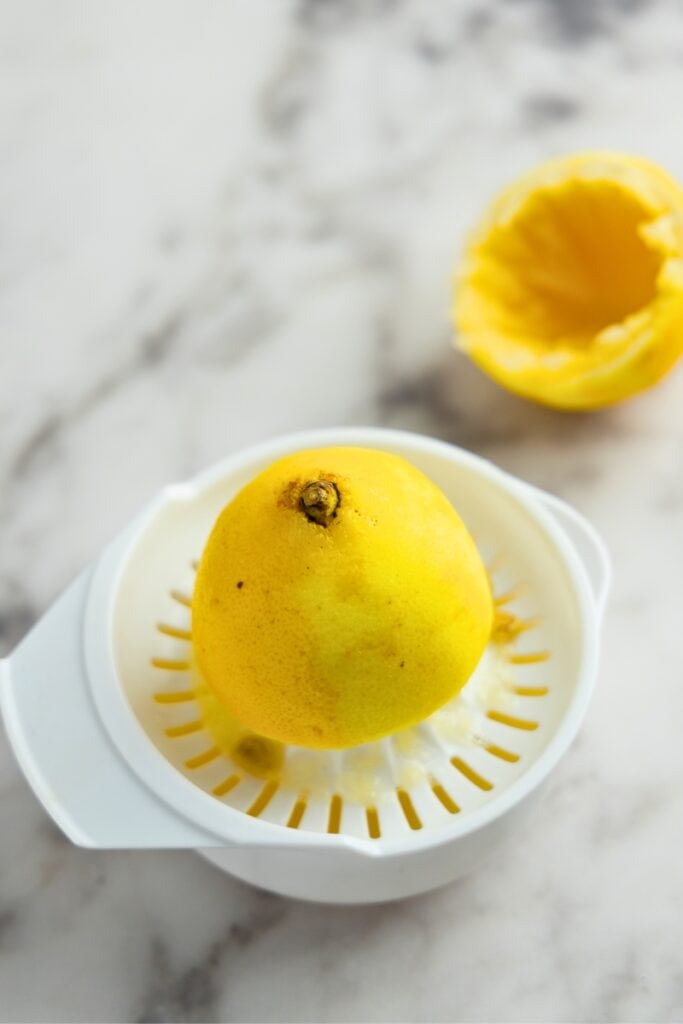
- Squeeze: Extract the juice from the lemon quarter.
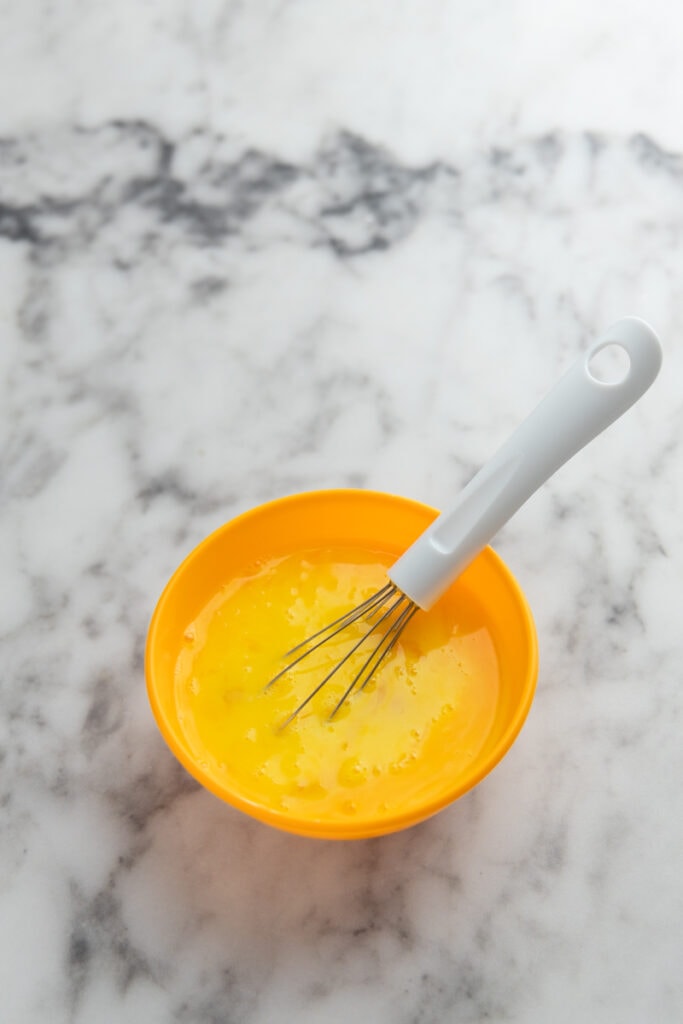
- Prep Eggs: Crack the eggs into a heatproof bowl, add the yolks, whisk, and stir in the sugar. Set aside.
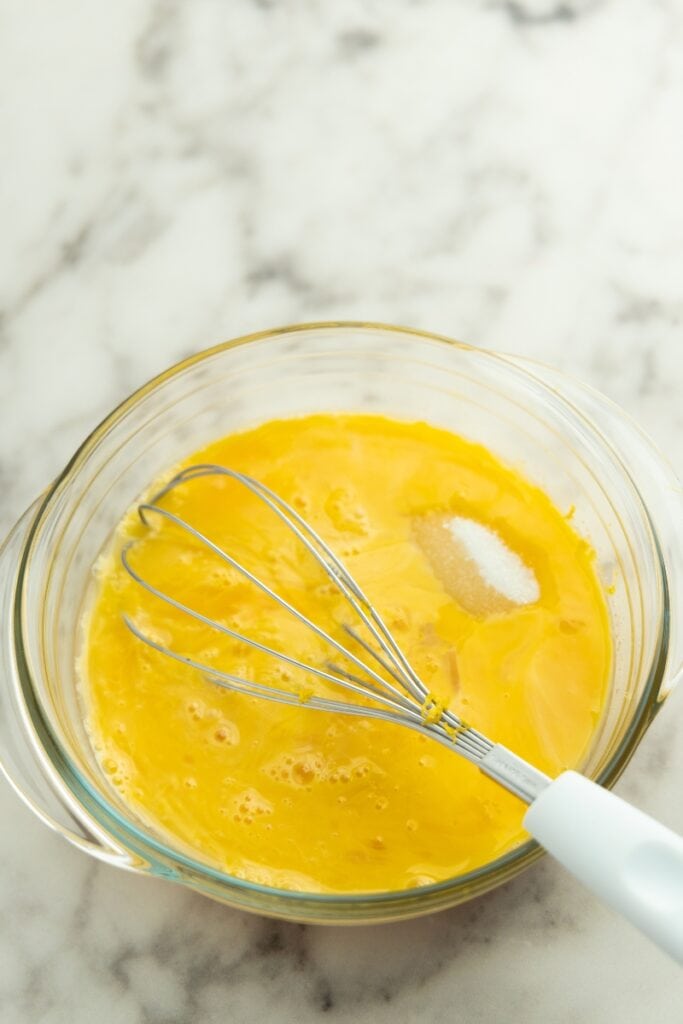 Crack eggs into a bowl
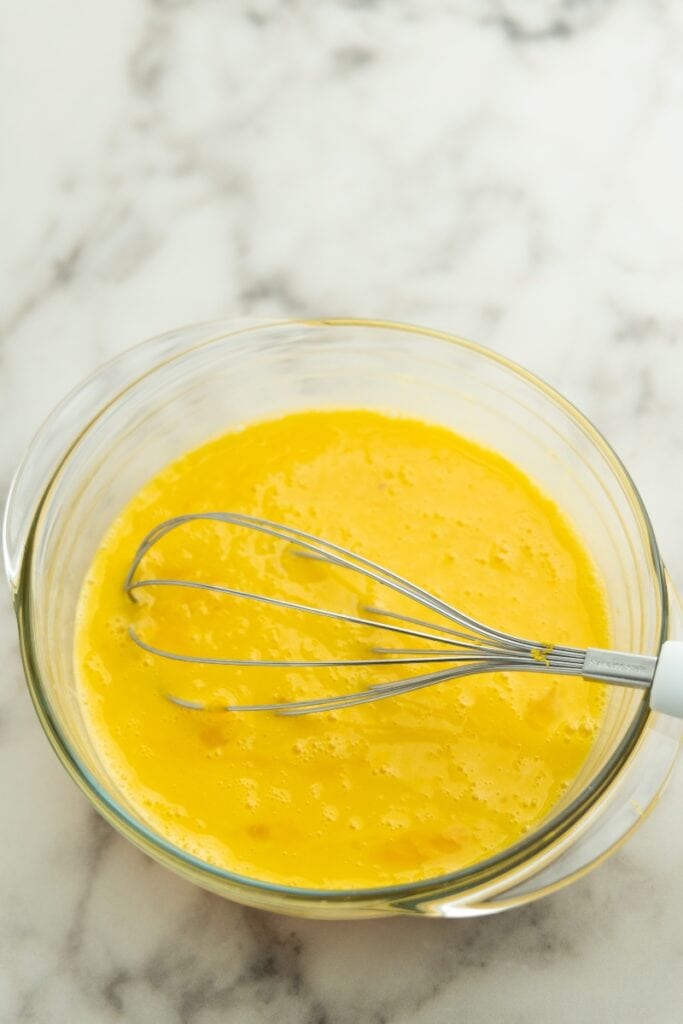 Whisk with sugar
- Cook Puree Mixture: Add the raspberry puree, lemon juice, and lemon zest to a pot, stir everything, and cook on medium heat until it bubbles. Take off the heat.

- Temper Eggs: Gradually incorporate the hot puree into the egg mixture by adding a few tablespoons at a time while constantly stirring. Continue until you combine at least half of the mixture with the eggs. Continue stirring at all times so the eggs don’t curdle. Pour the warm egg mixture back into the pot and set it on low heat.
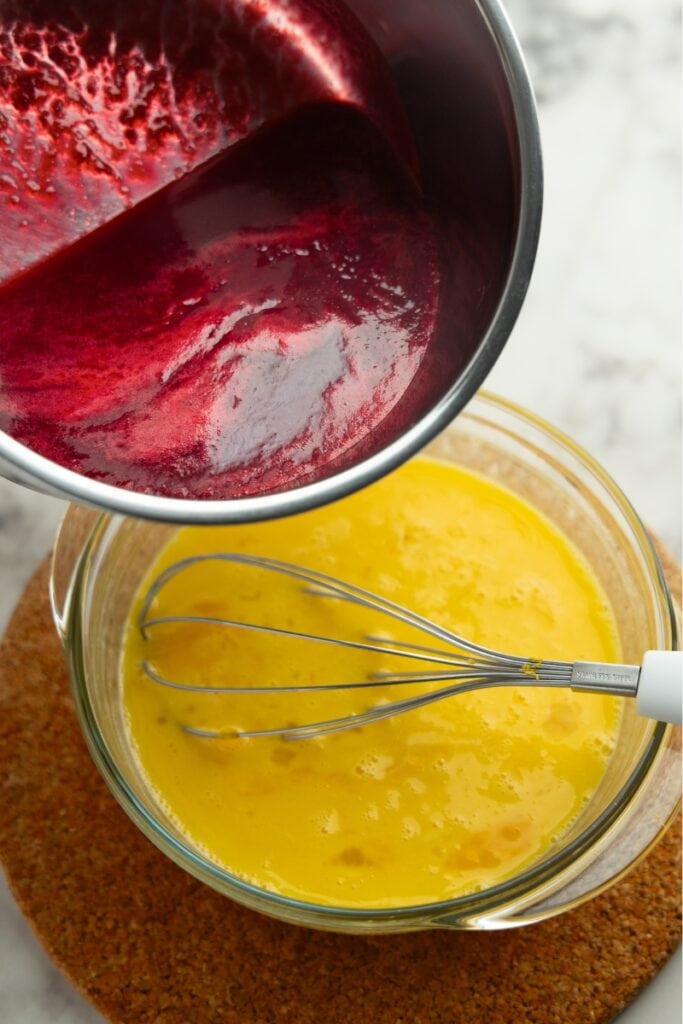 Add the hot puree
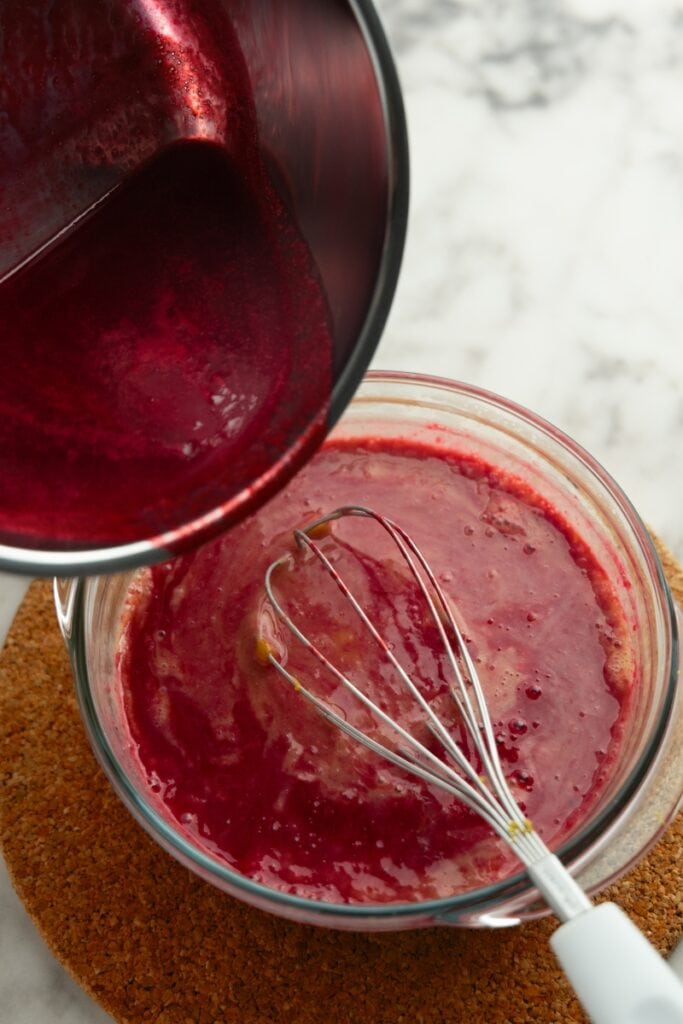 Mix at least half of the mixture with the eggs
- Cook: Cook the egg mixture while stirring continously until it noticeably thickens. As it cooks, it typically foams and that foam tends to disappear soon after the curd thickens. Don’t stop whisking, or the eggs will curdle.
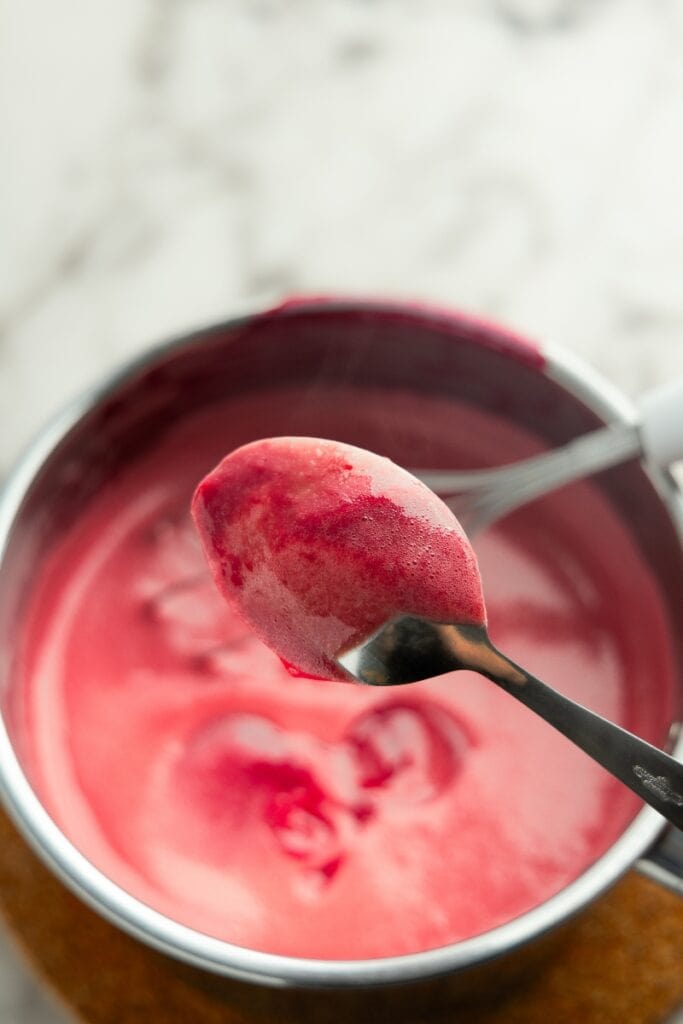 Mixture should be thick enough
 to coat the back of a spoon
- Add Butter: Once thickened, remove from heat, add the chopped butter, and stir until it melts and blends in.
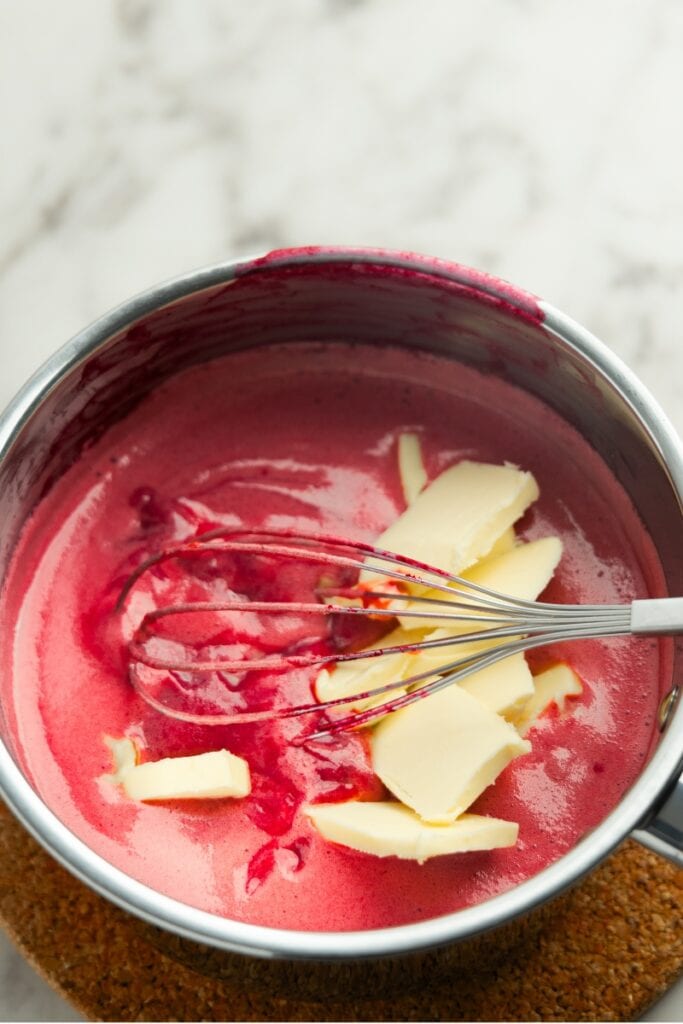 Add the chopped butter
 Stir until butter melts and blends in
- Stir in Gelatin: Grab the bowl with the bloomed gelatin and scoop its contents into the curd. Whisk until the gelatin melts and is incorporated.
 Add the bloomed gelatin
 Stir until the gelatin is fully incorporated
- (Optional) Strain: For a smoother texture, strain the curd to remove any lemon zest or bits of cooked egg. This step is optional, and I often omit it.
- Cover and Chill: Lay plastic wrap directly on the surface to avoid a skin forming. Let it cool at room temperature until it’s at about 100°F (or 40°C) before you add the whipped cream in step 5.

Step 3: Make Choux Pastry
(Read my article on choux pastry for a more detailed description and tips on working with choux pastry!)
- Preheat Oven. Start by preheating your oven to 390°F (200°C).
- Melt Butter and Bring to a Boil. In a pot, combine butter, milk, water, salt, and sugar, then bring the mixture to a boil, ensuring the butter is fully melted.
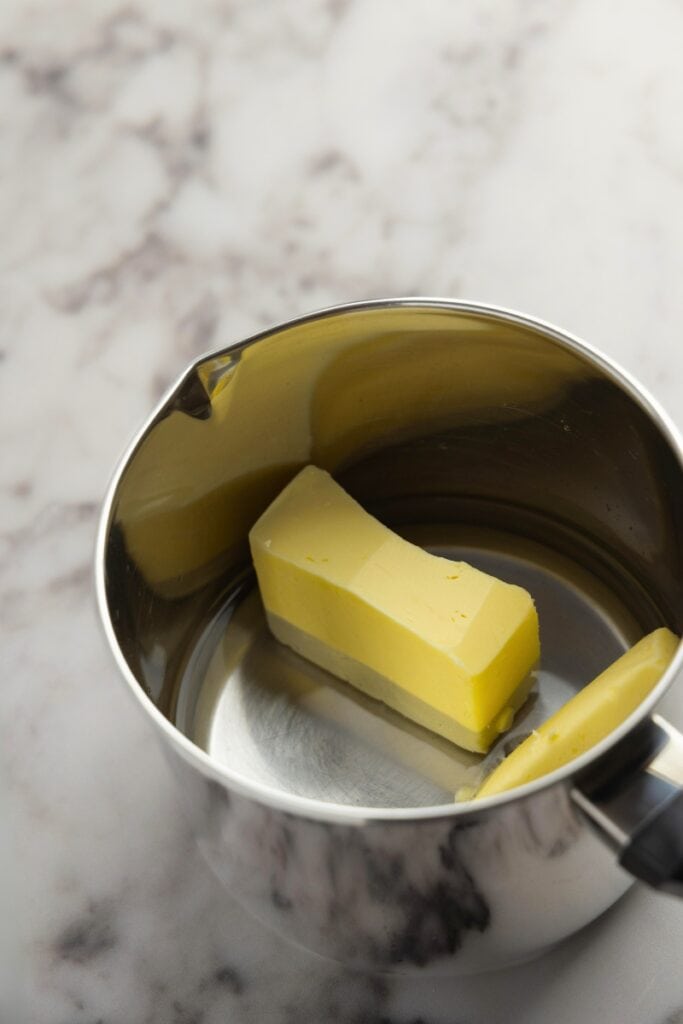 Add butter to the pot
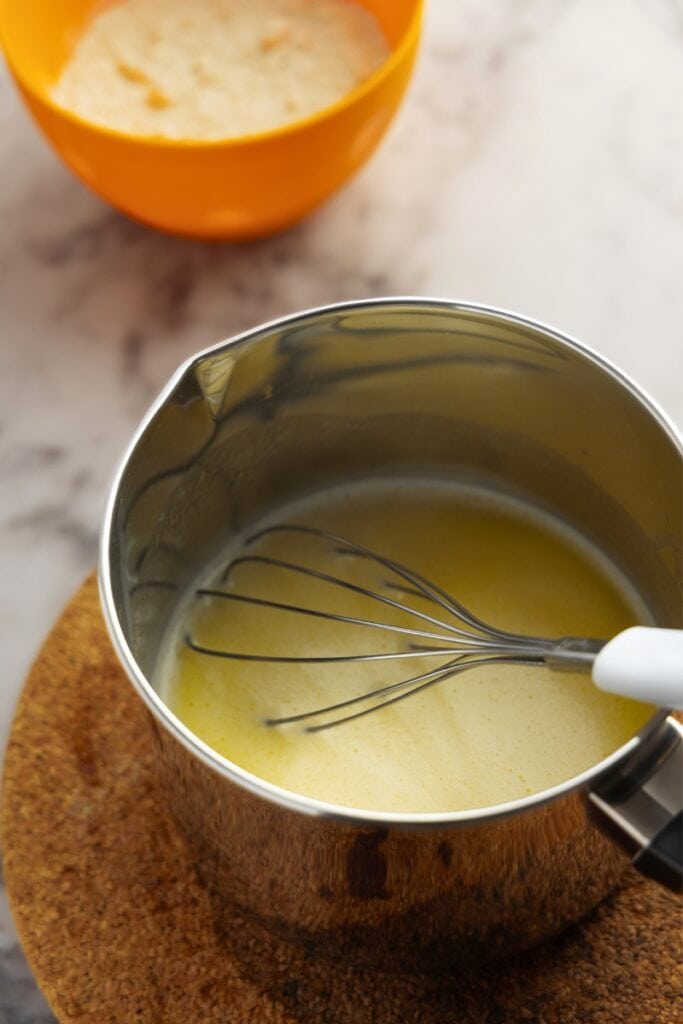 Boil it with water, milk, salt and sugar
- Add Flour. Take the pot off the heat, add all the flour to the mixture at once, and stir until it roughly combines. Bring the pot back to the stove and continue stirring with a spoon over low heat. The dough will thicken and clump quickly, but you should continue stirring the mixture for 2-3 minutes, ensuring all the flour is incorporated and no white floury spots are inside. While stirring, scrape the dough from the sides and bottom to prevent sticking. After 2-3 minutes, the dough should be glossy and easy to detach from the pot, and a thin layer, or film, should form on the bottom.
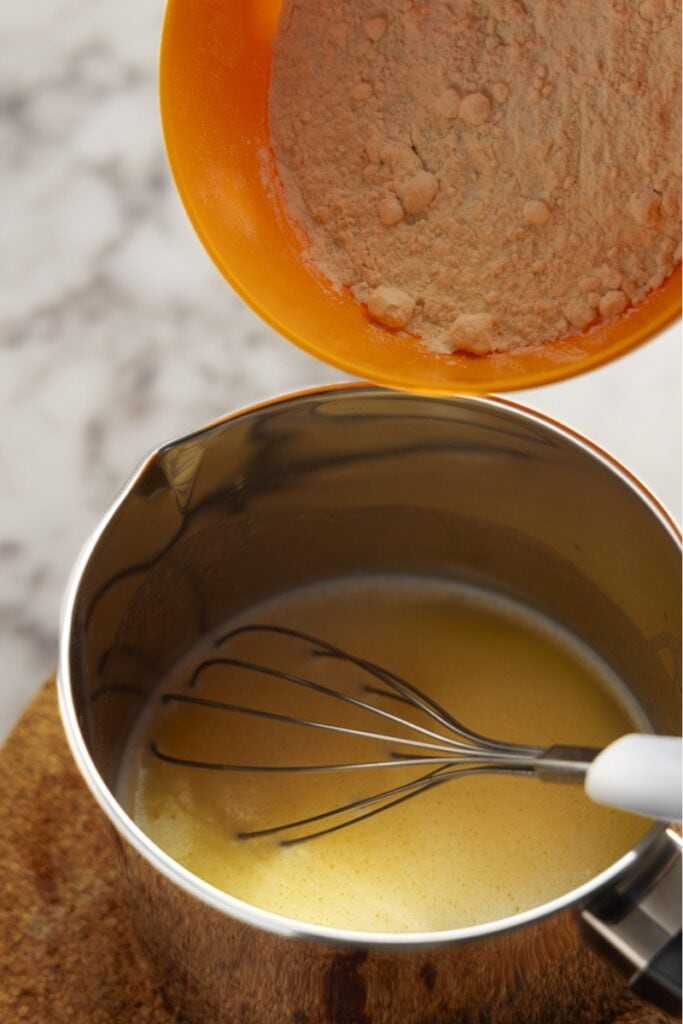 Add flour to the mixture
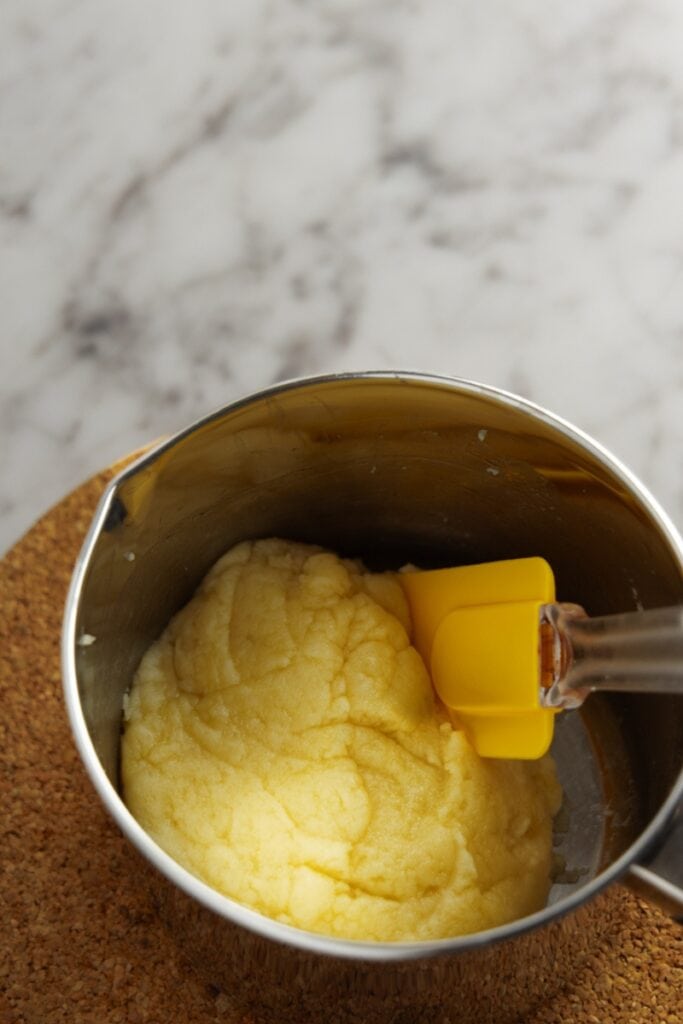 Stir and cook over low heat
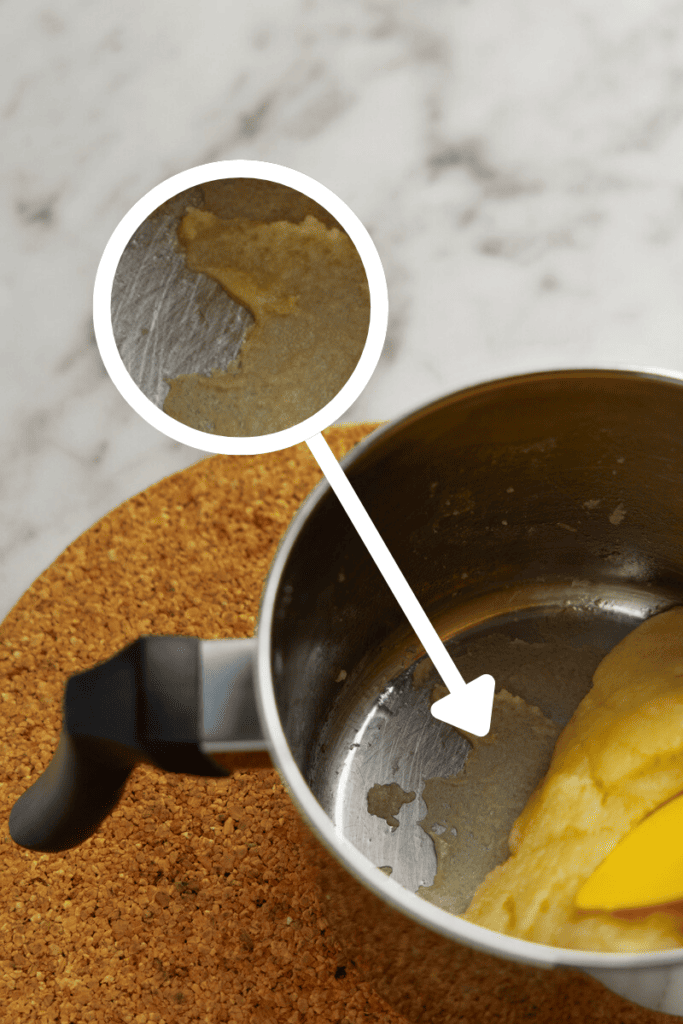 Thin layer of dough on the pot’s base
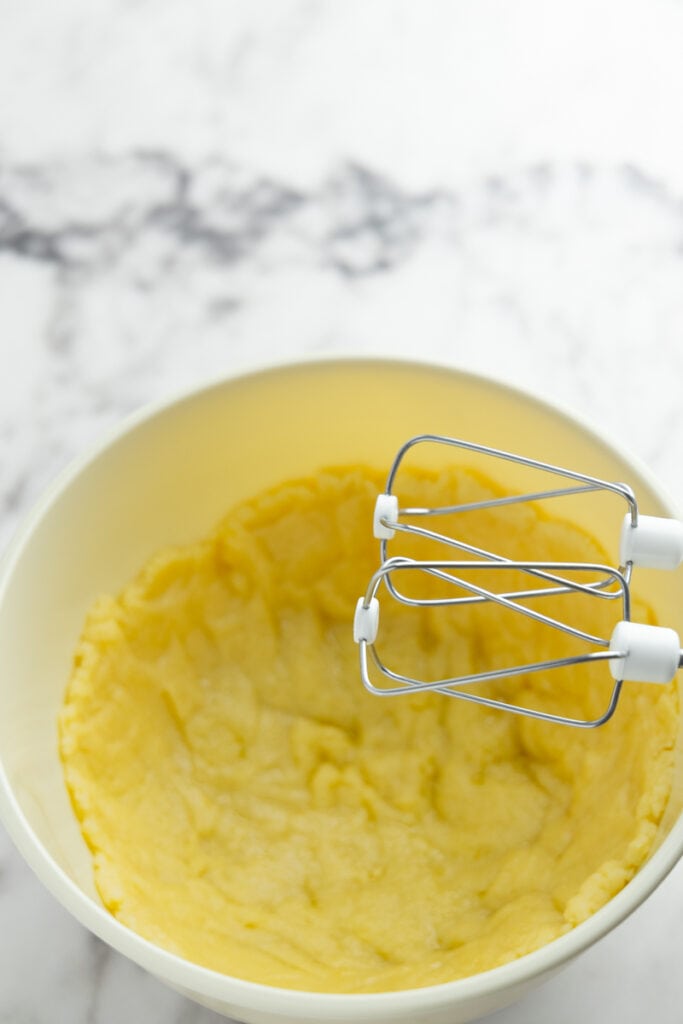
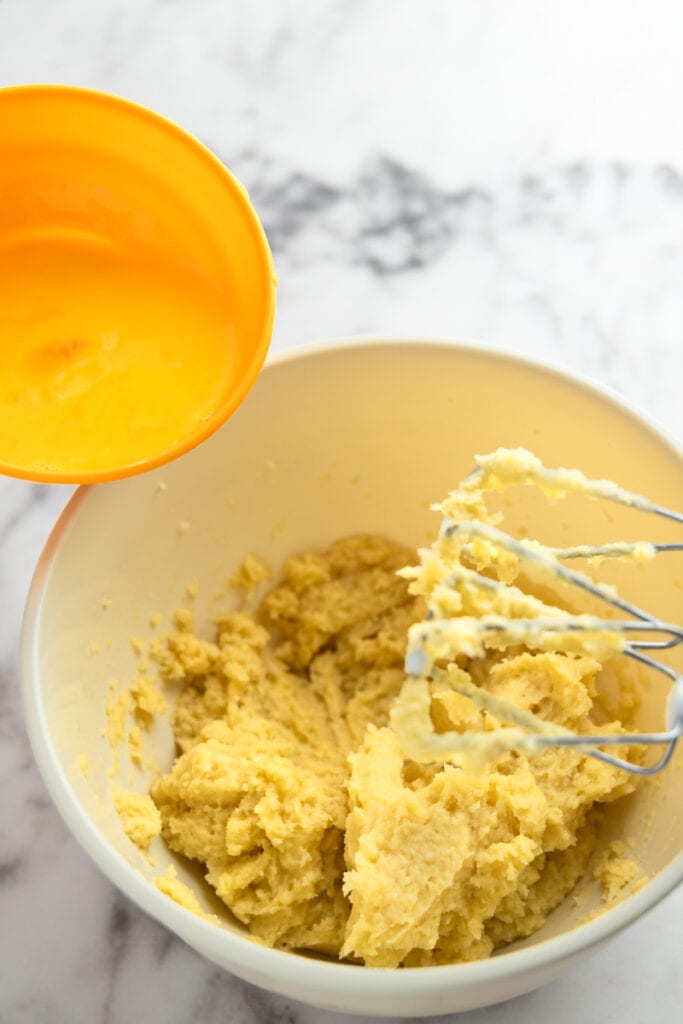
- Transfer. Move the dough to a mixing bowl and let it cool for about 10 minutes. Spreading it across the bowl can speed up cooling.
- Prepare Eggs. Crack the eggs into a separate bowl and whisk them.
- Make Dough. Once the dough has cooled slightly, start mixing it with a hand mixer at medium speed. After 20-30 seconds of mixing, add half the eggs to the dough and mix until incorporated. Repeat by adding half of the leftover egg mixture. Now it’s time to get the dough to the right consistency: you want it thick enough to hold its shape but still pipeable. The V-Shape test is the best way to check for that: Dip your mixer whisks or spatula into the dough and lift it. The dough should slowly fall off, eventually leaving a piece of dough hanging that forms a characteristic ‘V’ shape or a triangle at the end of the whisk or spatula. If the dough is not there yet, continue adding the eggs bit by bit and checking the consistency.
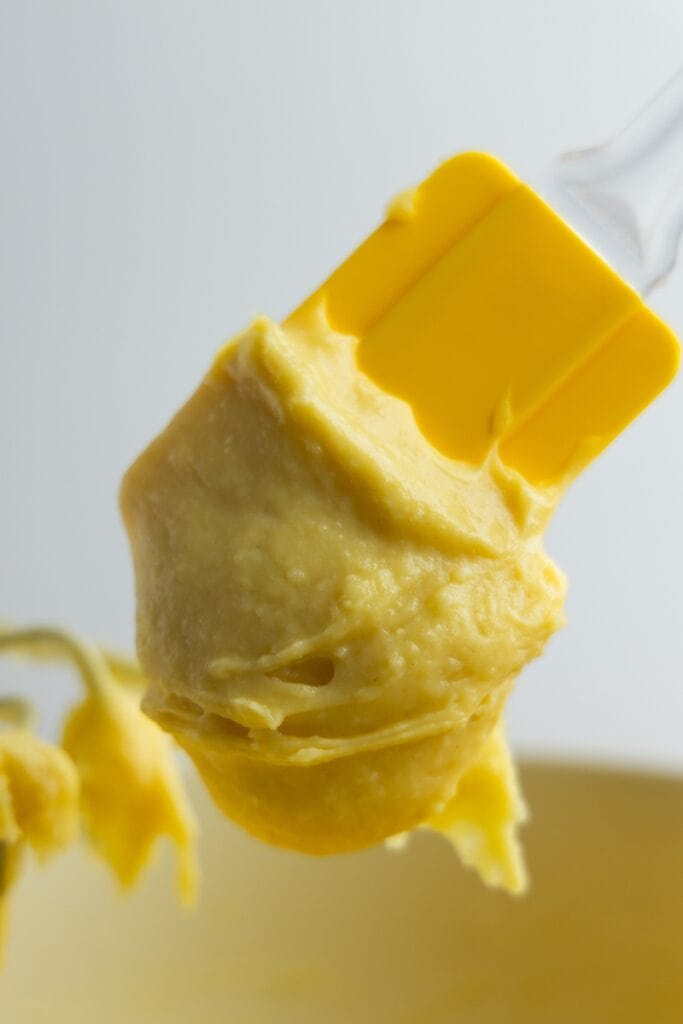 After falling off
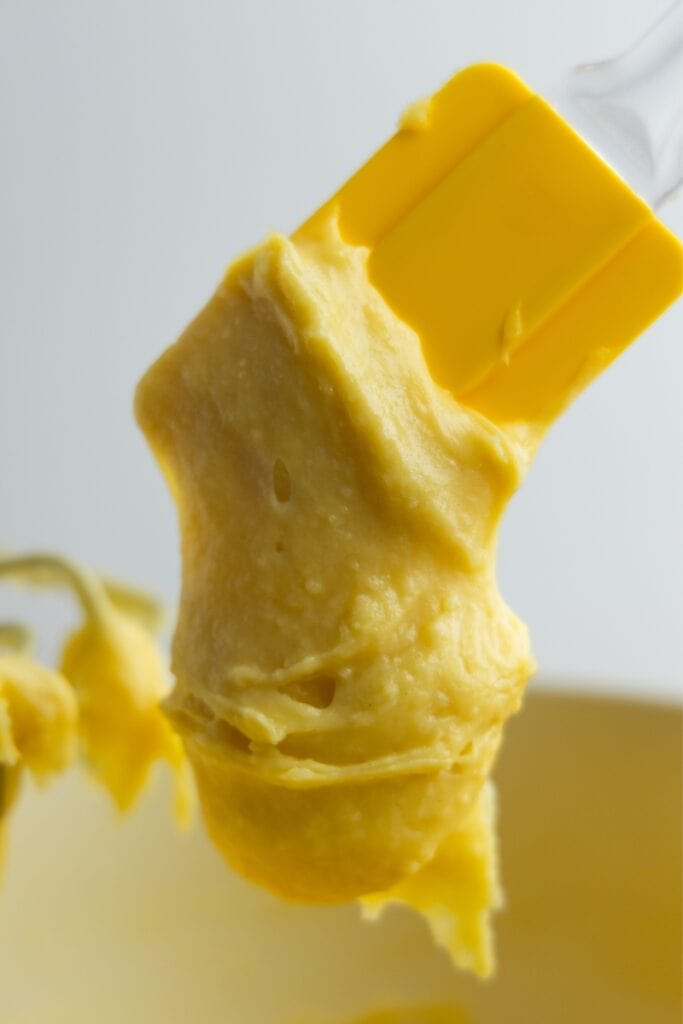 the remaining dough should
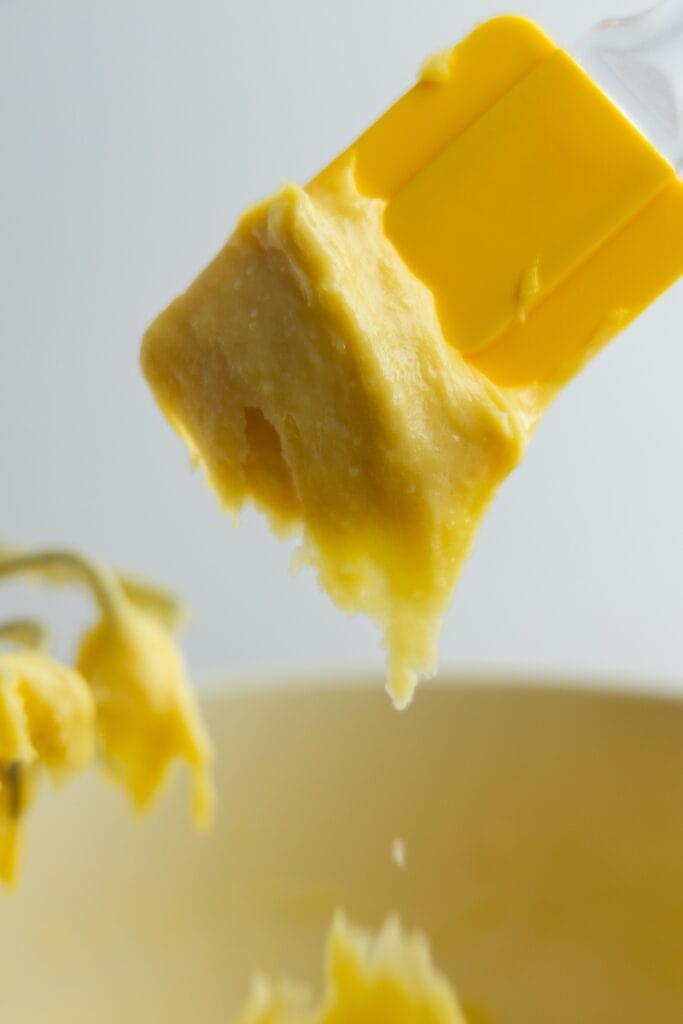 form a v-shape
Step 4: Pipe and Bake Cream Puffs
(Check out my cream puffs article for more info on making cream puffs.)
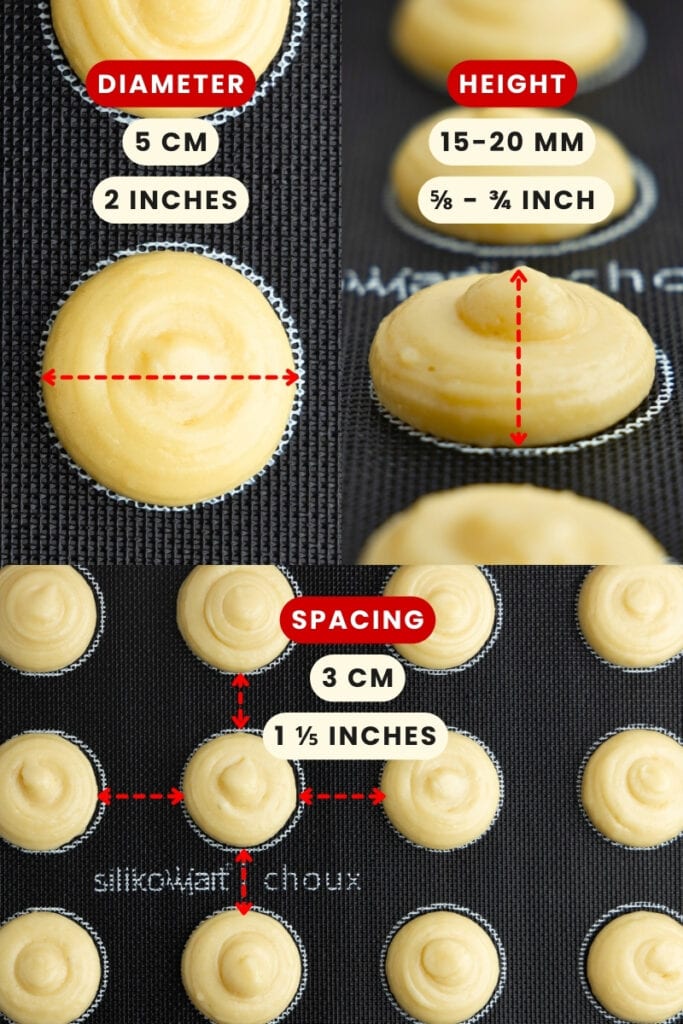
- Prepare Baking Tray. Line a baking tray with parchment paper or a silicone mat. Optionally, draw 2-inch circles on the underside of the parchment as guides, spaced about 1 1/5 inches apart, for uniformly sized cream puffs.
- Set up for piping. Transfer the dough to a piping bag fitted with a round tip or use a plastic food bag with a corner cut off.
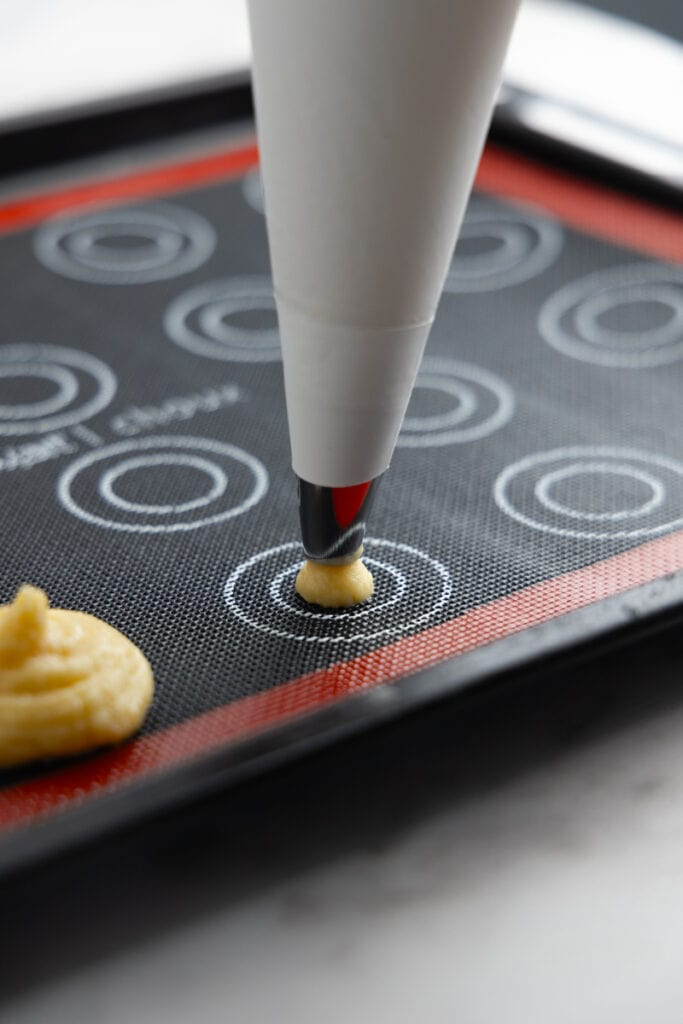
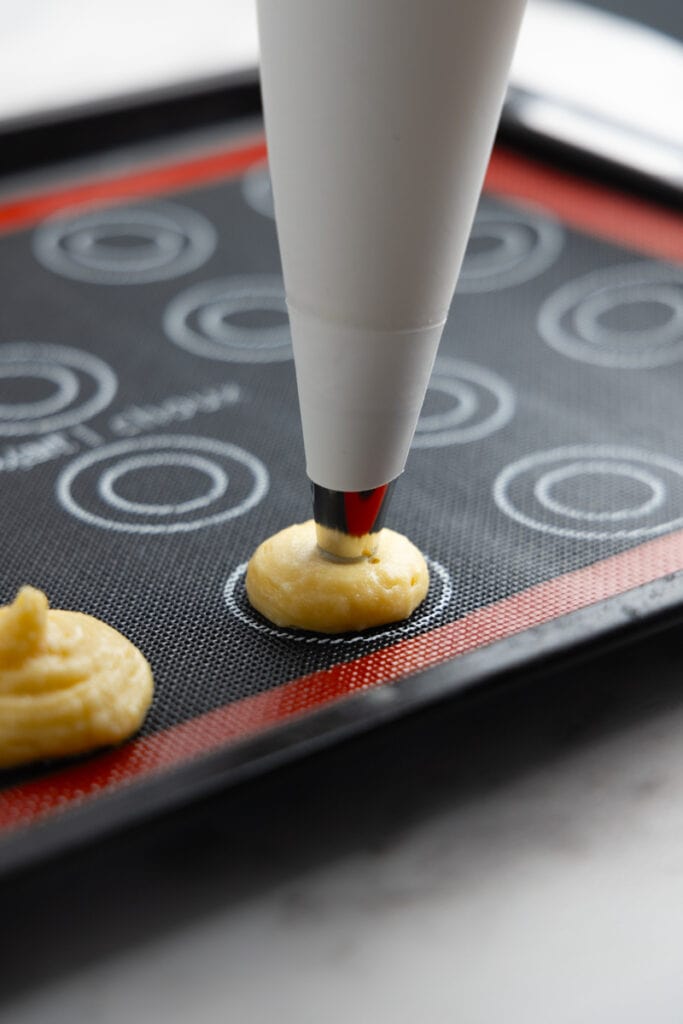
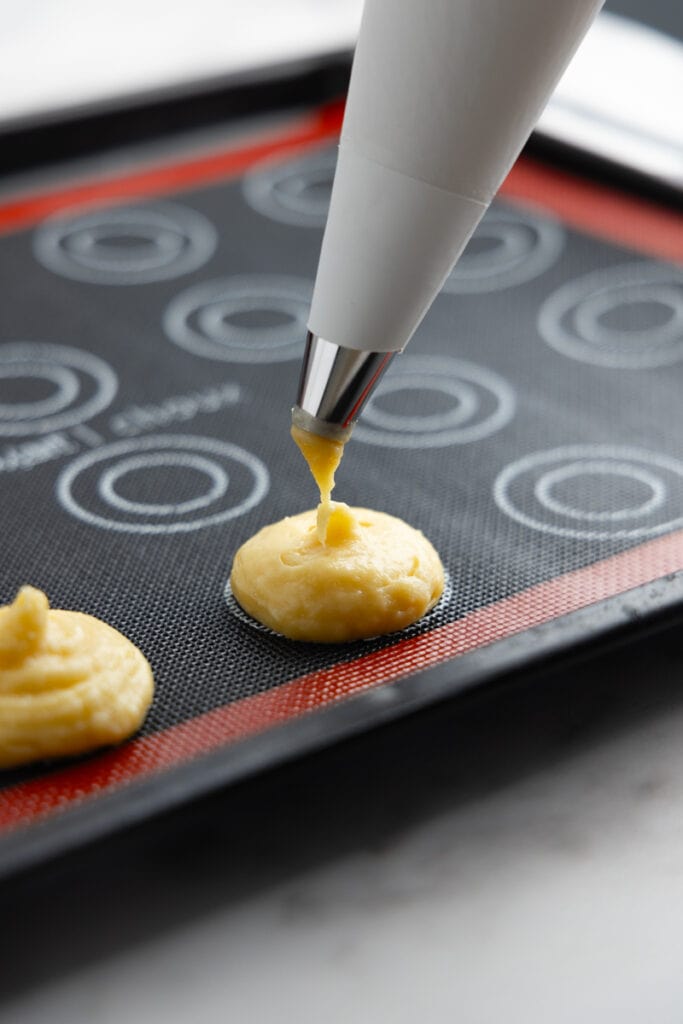
- Pipe the dough. Start by holding your piping bag with a round tip vertically above the baking sheet. Begin piping by gently squeezing the bag, letting the pastry build into a mound. As you form the mound, lift the bag slowly, still squeezing, to let the pastry stack upon itself. Keep the tip partially in the forming mound, guiding it to expand up and out. Aim for about 3/4 inches in height and 2 inches in diameter. To finish, stop squeezing and smoothly pull the tip up and away, leaving a small peak. You can lightly pat this down with a damp finger.
- Add streusel. Once the puffs are piped, take the crumb topping discs from the fridge and place one on top of each piped mound, pressing gently.

- Bake. Place the tray in the preheated oven, then immediately reduce the temperature to 356°F (180°C). Bake for 40 minutes. Open the door a tiny bit (and leave them open) for the last 5 minutes for any buildup steam to escape. If the puffs start to brown before the 35-minute mark, lower the temperature to 320°F (or 160°C).

- Cool. Remove the puffs from the oven, let them cool for 10 minutes, then carefully detach them from the parchment paper or silicone mat and let them cool on a wire rack for another 10 to 15 minutes.
Step 5: Make Raspberry Filling
- Whip Heavy Cream: Whip heavy cream until stiff peak form. Refrigerate if the raspberry cream isn’t cool enough to use yet.

- Prep Curd: Before starting, make sure the curd is slightly warm to the touch, but definitely not hot. As mentioned earlier, 100°F or 40°C is the sweet spot. If it’s still too warm, you can chill it in a cold water bath, stirring every now and then. If it’s much colder and has started gelling, you can warm it up in a double boiler until it’s warm and not as thick. Whisk the curd well before adding whipped cream.
- Fold Whipped Cream: Add about one-third of the whipped cream to the raspberry curd and stir it together. That helps loosen it up before adding the rest. Repeat with the second and third portions of the whipped cream. When folding, be gentle, as you don’t want to deflate the whipped cream or overbeat it.


Step 6: Pipe and Serve
- Pipe: Scoop the raspberry filling into a piping bag or syringe and fill the puffs. The filling has a mousse-like consistency right after preparation, so a piping syringe is easier to work with (at least for me). I fill these from the bottom, but you could go in from the side or even the top (if you plan on decorating these). Don’t worry about the cream oozing out — it thickens nicely in the fridge. If you fill the puffs from the bottom, storing them on their sides before the filling thickens is an option but not a must. The filling is thick enough not to ooze out if standing upright on a flat surface.
 Pipe the raspberry filling into the puffs
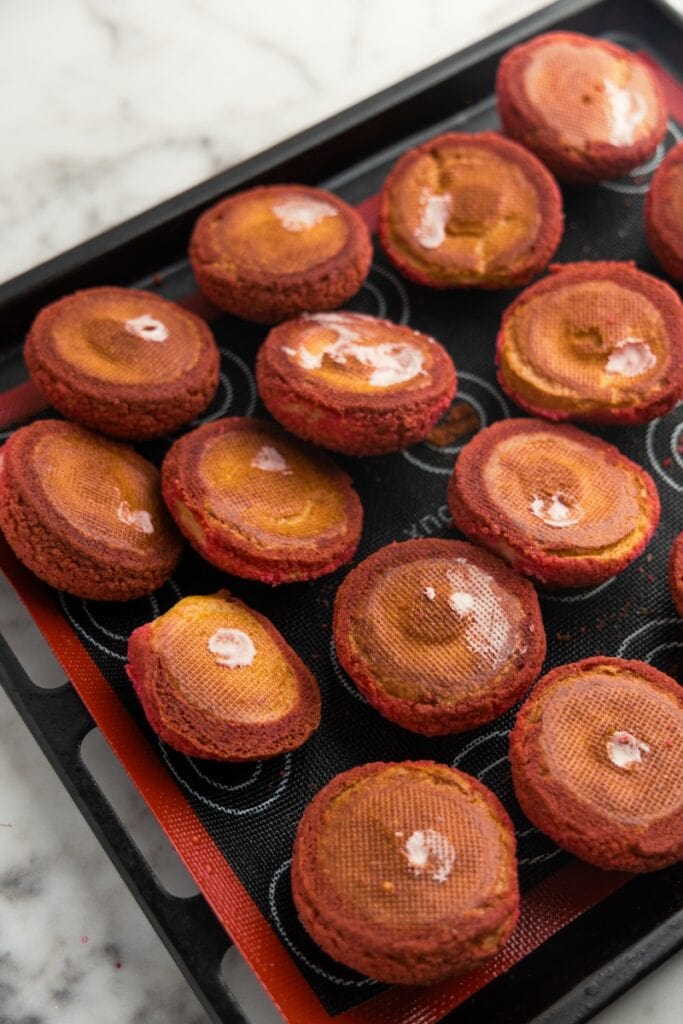 Puffs generously filled with raspberry filling
- Refrigerate: Tuck the filled puffs and the remaining raspberry filling into the fridge for about an hour. That should be enough time for the filling to firm up. If it’s still a bit wobbly, give it another half hour to an hour in the cold.
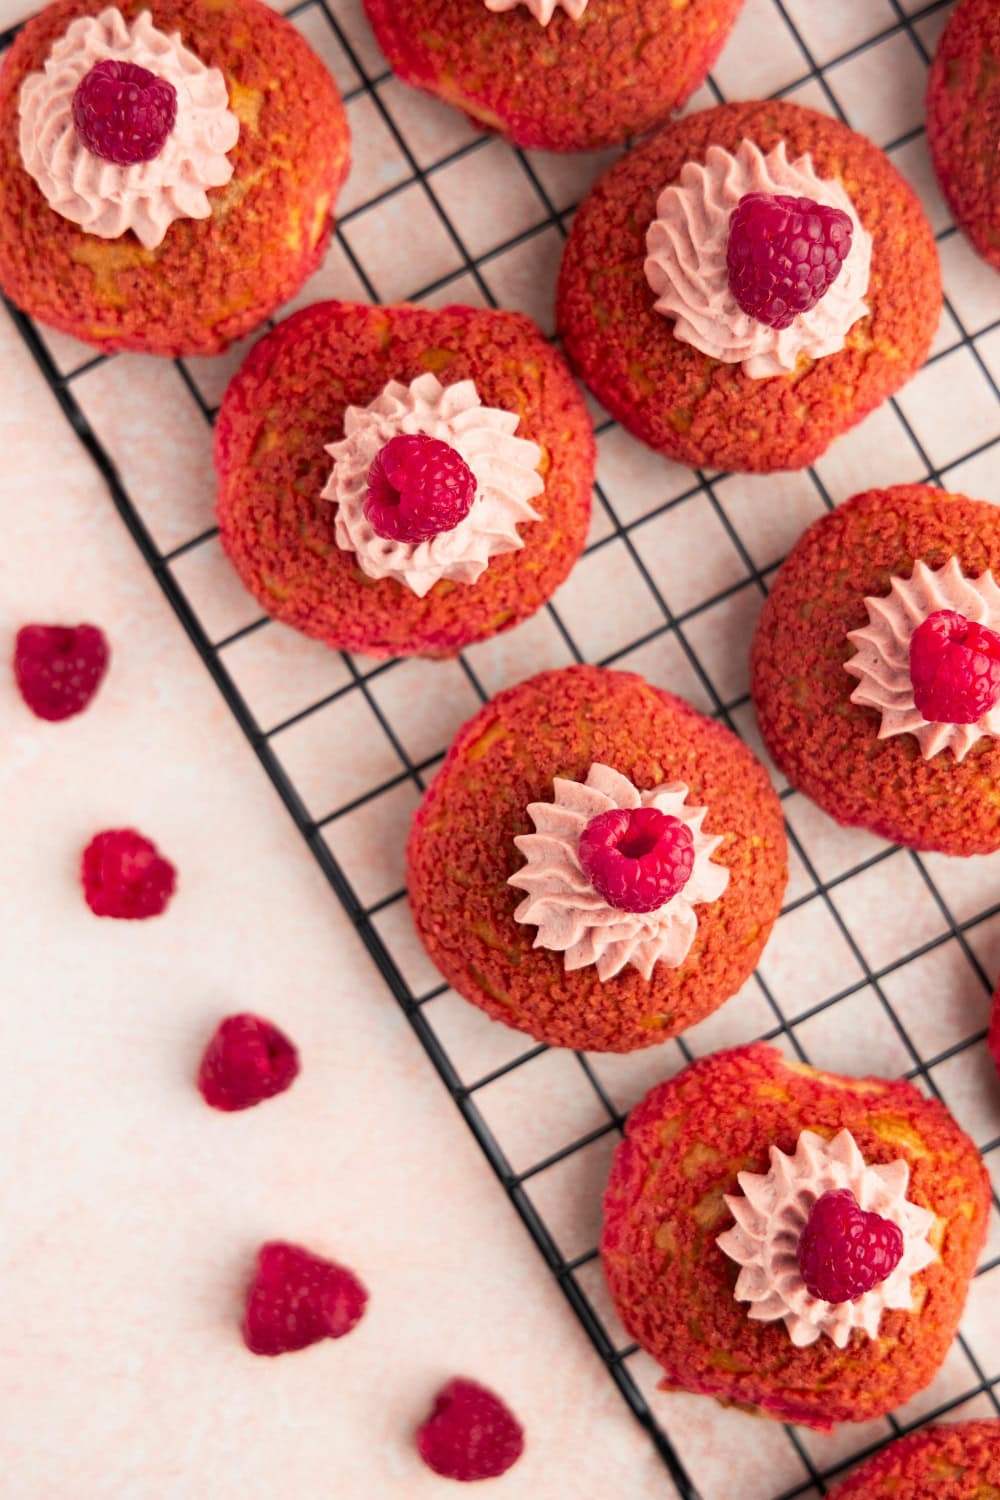
- Pipe Decorations: When the filling is set, whisk it to make it smooth and workable again, then pop it into a clean piping bag. Add a little swirl of filling on top of each puff and crown it with a fresh raspberry for a finishing touch.
 Chilled raspberry filling
 Whisk until smooth then transfer to a piping bag
- Serve: You can serve these right after decorating or keep them chilled until it’s time to serve.

Prep Ahead Tips
Here are a few tips to prepare parts of this recipe in advance so you’re not stuck in the kitchen all day:
- Crumb Topping: You can make the crumb topping up to 3 to 4 days in advance and store it in the fridge. For longer storage, seal it tightly and keep it in the freezer for a couple of weeks. Prepare it fully, including cutting the circles, and leave it in the freezer until you’re ready to bake the cream puffs. No need to defrost it before use.
- Raspberry Filling: This filling combines raspberry curd with whipped cream for a lighter texture and gelatin for stability. Raspberry curd lasts 3 to 4 days in the fridge, so preparing it the day before using it is an option. To prep it, follow the raspberry curd steps (Step 2), but hold off on adding the gelatin. Instead, refrigerate the curd overnight. The next day, gently reheat it in a double boiler to about 100°F (or 40°C), then stir in the bloomed and melted gelatin (melt it in a double boiler or microwave in short bursts).

Variations
Here are some ideas for modifying this recipe according to your needs and time constraints.
Simplify
- Skip Crumb Topping: While the crumb topping adds a wonderful crunch to the puffs, preparing it can be time-consuming and somewhat tedious. If you prefer, omit this step and simply dust the puffs with powdered sugar, or opt for a straightforward chocolate ganache. The ganache, as I showed in my vanilla cream puffs recipe, takes only 10 minutes to prepare, plus some cooling time. Without the crumb topping, you don’t need as much filling because the puffs won’t expand as much, allowing for less filling. Therefore, reduce the filling ingredients by a quarter.
- Simplify Filling: While the original filling is delicious, it can be time-consuming. Consider using a simpler alternative: raspberry jam and whipped cream. Both can be homemade or purchased ready-made to save even more time. Start by slicing the tops off your puffs. Next, pipe enough raspberry jam into each puff to cover the bottom, then fill the remaining space with whipped cream, making sure there’s a bit above the rim to help secure the top back on. Replace the cut tops and serve. These will taste great, and you’ve skipped about half of the recipe! For this quantity, you’ll need approximately 2 cups of heavy cream or 4 cups of whipped topping. I did a similar thing in my tiramisu cream puffs recipe, if you’re looking for photos.

Elevate
- Add Glaze: For an extra touch of elegance, prepare a simple powdered sugar glaze. In a mixing bowl, whisk one-third of a cup of powdered sugar with a splash of vanilla extract and enough milk or lemon juice (typically 1 to 1.5 teaspoons) to achieve a consistency suitable for drizzling. This will make them look even prettier and add a sweet finish to your cream puffs.

Storage
You can store these cream puffs in the fridge for 3 to 4 days. Make sure the container is sealed tightly so they don’t absorb any smells.
Similar Recipes to Try
Looking for more? Check out the following recipes:
- Cream Puff Fillings. Our list of all cream puff fillings covered on the site. Highly recommended if you’re looking for inspiration.
This post may contain affiliate links. Read our privacy policy.
Ingredients
Choux Pastry:
- ¼ cup water ~60 ml
- ¼ cup milk ~60 ml
- 3 tbsp unsalted butter ~45 g
- 2½ oz all-purpose flour ~70 g
- ¼ tsp salt
- 1¼ tsp sugar
- 2 large eggs ~95g after cracking
Streusel Topping:
- 2 oz unsalted butter 4 tbsp or 61g
- 2 oz all-purpose flour 1/2 cup or 61g
- 2 oz light brown sugar 1/4 cup or 61g
- Food dye optional
Raspberry Filling:
- 1/2 pound raspberries ~225g, fresh or frozen
- 1/4 lemon medium
- 2.7 oz sugar 1/3 cup + 2 teaspoons or 75g
- 2 eggs large
- 1 egg yolk large, about 15-17g
- 2 oz butter ~65g
- 4 tsp gelatin ~12g
- 4 tbsp water 60g
- 1 3/4 cups heavy cream ~420 ml
- 16 fresh raspberries for decoration
Instructions
Streusel:
- Soften Butter: Cut the butter into cubes and let it soften at room temperature for about an hour.2 oz unsalted butter
- Mix Dry Ingredients: In a medium bowl, combine sugar and flour.2 oz light brown sugar , 2 oz all-purpose flour
- Add Butter: Incorporate the softened butter using a fork or mixer until evenly mixed.
- Add Food Dye: If using, add the food dye and stir it until well incorporated.Food dye
- Roll Out Dough: Between parchment papers, roll dough to a thickness of 2-3mm. Peel and replace paper as needed for easier rolling.
- Refrigerate: Refrigerate the rolled dough (still between sheets) for about 30 minutes, ideally on a cutting board that will retain temperature for longer.
- Cut Shapes: Cut the dough into 1.5 to 2-inch disks quickly before it softens, remove the excess, and return the disks to the fridge.
Raspberry Curd:
- Bloom Gelatin: In a small bowl, whisk gelatin with water and let it sit until needed.4 tsp gelatin, 4 tbsp water
- Puree Raspberries: Use a hand blender for fresh raspberries or cook frozen raspberries with water until soft. Strain to remove seeds.1/2 pound raspberries
- Prep Lemon: Wash the lemon thoroughly, soaking if needed to remove pesticides.
- Zest & Squeeze: Zest and then juice the lemon.1/4 lemon
- Prep Eggs: Whisk eggs and yolks with sugar in a bowl and set aside.2 eggs, 1 egg yolk, 2.7 oz sugar
- Cook Puree Mixture: Combine raspberry puree, lemon juice, and zest in a pot. Heat until it bubbles then remove from heat.
- Temper Eggs: Slowly mix the hot puree into the eggs to avoid curdling. Return the mixture to the pot.
- Cook: Stir the mixture on low heat until it noticeably thickens.
- Add Butter: Off the heat, add chopped butter and stir until melted and incorporated.2 oz butter
- Add Gelatin: Add bloomed gelatin and whisk until dissolved.
- Strain (Optional): Strain to remove any lumps or cooked egg bits.
- Cover: Cover with plastic wrap and leave at room temperature until it cools to about 100°F (or 40°C).
Choux Pastry:
- Preheat Oven: Heat oven to 390°F (200°C).
- Boil Butter Mixture: In a pot, mix butter, milk, water, salt, and sugar. Bring to a boil, ensuring the butter melts completely.¼ cup water , 3 tbsp unsalted butter , ¼ tsp salt, 1¼ tsp sugar, ¼ cup milk
- Add Flour: Off the heat, add the flour and stir. Return to low heat, stirring continuously for 2-3 minutes until the dough is thick, glossy, and leaves a thin film on the pot bottom.2½ oz all-purpose flour
- Cool Dough: Transfer dough to a bowl and let it cool for 10 minutes, spreading it out to cool faster.
- Whisk Eggs: Beat eggs in a separate bowl.2 large eggs
- Mix Dough: With the dough slightly cooled, mix with a hand mixer. Gradually add half the eggs, mix, then add the remaining eggs bit by bit until the dough forms a 'V' shape when lifted with a whisk or spatula.
Bake:
- Prepare Tray: Line a baking tray with parchment paper or a silicone mat.
- Pipe Dough: Fill a piping bag and pipe dough onto the tray in 2-inch mounds, leaving 1¼ inches space between each.
- Add Streusel: Place refrigerated streusel discs on each dough mound.
- Bake: Place the baking tray in the oven, immediately reduce temperature to 356°F (180°C), and bake for 40 minutes until slightly browned. Open the oven door slightly for the last 5 minutes of baking.
Raspberry Filling:
- Whip Cream: Whip cream until stiff.1 3/4 cups heavy cream
- Combine with Raspberry Curd: Fold whipped cream into cooled and whisked raspberry curd in 3 to 4 stages to keep it light.
Assembly:
- Fill Puffs: Pipe raspberry filling into cooled puffs.
- Chill: Refrigerate filled puffs and the leftover raspberry filling cream for at least an hour to set.
- Decorate and Serve: Decorate each puff with the leftover (now stiff) filling and a raspberry on top before serving.16 fresh raspberries