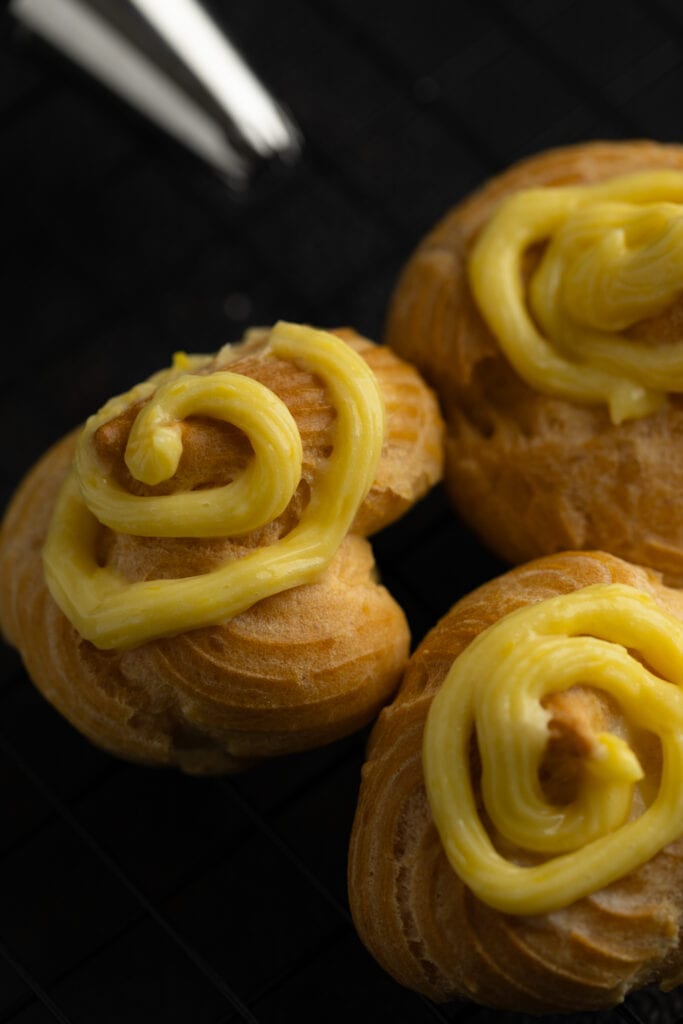
Easy Cream Puffs Recipe (Step-by-Step)
Whip up some magic in the kitchen with my simple and customizable cream puff recipe, guaranteed to impress at any gathering!
Recipe At a Glance
Cream puffs are one of the simplest uses of choux pastry, next to eclairs. The primary difference between the two lies in their shape: eclairs have an oblong shape, similar to a very small loaf of bread, while cream puffs are round and ball-shaped.
Both pastries can be filled and topped with whatever you like, making them super versatile to use and allowing for endless variations, depending on what you have on hand.
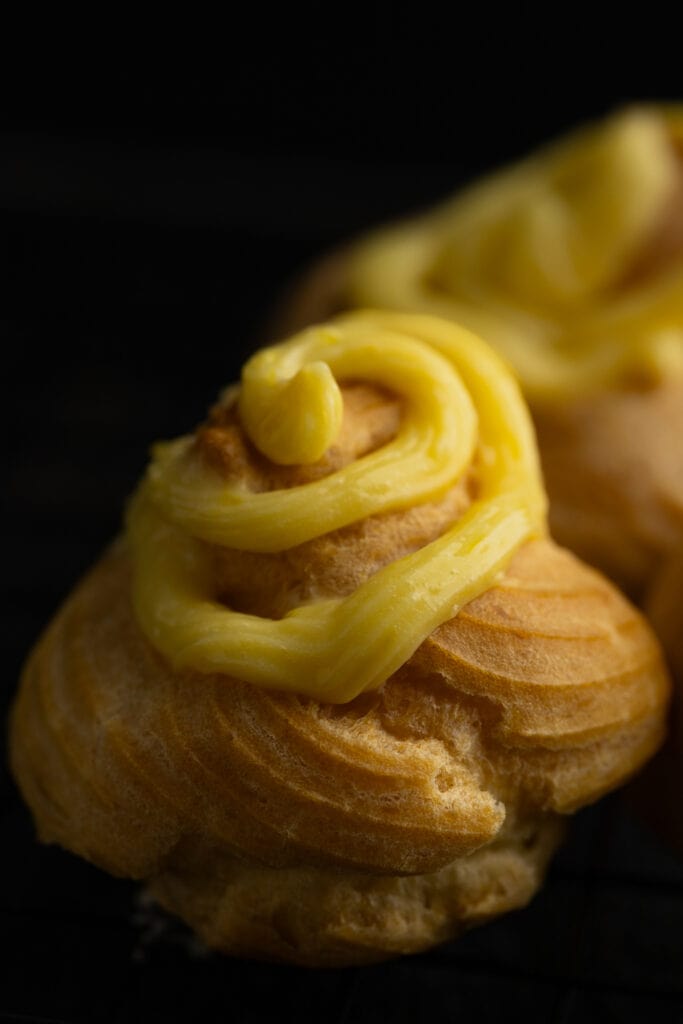
In this recipe, we’ll fill our cream puffs with pastry cream based on our Polish vanilla pudding recipe and dust them with powdered sugar. However, you are free to use any other filling or topping of your choice.
If you’re making cream puffs for the first time, read the ingredients notes, step-by-step instructions, and tips. If you’re a veteran, feel free to jump to the recipe card.
Ingredients Notes and Substitutes
Modern Choux Pastry:
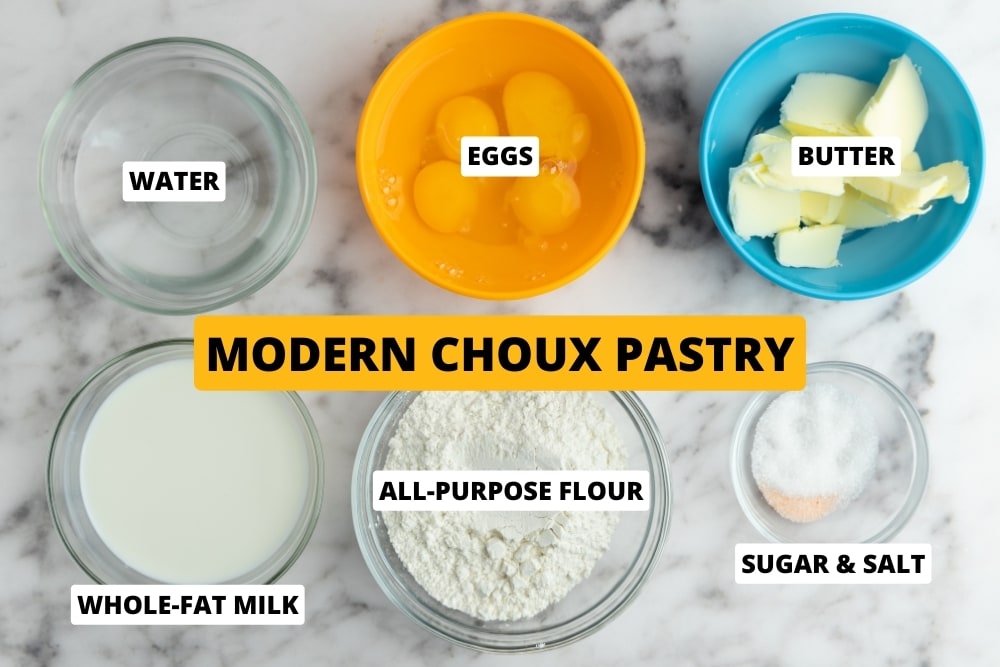
- Water and milk. Using half water and half milk as the liquid base gives the dough more flavor. You could go with just water if you want the puffs to rise more.
- Unsalted butter.
- All-purpose flour.
- Eggs.
- Sugar and salt. A bit of sugar and salt makes the dough itself quite tasty.
TIP: You can use the classic choux pastry recipe instead of the modern version.
Filling:
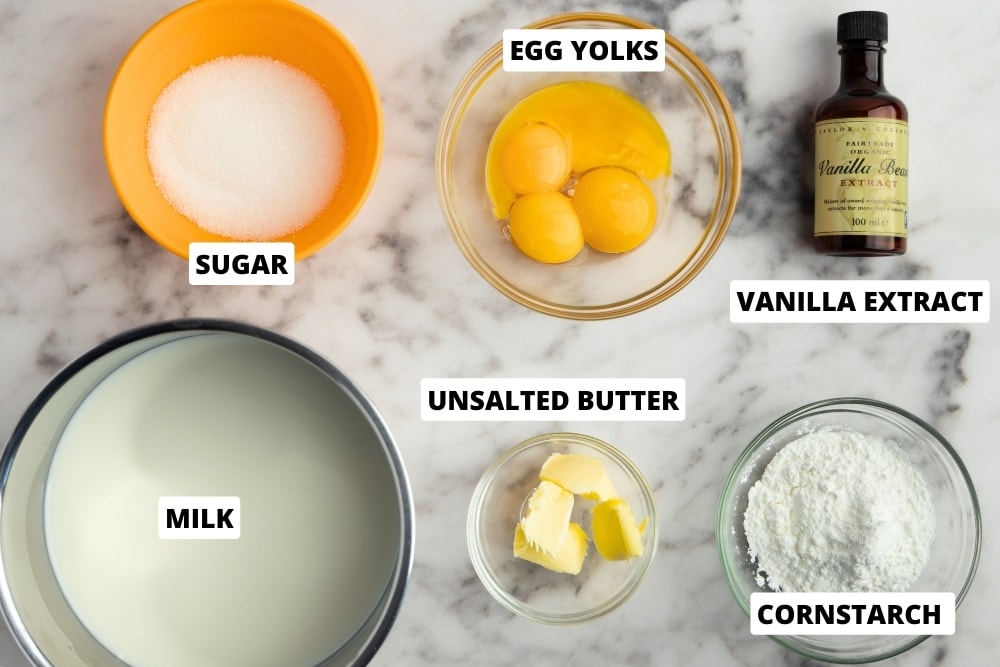
In this recipe, I use a simple vanilla pastry cream, but there’s nothing stopping you from using any other pipeable filling.
- Milk. Whole fat is best.
- Sugar. Regular granulated sugar is all you need, but feel free to use any sugar alternative.
- Cornstarch. Potato starch is a great alternative, though you need to lower the amount to two-thirds that of cornstarch (2 tbsp potato starch instead of 3 tbsp cornstarch).
- Vanilla extract. If you have vanilla beans on hand, you can use the beans instead. Cut a single bean lengthwise, scrape the seeds, and add to the milk, then cut the bean in half and add to the milk. Remove the cut beans before adding the starch.
- Egg yolks.
- Unsalted butter.
How to Make Cream Puffs
Here’s a detailed, step-by-step description of making cream puffs. I divided it into sections that focus on certain parts of the recipe, but you’re free to optimize the ordering of steps (e.g., start making the pastry when the pudding chills).
Step 1: Make Pastry Cream
(Skip this section if you’re using a different filling.)
This filling is based on our Polish vanilla pudding recipe. The main differences are that we use less milk (which intensifies the flavor and thickens the consistency) and add whipped butter to transform the pudding into a pastry cream.
- Warm up the butter. Begin by taking the butter (for the filling) out to warm it to room temperature. Cutting it into several slices will speed up the process.
- Pudding prep. Measure all the ingredients for the pudding cream, except for the butter, and set them aside. Set aside one-third of the milk from the total amount and pour the remainder into a large pot. Add sugar, vanilla extract, and egg yolks to the pot, stir it, and start heating the mixture until it comes to a boil.
- Prepare starch slurry. In a separate bowl, mix the reserved milk with cornstarch, ensuring there are no lumps.
- Make the pudding. When the milk mixture in the pot is almost boiling, pour in the starch mixture while stirring. Continue stirring on low heat until it thickens, then turn off the heat.
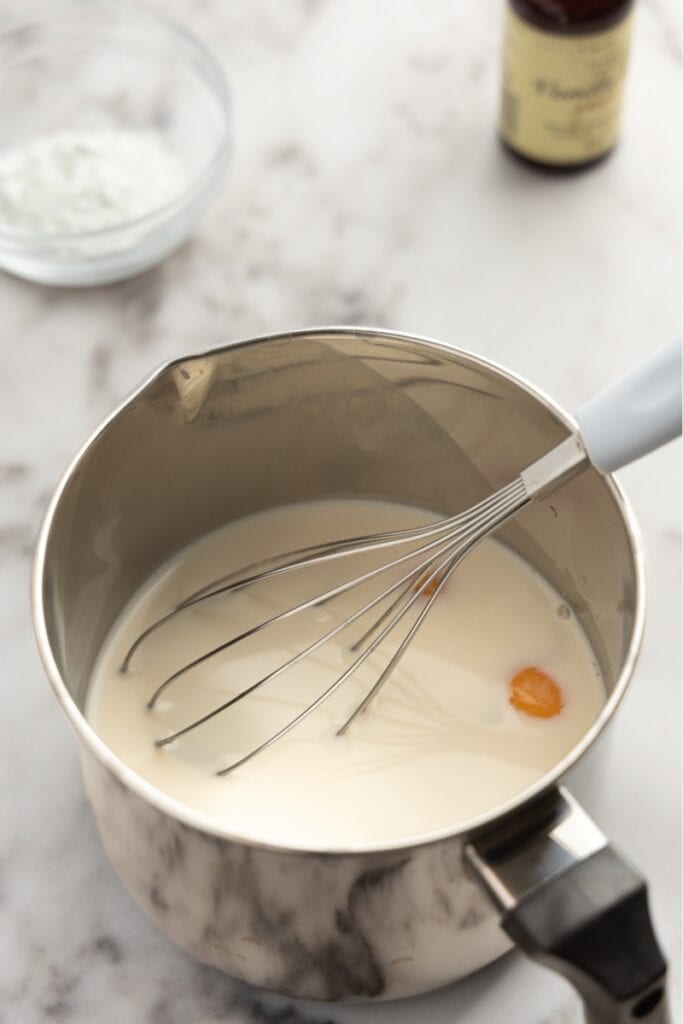 Add the ingredients to a pot
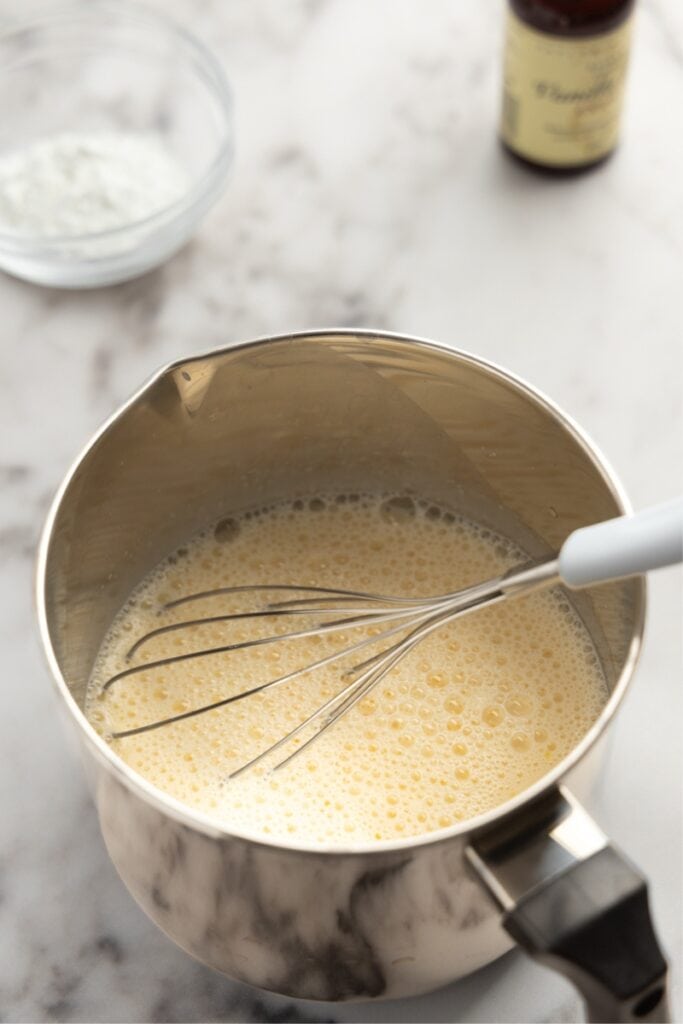 Mix the ingredients
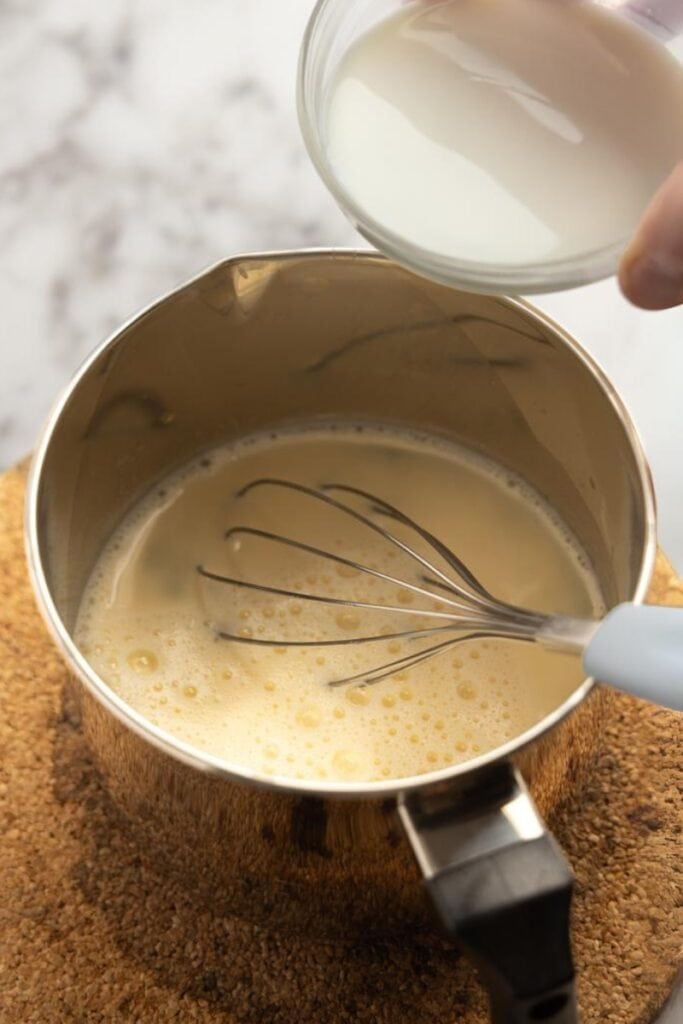 Pour in starch slurry
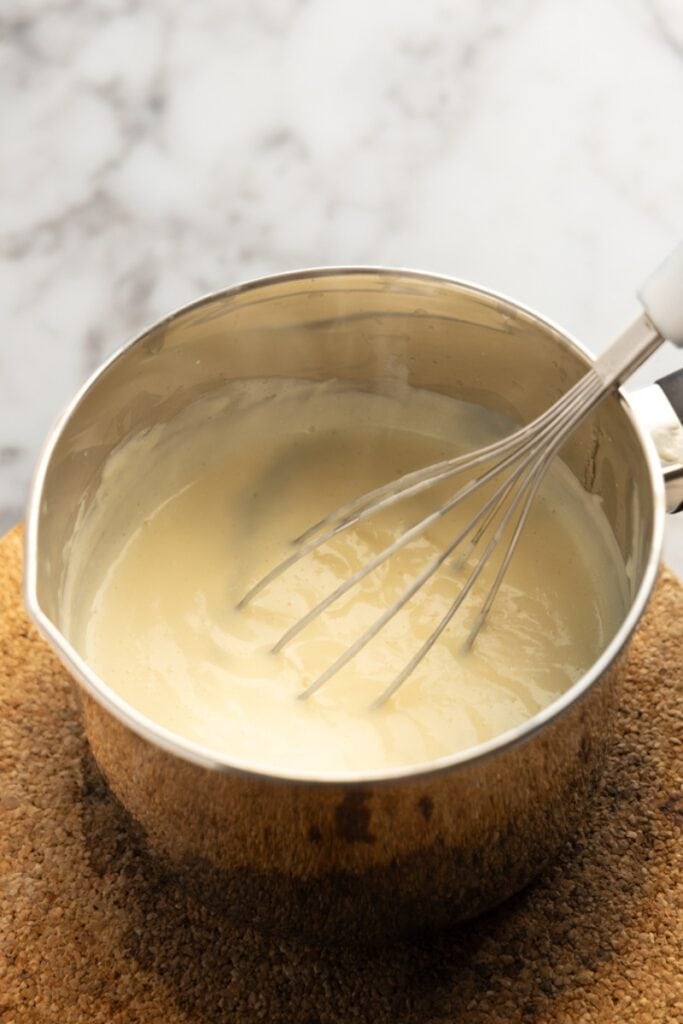 Stir the mixture to thicken
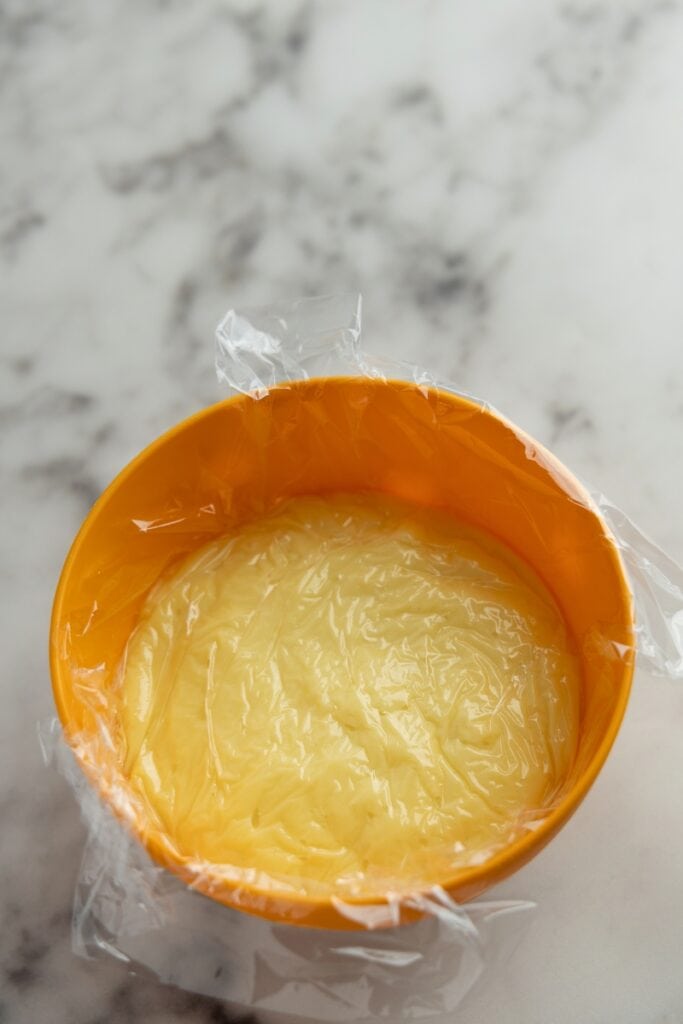
- Chill. Place plastic wrap directly on the pudding’s surface to prevent a crust from forming, then leave it at room temperature to cool for at least 60 to 90 minutes. Aim for the pudding to reach the same temperature as the butter.
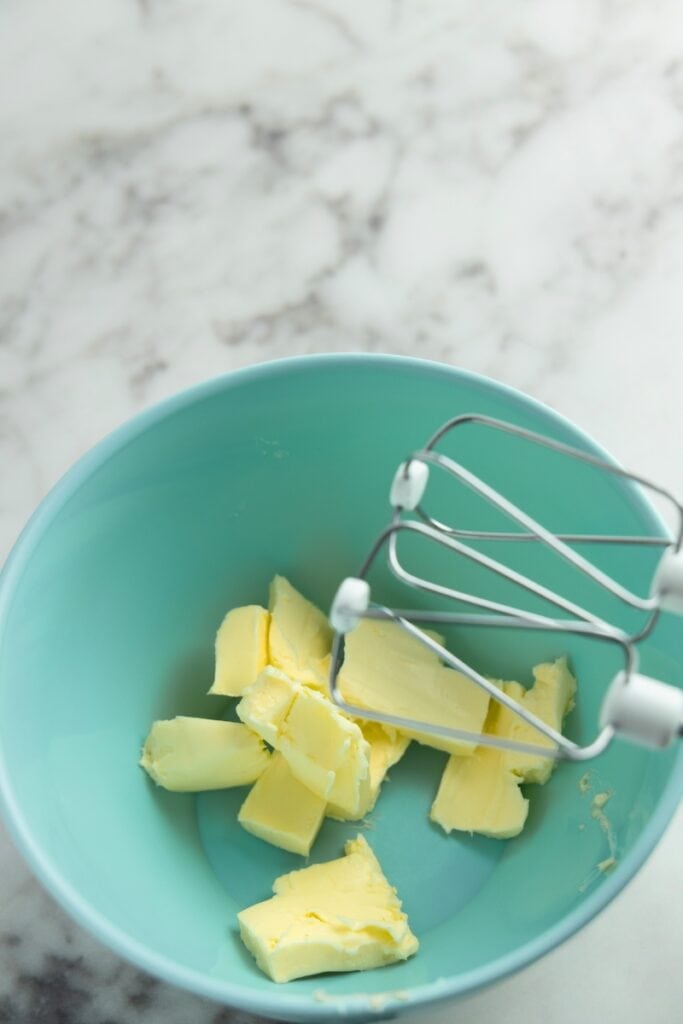
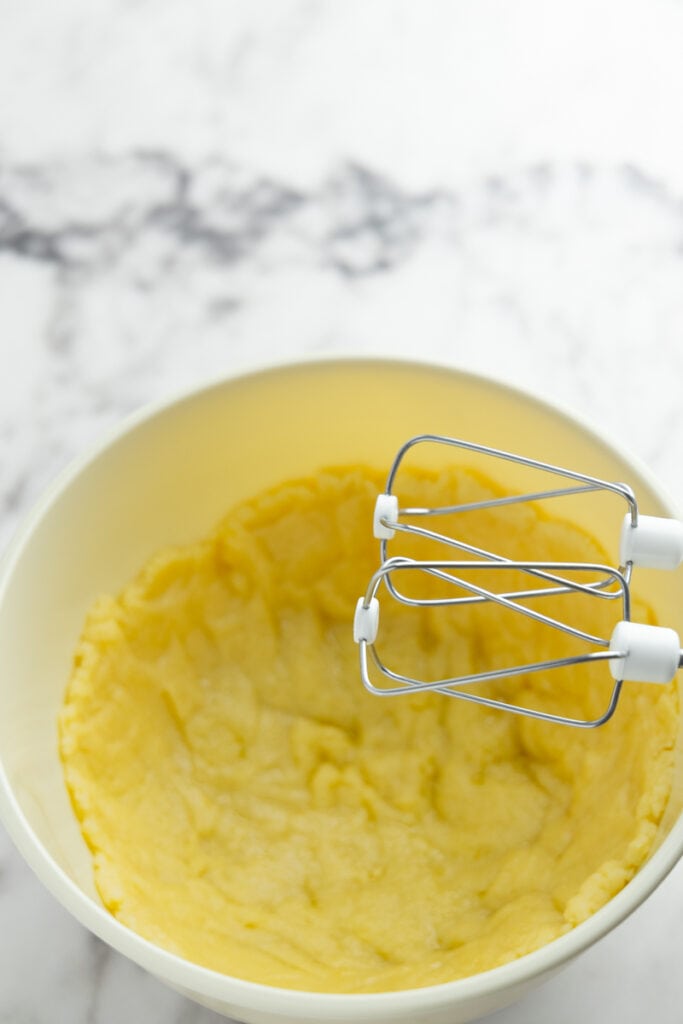
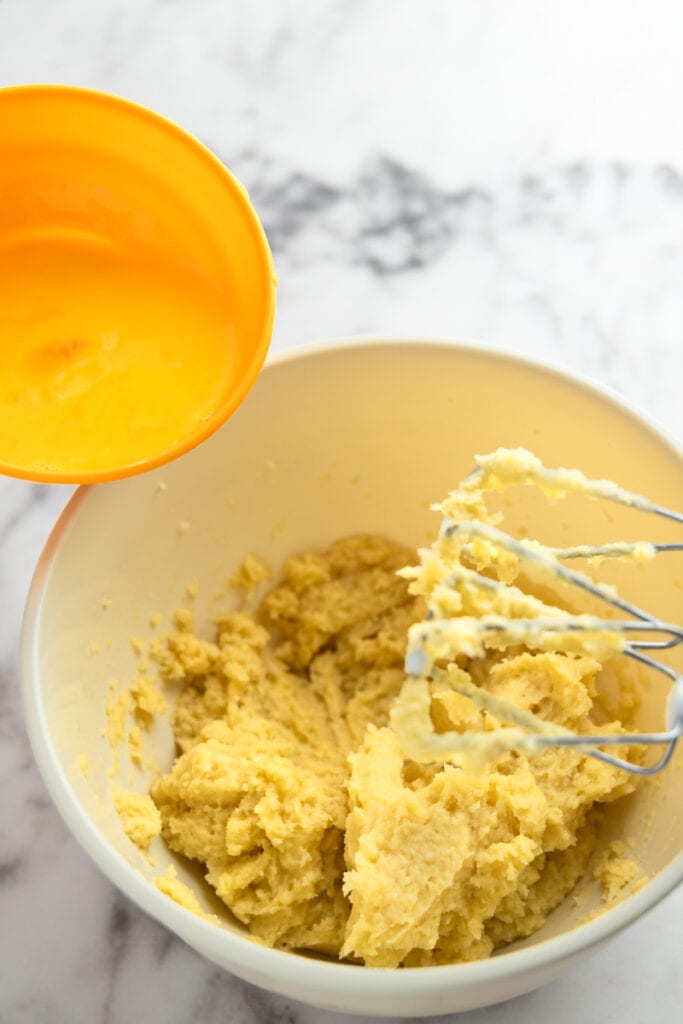
- Make pastry cream. Whip the room-temperature butter in a bowl, starting at low speed and gradually increasing to high speed until well aerated, usually 20-30 seconds. Gradually add the cooled pudding to the whipped butter, one tablespoon at a time, mixing well after each addition until a creamy consistency is achieved.
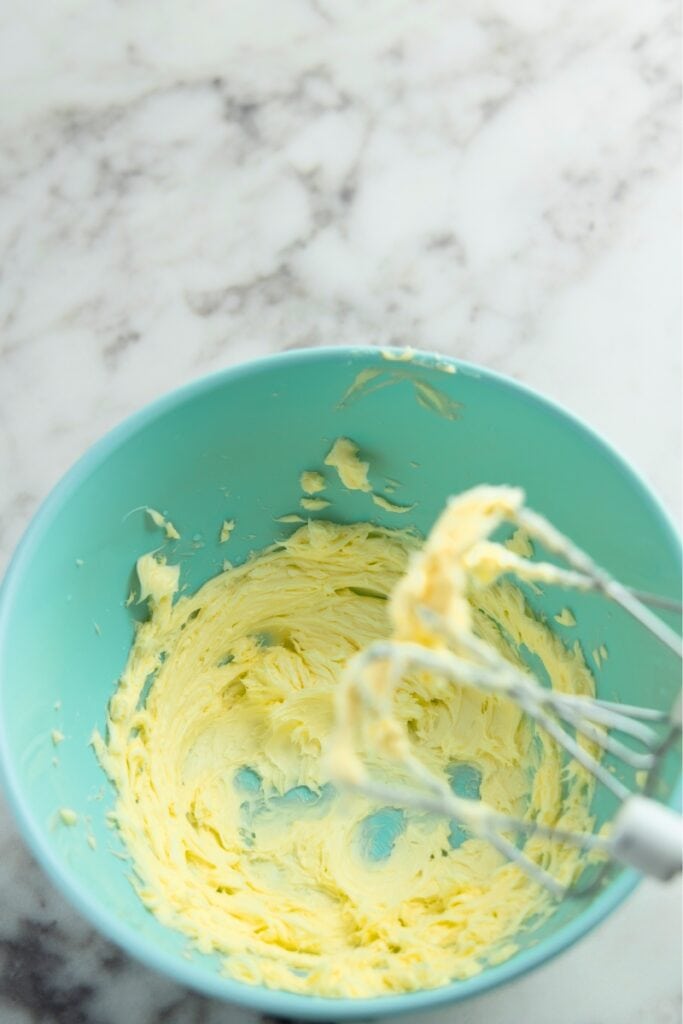 Whip the softened butter
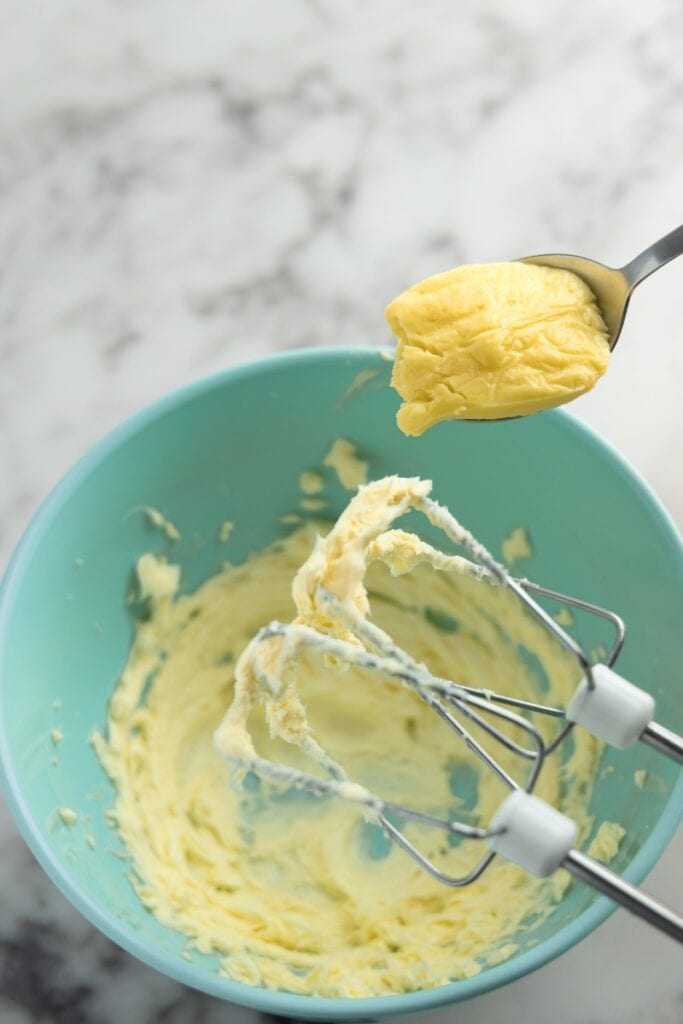 Gradually add the pudding
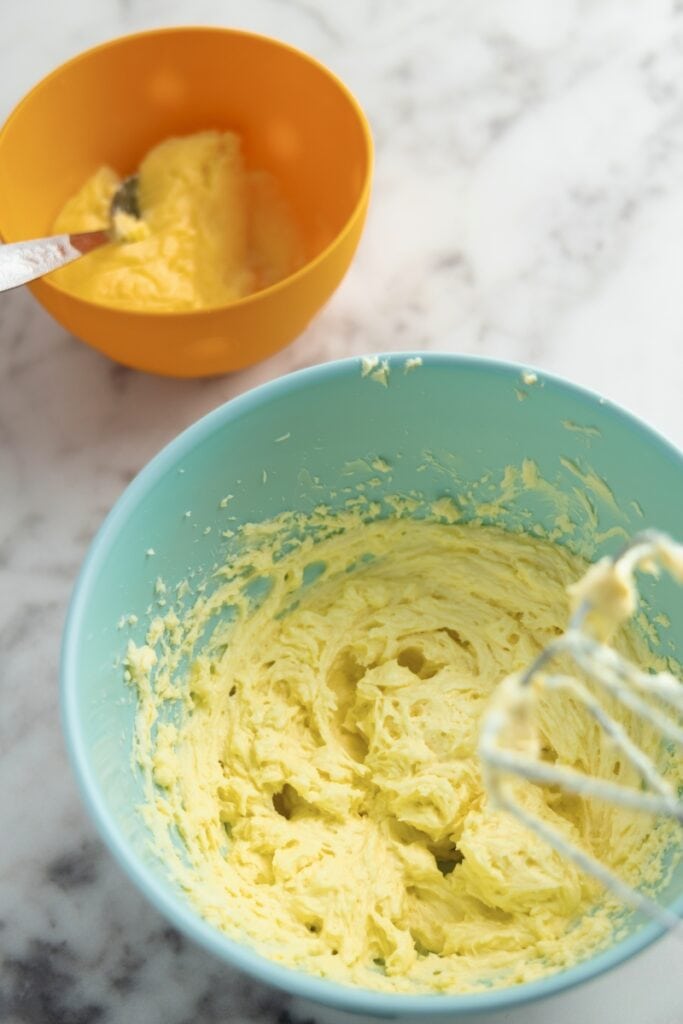 Mix continuously
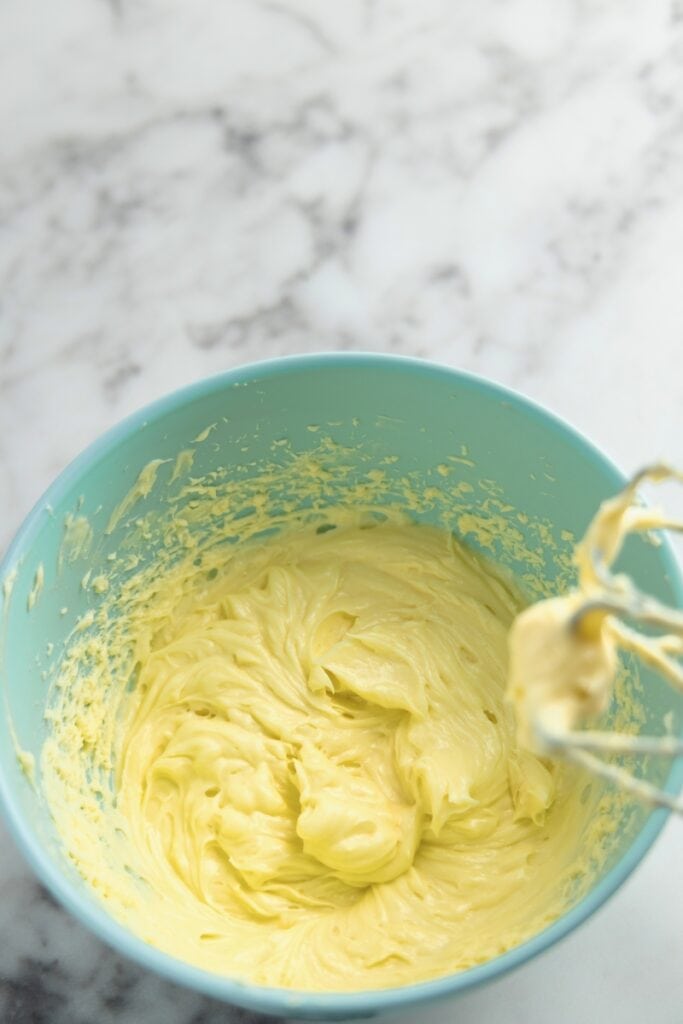 Add all the pudding and mix until smooth
- Taste test. If necessary, add powdered sugar to the cream for sweetness, mixing until well combined.
- Refrigerate. Refrigerate the cream for at least an hour before use, allowing it to thicken and hold its shape when piped.
Step 2: Make Choux Pastry
- Preheat the oven. Start by preheating your oven to 390°F (200°C).
- Melt the butter and bring to a boil. In a pot, combine butter, milk, water, salt, and sugar, then bring the mixture to a boil, ensuring the butter is fully melted.
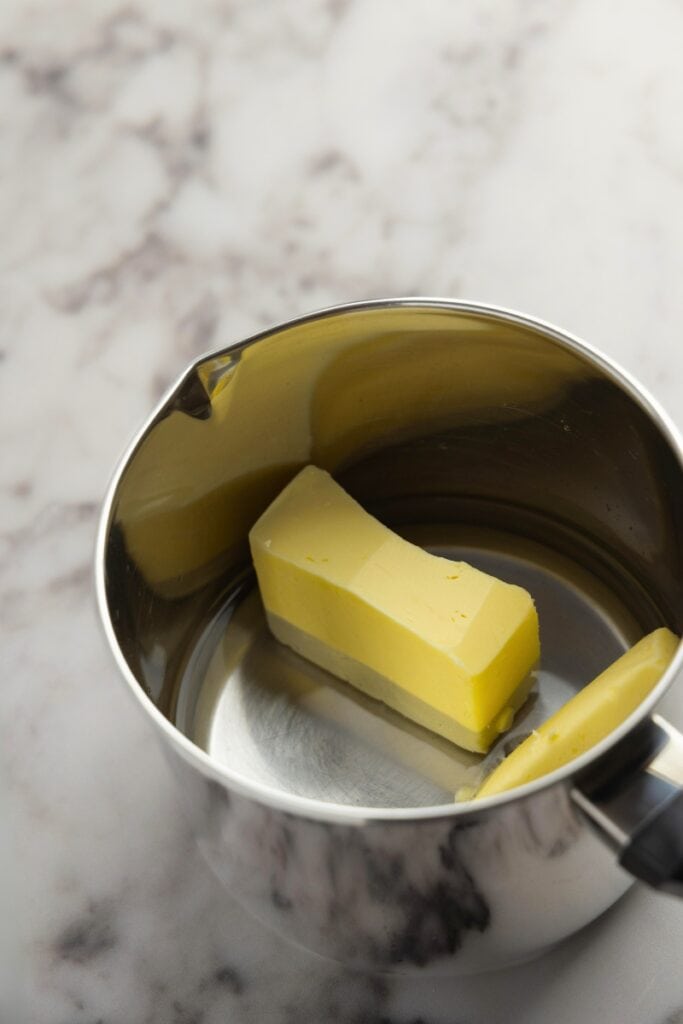 Add butter to the pot
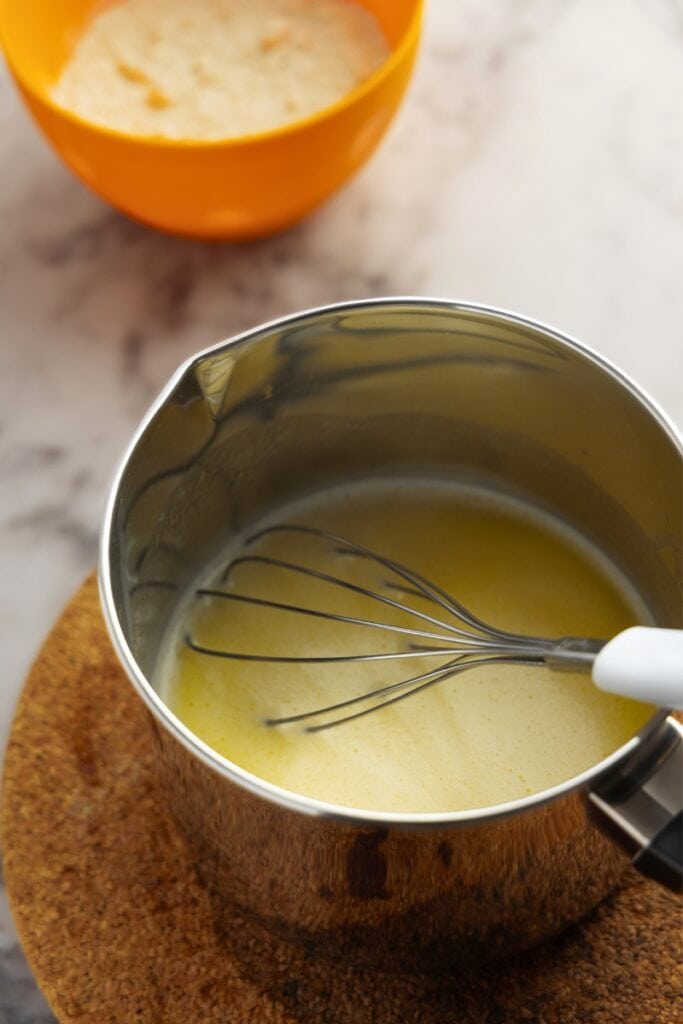 Boil it with water, milk, salt and sugar
- Add the flour. Take the pot off the heat, add all the flour to the mixture at once and give it a quick stir until it roughly combines. Bring the pot back to the stove and continue stirring with a spoon over low heat. The dough will thicken and clump quickly, but you should continue stirring the mixture for 2-3 minutes, making sure all the flour is incorporated and there are no white floury spots inside. While stirring, scrape the dough from the sides and bottom to prevent sticking. After 2-3 minutes, the dough should be glossy and easy to detach from the pot, and a thin layer, or film, should form on the bottom of the pot.
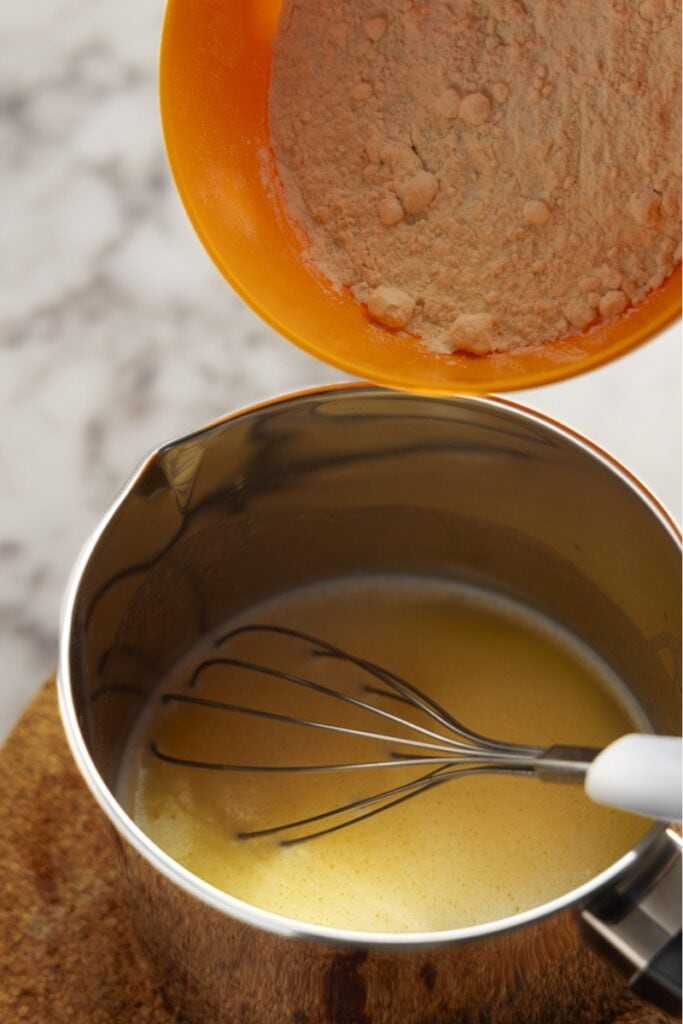 Add flour to the mixture
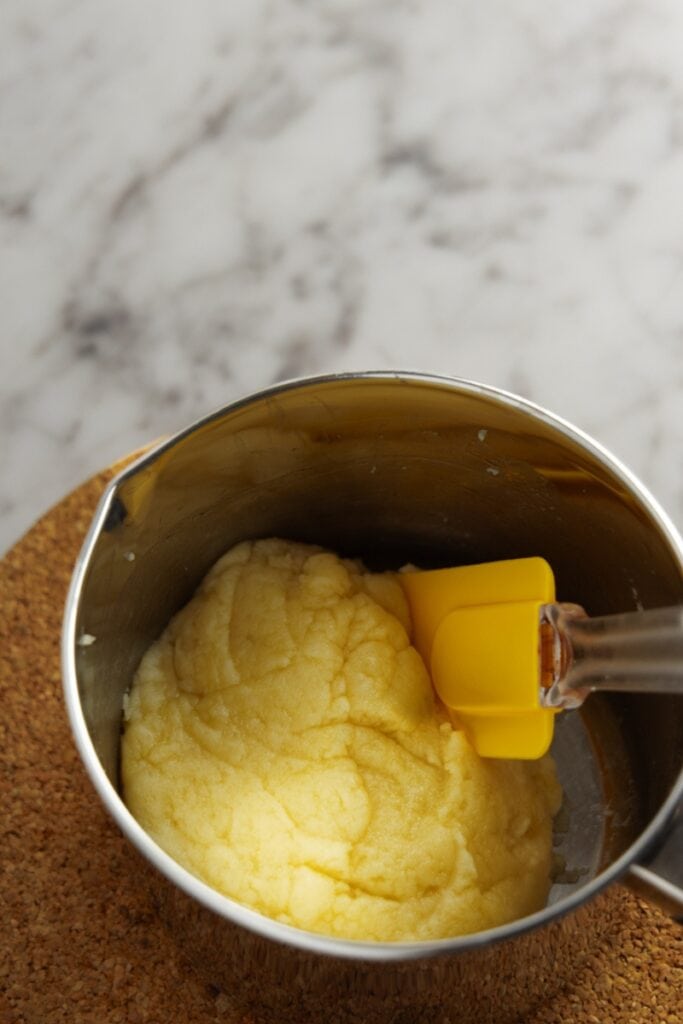 Stir and cook over low heat
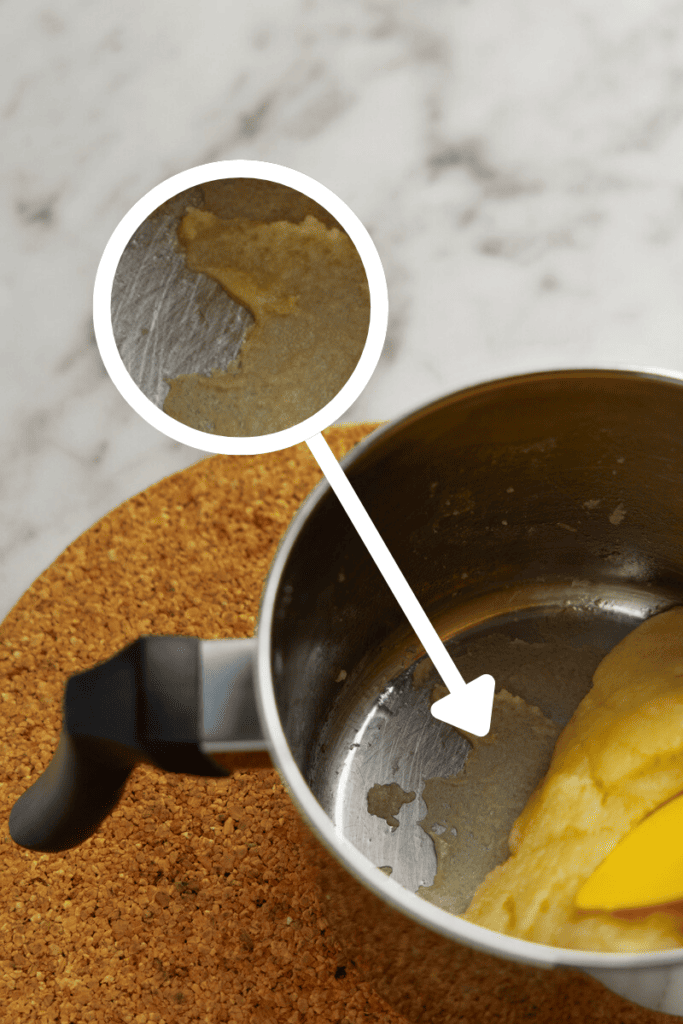 Thin layer of dough on the pot’s base
- Transfer. Move the dough to a mixing bowl and let it cool for about 10 minutes. Spreading it across the bowl can speed up cooling.
- Prepare the eggs. Crack the eggs into a separate bowl and whisk them.
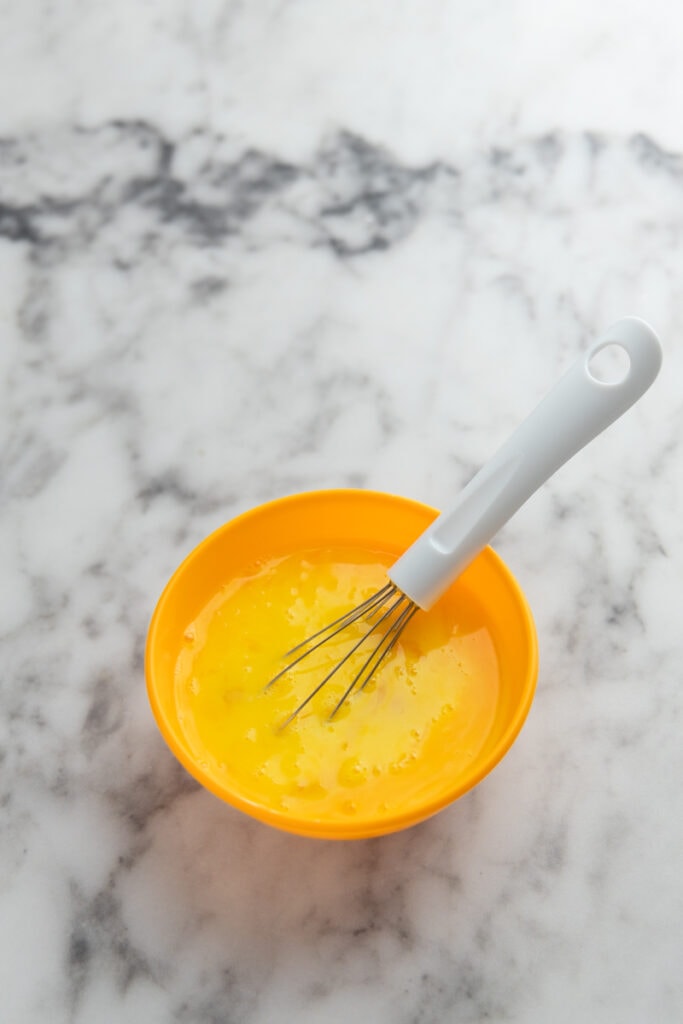
- Make dough. Once the dough has cooled slightly, start mixing it with a hand mixer at medium speed. After 20-30 seconds of mixing, add half the eggs to the dough and mix until incorporated. Repeat by adding half of the leftover egg mixture. Now it’s time to get the dough to the right consistency: you want it thick enough to hold its shape, but still pipeable. The best way to check for that is the V-Shape test: Dip your mixer whisks or spatula into the dough and lift it. The dough should slowly fall off, eventually leaving a piece of dough hanging that forms a characteristic ‘V’ shape or a triangle at the end of the whisk or spatula. If the dough is not there yet, continue adding the eggs bit by bit and checking the consistency.
 Add the whisked eggs
 Check dough consistency with the V-shape test
Step 3: Pipe and Bake Cream Puffs
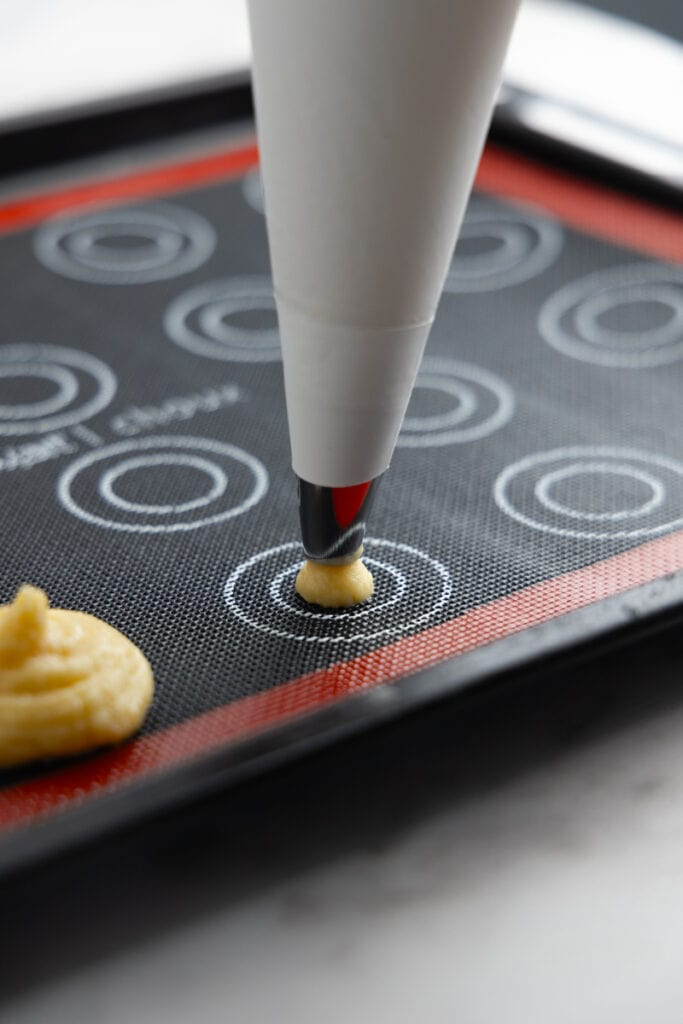
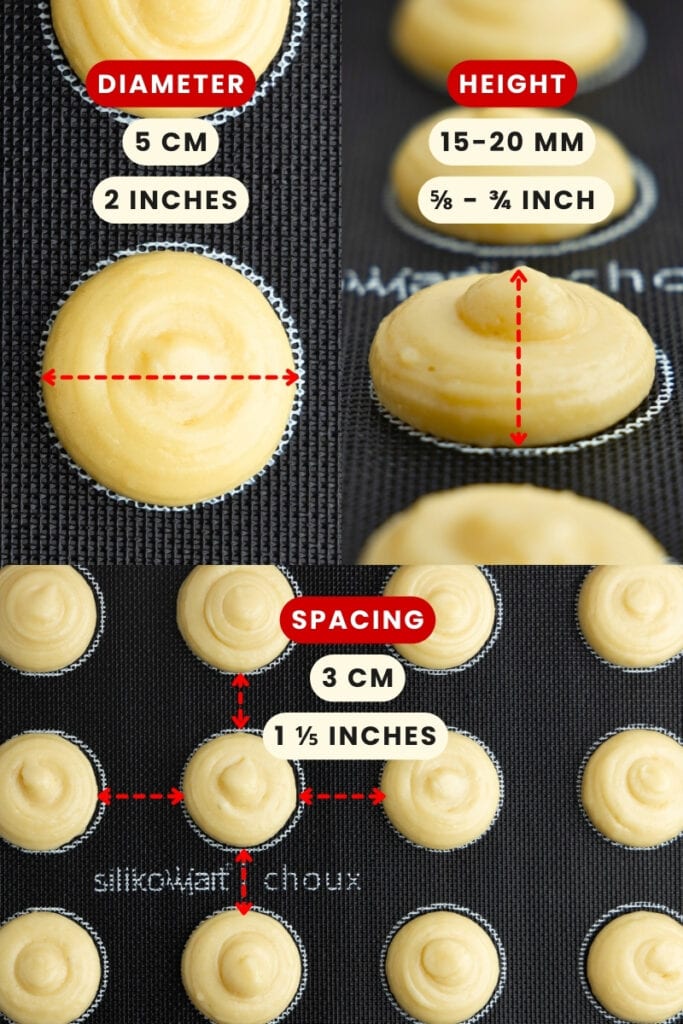
- Prepare the baking tray. Line a baking tray with parchment paper or a silicone mat. Optionally, draw 2-inch circles on the underside of the parchment as guides, spaced about 1 1/5 inches apart, for uniformly sized cream puffs.
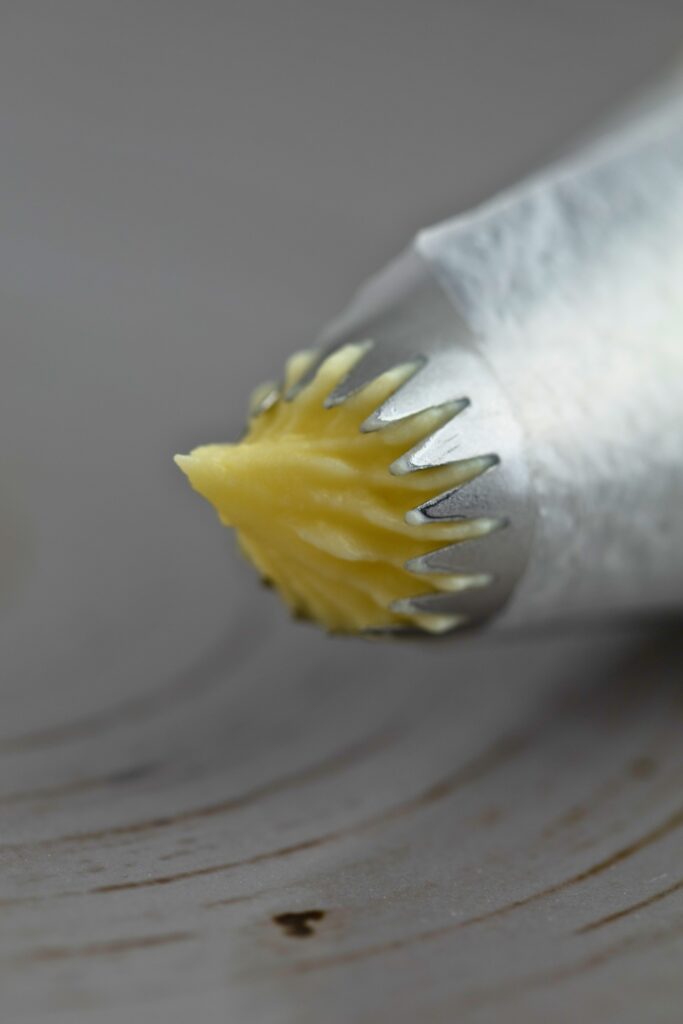
- Set up for piping. Transfer the dough to a piping bag fitted with a large tip. I use a Wilton 6B, which has an opening of approximately 15mm in diameter (a bit more than half an inch). Alternatively, use a plastic food bag with a corner cut off.
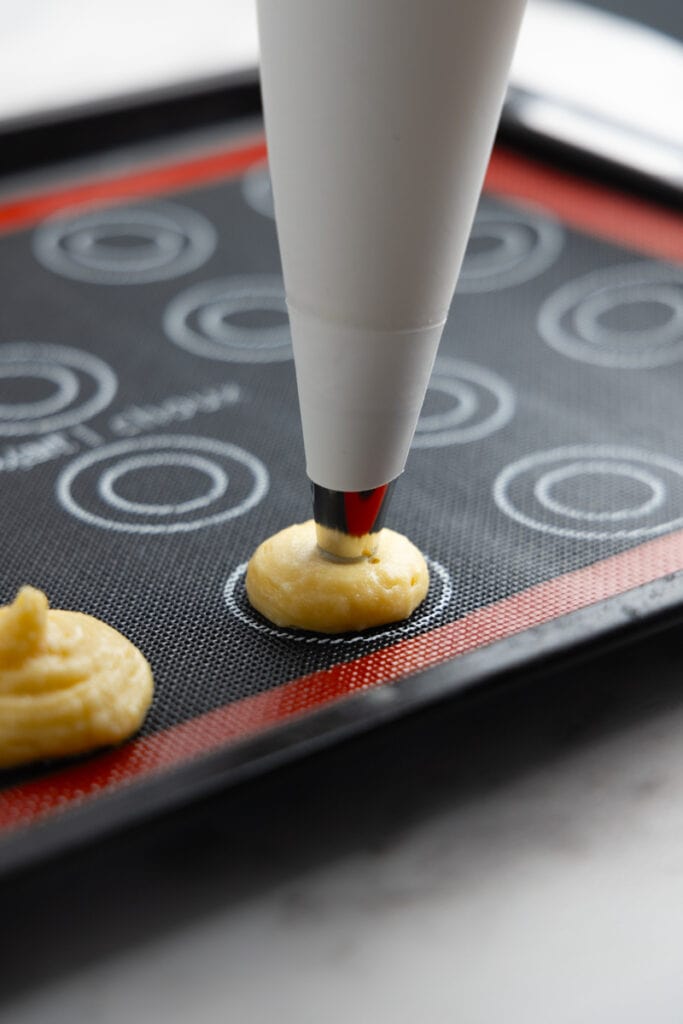
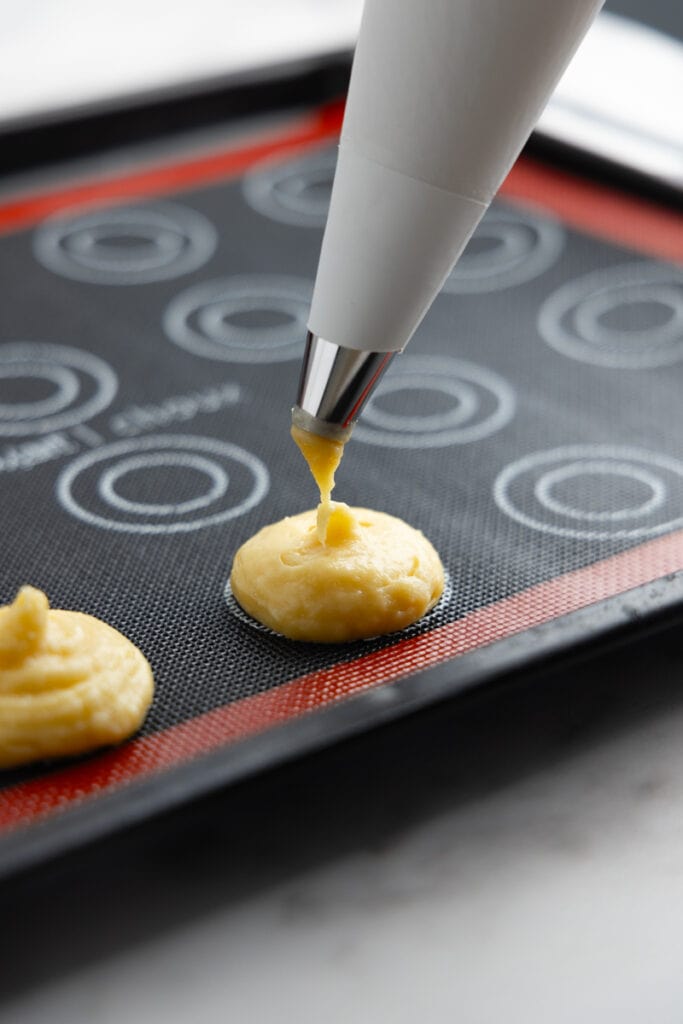
- Pipe the dough. Hold the piping bag vertically above the tray and apply steady pressure to release the dough, moving the tip in a small circular motion. Lift the bag to finish each puff. If a small peak forms, dampen your finger and gently pat it down.
 Hold the piping bag vertically
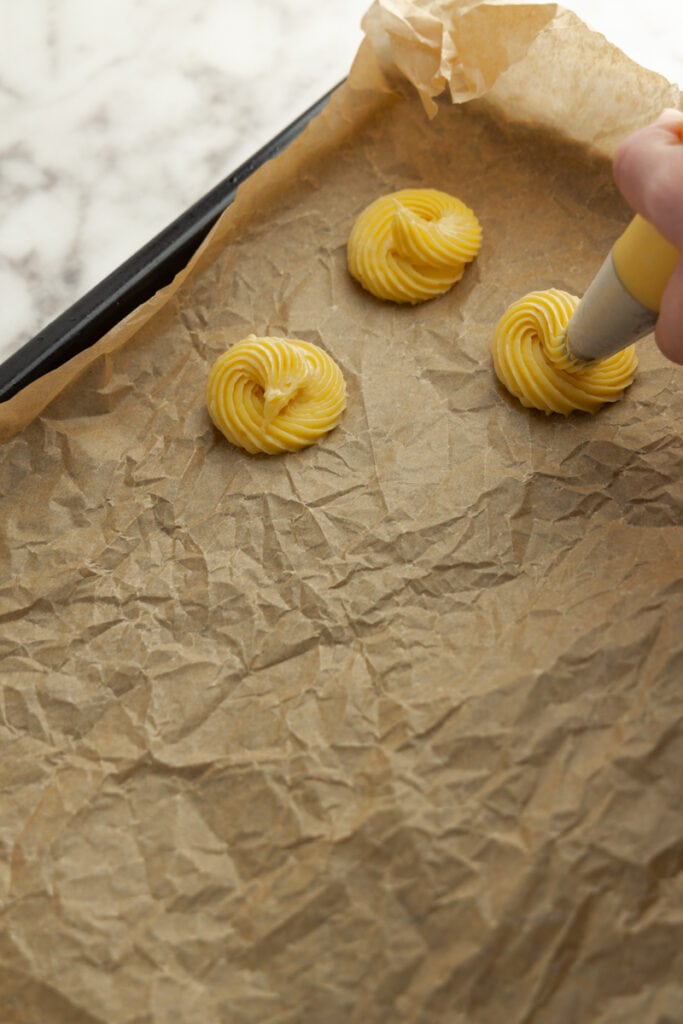 Move the tip in small circular motion
 Lift the bag to finish each puff
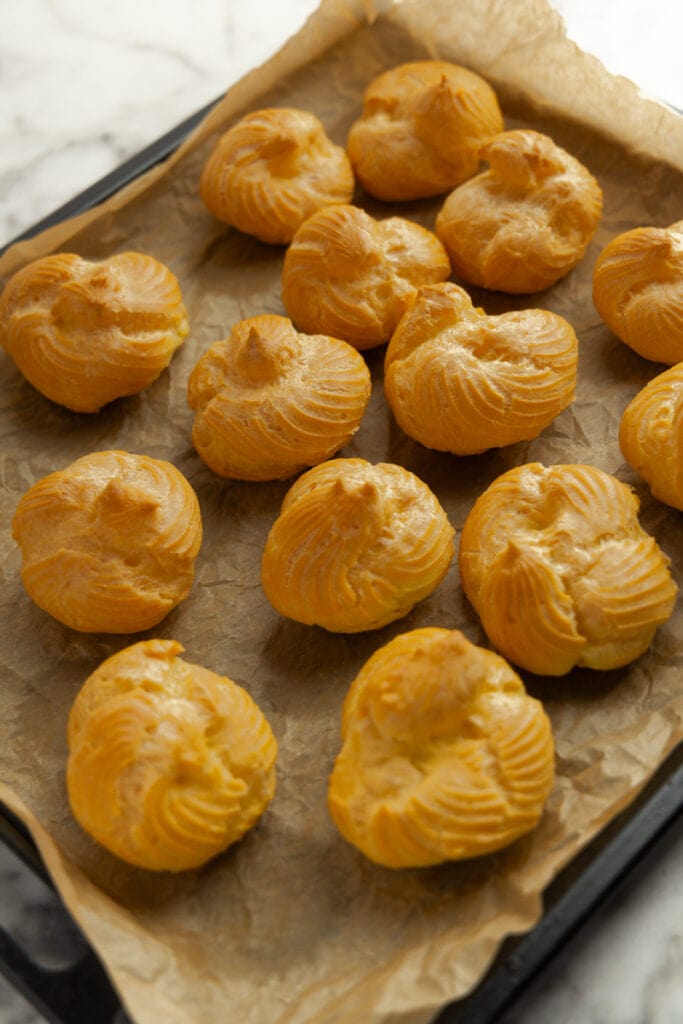
- Bake. Place the tray in the preheated oven, then immediately reduce the temperature to 356°F (180°C). Bake for 40 minutes, avoiding opening the oven door during the first 30 minutes to ensure proper rising. Leave the oven door slightly open for the last 5 minutes. To do so, carefully place an oven mitt or a folded kitchen towel between the door and the oven frame. This should create a small gap, allowing steam to escape from the oven.
Step 4: Combine & Serve
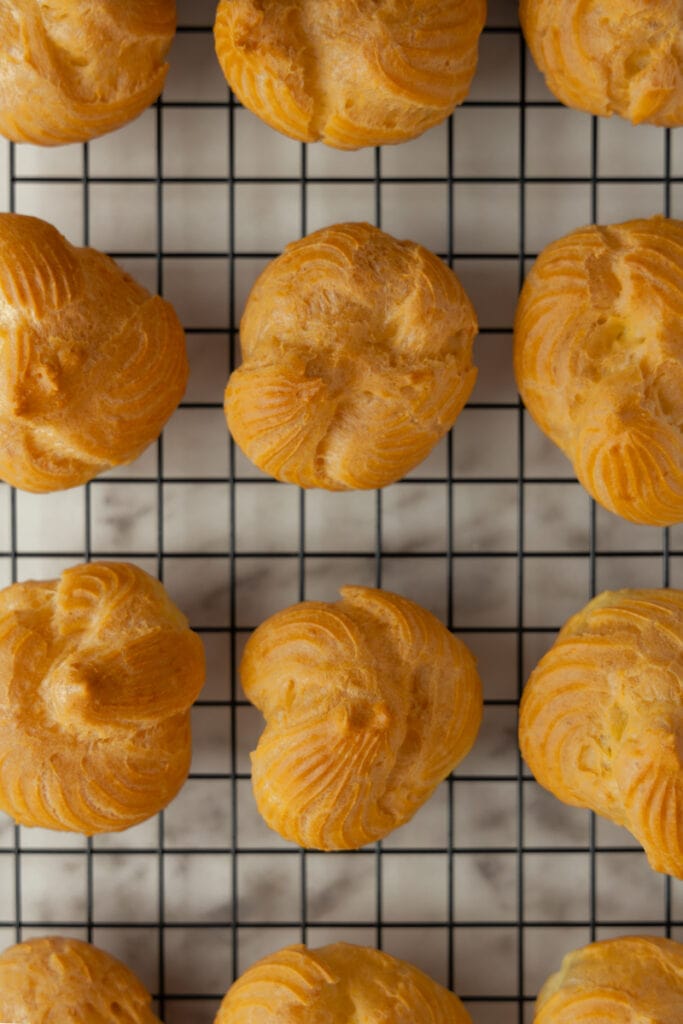
- Cool the puffs. After baking, let the pastries cool on a wire rack for 15 minutes.
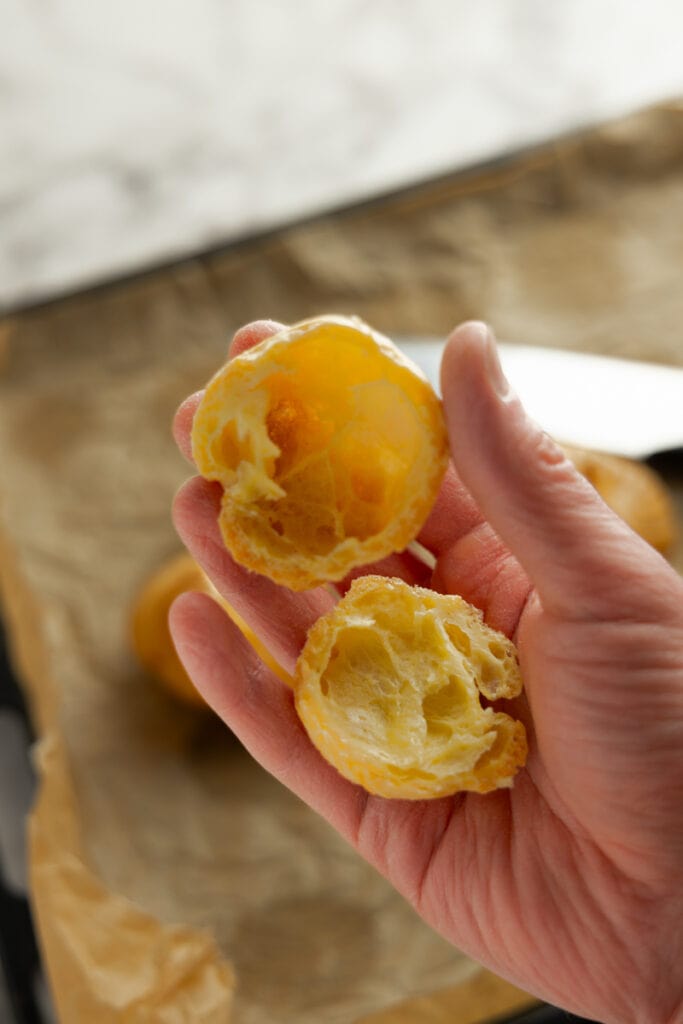
- Slice. Carefully cut the puffs horizontally to create tops and bottoms.
- Fill. Pipe the pastry cream onto the bottom halves of the puffs. Be generous if desired, then place the top halves back on.
- Finish. Dust the puffs with powdered sugar, or use another topping of your choice.
- Serve. Enjoy the cream puffs immediately for the best taste and texture.
Tips for Making Cream Puffs
If you’re working with choux pastry for the first time, definitely check out my article on choux pastry. It’ll teach you everything you need to know to get the cream puffs right the first time around.
Piping Mounds
Instead of piping the dough in a circular motion, you can pipe it in mounds. This method makes nice, round puffs that are more similar to one another.
Here’s how:
- Start: Hold the piping bag with a round tip vertically, with the nozzle a bit above the baking sheet. Begin to pipe by applying steady pressure to the bag, allowing the pastry to form a mound.
- Forming the Mound: As the pastry starts to form a base, slowly lift the piping bag upwards while maintaining pressure, allowing the pastry to build up on itself. I keep the tip partially immersed in the top portion of the mound being formed. This ensures the pastry expands both upwards and outwards in a controlled manner. Aim for the pastry to grow upwards to about 3/4 inch and widen to approximately 2 inches (5 cm) in diameter.
- Finishing the Mound: Once you’ve reached the desired size, stop applying pressure and swiftly but gently pull the nozzle upwards and away to finish. This usually leaves a small peak that you can pat down using a damp finger.
Filling Cream Puffs
The version of the recipe that I described above asks you to cut the puffs in half and fill them. That’s one way to do it.
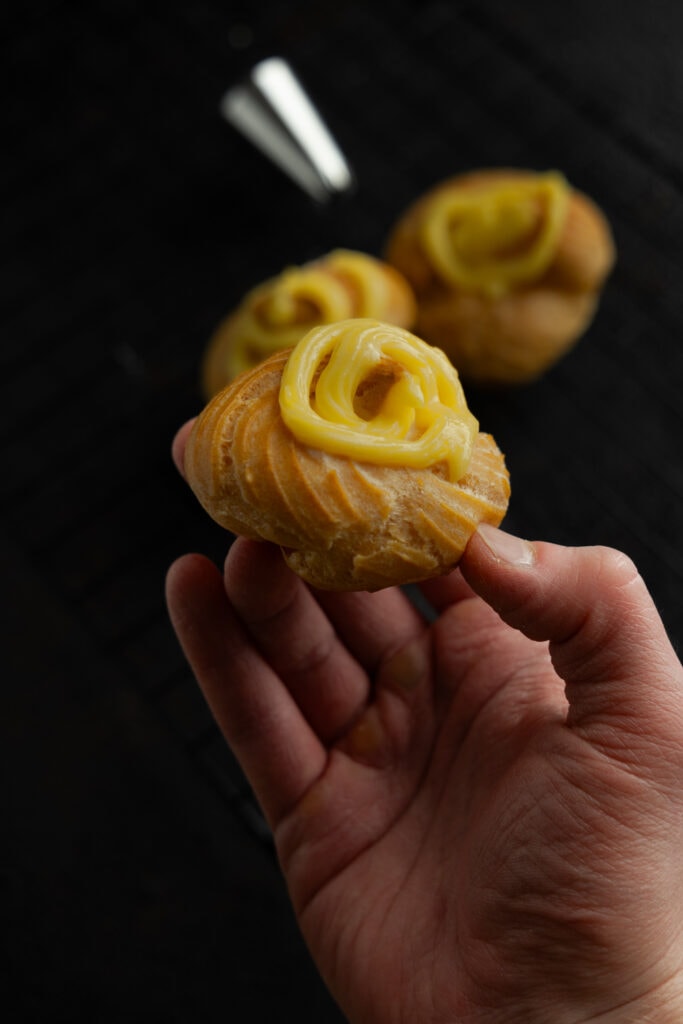
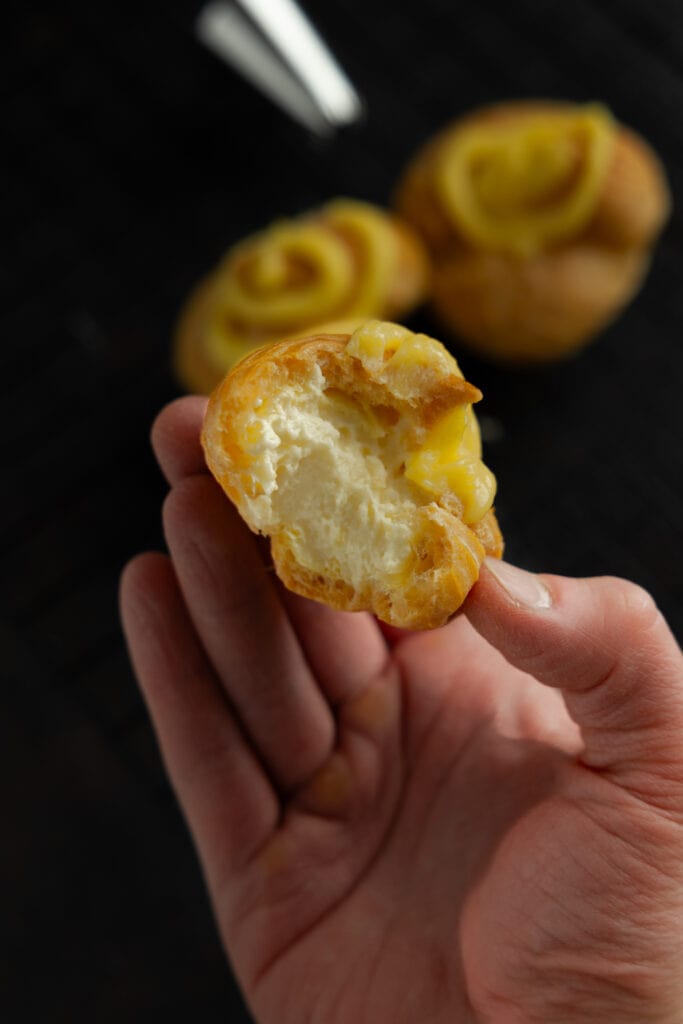
Another is to leave the puffs whole and pipe them by puncturing the pastry. This version is great if you don’t want to add too much filling or if your filling doesn’t quite retain its shape after piping.
- Baked puff sliced horizontally
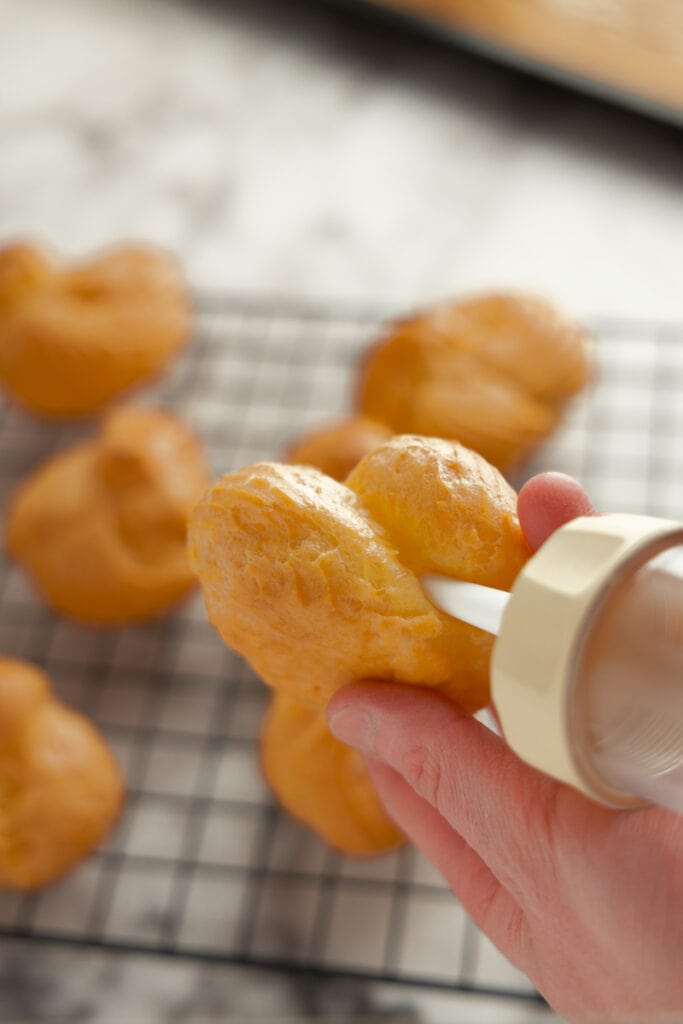 Uncut puff pierced with filling
(No one will know the filling doesn’t hold its shape if it’s inside.)
The same method works for eclairs, except cream puffs are round instead of oblong, making them easier to fill that way.
Pipe-Filled Cream Puffs
- Select a piping tip. Opt for a long, narrow piping tip, such as a Bismarck tip. You need one that can puncture the pastry without causing it to crack or crumble.
- Pierce the puff. Gently insert the tip of the piping bag into the pastry, looking for a place where the pastry is thin and easy to pierce. The tip should enter easily without applying too much pressure.
- Pipe. Gradually fill the puff, stopping when the shell begins to expand or the puff starts to move away from the piping bag. Either sign indicates the pastry is filled.
- Clean any excess. If any filling oozes out of the pierced hole, gently wipe it off.
- Repeat for each cream puff.
How to Serve Cream Puffs
Cream puffs are incredibly versatile, offering a wide range of options for fillings and toppings. Below are some delightful suggestions to try.
For fillings, whipped cream and various types of pastry cream are the most popular choices. If you prefer filling the puffs without slicing them open, options like lemon curd and other fruit curds can be excellent choices.
As for toppings, powdered sugar is the simplest choice, with basic frosting as another popular option. You can also try making a ganache or a coffee-flavored variation.
Cream Puffs Recipes Published
Here’s a list of cream puff recipes we’ve already published:
- Choux au Craquelin
- Coffee Cream Puffs
- Vanilla Cream Puffs
- Tiramisu Cream Puffs
- Bavarian Cream Puffs
- Strawberry Cream Puffs
- Raspberry Cream Puffs
- Earl Grey Cream Puffs
- Oreo Cream Puffs
- Black Forest Cream Puffs
Storage
To store filled cream puffs, seal them tightly and keep them refrigerated. They should remain fresh for 3 to 4 days. Note some fillings, like whipped cream, may weep or become watery after a day or two, potentially making the cream puffs soggy over time.
Similar Recipes to Try
Looking for more? Check out the following recipes:
- Cream Puff Fillings. Our list of all cream puff fillings covered on the site. Highly recommended if you’re looking for inspiration.
Like many desserts, cream puffs are ideally served on the same day they are made for the best texture and flavor.
If you need to prepare them ahead of time, bake the puffs a day in advance and store them uncut in an airtight container at room temperature. This way, you can fill them when you’re ready to serve.

This post may contain affiliate links. Read our privacy policy.
Equipment
Ingredients
Choux Pastry:
- ¼ cup water ~60 ml
- ¼ cup milk ~60 ml
- 3 tbsp unsalted butter ~45 g
- 2½ oz all-purpose flour ~70 g
- ¼ tsp salt
- 1¼ tsp sugar
- 2 large eggs ~95g after cracking
Pastry Cream:
- 1¼ cups milk
- 2 egg yolks
- 3 tbsp sugar
- 3 tbsp cornstarch or 1½ tbsp potato starch
- 2 tsp vanilla extract
- 7 tbsp unsalted butter room temperature (~100 g)
Instructions
Pastry Cream:
- Butter Prep: Slice butter and let it sit at room temperature for at least 1 hour to warm up.7 tbsp unsalted butter
- Pudding Setup: Measure pudding ingredients, set aside 1/3 of milk. In a pot, mix remaining milk, sugar, vanilla extract, egg yolks, and heat.1¼ cups milk, 3 tbsp sugar, 2 tsp vanilla extract, 2 egg yolks
- Starch Slurry: Mix reserved milk with cornstarch in a separate bowl.3 tbsp cornstarch
- Cook Pudding: Once milk mixture is almost boiling, add the starch slurry while stirring. Stir on low heat until thickened, then remove from heat.
- Cooling: Cover pudding with plastic wrap, cool to room temperature for 60-90 minutes.
- Pastry Cream: Whip room-temperature butter, then gradually add cooled pudding (one tablespoon at a time) and mix to a creamy consistency.
- Adjust Taste: Add powdered sugar if needed, mix briefly to combine.
- Chill Cream: Refrigerate for at least an hour before use.
Make Choux Pastry:
- Preheat Oven: Set to 390°F (200°C).
- Boil Butter Mixture: In a pot, mix butter, milk, water, salt, and sugar. Bring to a boil, ensuring the butter melts completely.¼ cup water, ¼ cup milk, 3 tbsp unsalted butter, 1¼ tsp sugar, ¼ tsp salt
- Add Flour: Off the heat, add flour all at once and stir. Return to low heat, stirring continuously for 2-3 minutes until the dough is thick, glossy, and leaves a thin film on the pot bottom.2½ oz all-purpose flour
- Cool Dough: Transfer dough to a bowl and let it cool for 10 minutes, spreading it out to cool faster.
- Whisk Eggs: In a separate bowl, whisk the eggs.2 large eggs
- Mix Dough: With the dough slightly cooled, mix with a hand mixer. Gradually add half the eggs, mix, then add the remaining eggs bit by bit until the dough forms a 'V' shape when lifted with a whisk or spatula.
Bake Puffs:
- Prepare Tray: Line baking tray with parchment paper or silicone mat.
- Piping Setup: Fill piping bag with dough.
- Pipe Dough: Fill a piping bag and pipe dough onto the tray in 2-inch mounds, leaving 1¼ inches of space between each.
- Baking: Place the baking tray in the oven, immediately reduce temperature to 356°F (180°C), and bake for 40 minutes until slightly browned. Open the oven door slightly for the last 5 minutes of baking.
Fill and Serve:
- Cool Puffs: Let puffs cool on a wire rack for 15 minutes.
- Cut: Slice puffs horizontally.
- Fill: Pipe cream onto bottom halves, reassemble puffs.
- Decorate: Dust with powdered sugar.
- Serve: Enjoy immediately for best taste.
Notes
- Use a scale to measure flour. It’s much more precise than going with cups.