
Best Pierogi Dough Recipe [4-Ingredients, No Eggs]
Master pierogi dough recipe for all your favorite fillings, both sweet and savory.
This is my go-to easy pierogi dough recipe made with just 4 simple ingredients: flour, salt, boiling water, and oil. No eggs, no dairy — just a soft, elastic dough that works for both sweet and savory pierogi.
If you’re looking for the best pierogi dough that’s naturally vegan and reliable every time, this is it. It rolls easily, seals well, and cooks up tender without tearing.
Below you’ll find detailed step-by-step instructions with photos, kneading tips, and the full recipe writeup so you can make perfect pierogi for dinner, holidays, or classic comfort food nights.
Ingredients Notes and Substitutes
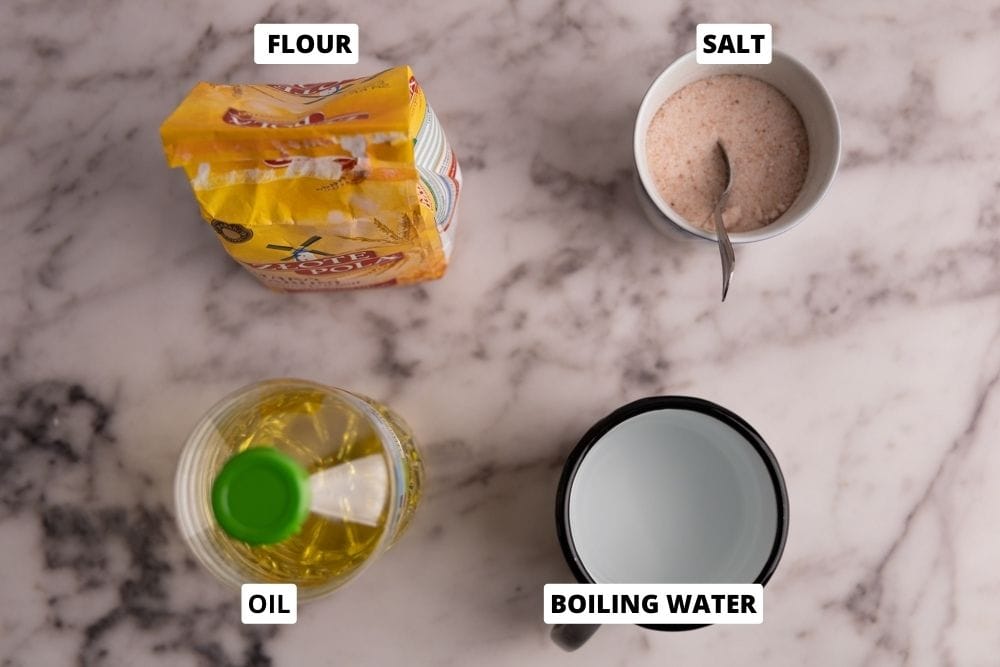
- Flour. Use all-purpose flour. Bread flour or whole wheat flour will require more liquid to reach the right dough consistency.
- Oil. Use a neutral-flavored oil. Avoid olive oil, as its flavor can come through in the dough.
- Salt. Fine-grained salt dissolves more evenly in the dough.
- Water. Use freshly boiled water.
Step-By-Step Instructions
- Boil a pot of water.
- Combine the dry ingredients. Add the flour to a large bowl and sprinkle in the salt. Give it a quick stir to distribute the salt evenly. (Sifting is optional — I rarely do.)
- Add oil and boiling water. Pour in the oil, then carefully add the boiling water. Stir immediately with a spoon or fork. Mix until the water is fully absorbed and there are no visible pockets of liquid left.

- Switch to your hands. Once the dough is cool enough to handle, gather everything into a loose, shaggy ball. Don’t worry if it looks rough — that’s normal.
- Knead (press, fold, turn). Press the dough against the bottom of the bowl with the palm of your hand. Fold it back onto itself, give it a slight turn, and repeat. As you knead, the dough will become smoother and more elastic. This usually takes about 4–6 minutes. You shouldn’t need to add extra flour or oil — it will come together with time. You’re aiming for a fairly smooth dough ball that isn’t sticky. It doesn’t have to be perfect.

- Wrap and rest. Wrap the dough tightly in plastic wrap and let it rest for at least 30 minutes (60 minutes is perfectly fine). Resting relaxes the gluten, making the dough easier to roll and helping it hold its shape when filling.

- Make pierogi. Once that half an hour of waiting is over, the dough is ready for rolling and making pierogi.

Step-By-Step Video
Storage
If you run out of filling and don’t want to discard the dough, you can refrigerate it (well-wrapped) for 2 to 3 days. If you don’t wrap it tight, it will dry out and be useless the next day.
Alternatively, you can freeze leftover pierogi dough, as explained in the “How to Freeze Pierogi” article.

How to Use This Dough
This is my master pierogi dough, and it works for every type of filling.
- If you want a full start-to-finish walkthrough, see my Homemade Pierogi Guide.
- For all fillings ideas, browse the complete list of pierogi fillings.
- Looking for plant-based options? Here are my vegan pierogi fillings.
- For sweet versions, check out these dessert pierogi fillings.
Pick your filling, roll the dough, and start shaping.

Pierogi Dough FAQ
What’s the best flour for pierogi dough?
Your regular all-purpose wheat flour is the ideal choice for pierogi dough because it’s the most user-friendly. This type of dough rolls out smoothly and can be stretched by hand without tearing.
If you’re looking for an alternative, white spelt flour (not the wholemeal variety) is a good substitute, as it shares similar properties with regular all-purpose flour.

Can you make pierogi dough ahead of time?
Yes, you can store prepared pierogi dough in the fridge for up to two days before using it. To prevent it from drying out, ensure it’s wrapped tightly in plastic wrap.
Before you start working with it, remove the dough from the fridge and let it sit at room temperature for 30 to 60 minutes. This is crucial because dough straight out of the fridge is noticeably firmer and can be challenging to roll out.

This post may contain affiliate links. Read our privacy policy.
Equipment
Ingredients
- 2 cups all-purpose flour ~250 g
- ¼ tsp salt
- 1 ½ tbsp oil ~23 g
- ½ cup boiling water ~120 g
Instructions
- Boil Water: Boil a pot of water.
- Mix Flour and Salt: Mix flour and salt in a large bowl.2 cups all-purpose flour, ¼ tsp salt
- Add Wet Ingredients: Pour in the oil, then carefully add the boiling water. Stir immediately with a spoon or fork. Mix until the water is fully absorbed and there are no visible pockets of liquid left.1 ½ tbsp oil, ½ cup boiling water
- Knead: Once the dough is cool enough to handle, gather everything into a loose, shaggy ball. Press the dough against the bottom of the bowl with the palm of your hand, Fold it back onto itself, give it a slight turn, and repeat. Knead for about 4 to 8 minutes until it's smooth and elastic.
- Wrap and Rest: Wrap the dough ball tightly in plastic wrap and let it rest for about 30 minutes before continuing.
- Make Pierogi: Once the wait is over, the dough is ready for rolling and making pierogi.
Notes
- If you’ve been kneading the dough for a couple of minutes already and it’s super dry and doesn’t seem to take in any more flour, add a tablespoon or two of warm water.
- This recipe is adapted from a popular polish recipe website: AniaGotuje.pl. Here’s the direct link to the recipe.
So happy I came across your site. I grew up eating savory pierogi but never heard of them with sweet filling. I have a major sweet tooth so I’m making the sweet cheese and blueberry filling. Going to make a sauce with the drained berry juice and have the best breakfast! Thank you so much for explaining everything so well, and the helpful photos.