Asparagus Pierogi Recipe
These asparagus pierogi are a delicious twist on a classic dish. With fresh asparagus and creamy mascarpone cheese, they’re sure to be a hit at your next meal. And you can even make these vegan if you want.
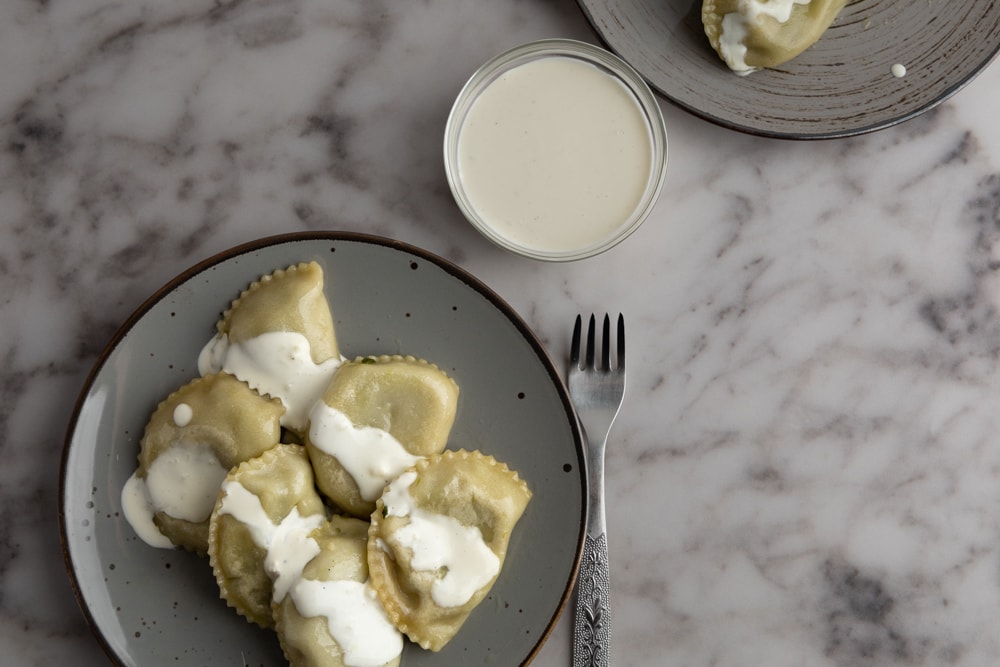
I found these pierogi at a farmer’s market the other day and decided to buy a couple as a test. And as it turns out, these are easy to make and taste pretty great. If asparagus is in season, definitely try these out.
Recipe Info
Here’s what you need to know about this recipe:
- Kid-friendly. If your little ones want nothing to do with cooked asparagus, perhaps asparagus mush mixed with cheese wrapped in dough will do?
- Seasonal. Asparagus is much cheaper in season, so that’s the best time to make these.
- Time-consuming. Making pierogi takes time, and you’ll need at least one and a half hours to make those. That’s why I usually make pierogi on the weekends.
- Scales well. If you have two bunches of asparagus or want to test another pierogi filling, do so. This way, you save a lot of time on meal prep. While making a single batch typically takes me 90 to 120 minutes, doubling the recipe means only an extra 45 to 60 minutes in the kitchen. Less if you streamline everything.
- Freezes well. You can easily freeze any extras if you don’t feel like eating pierogi four days in a row.
If you’re making spinach pierogi for the first time, read the ingredients notes, step-by-step instructions, and tips. If you’re a veteran, feel free to jump to the recipe card.
Extra Learning
Before we jump in, here are a few handy resources to help you nail this recipe:
- Homemade Pierogi for Beginners. My pierogi guide that walks you through the pierogi making process, start to finish. Whether you’re new to pierogi or just need a refresher, this guide has you covered.
Ingredients Notes and Substitutes
Pierogi Dough
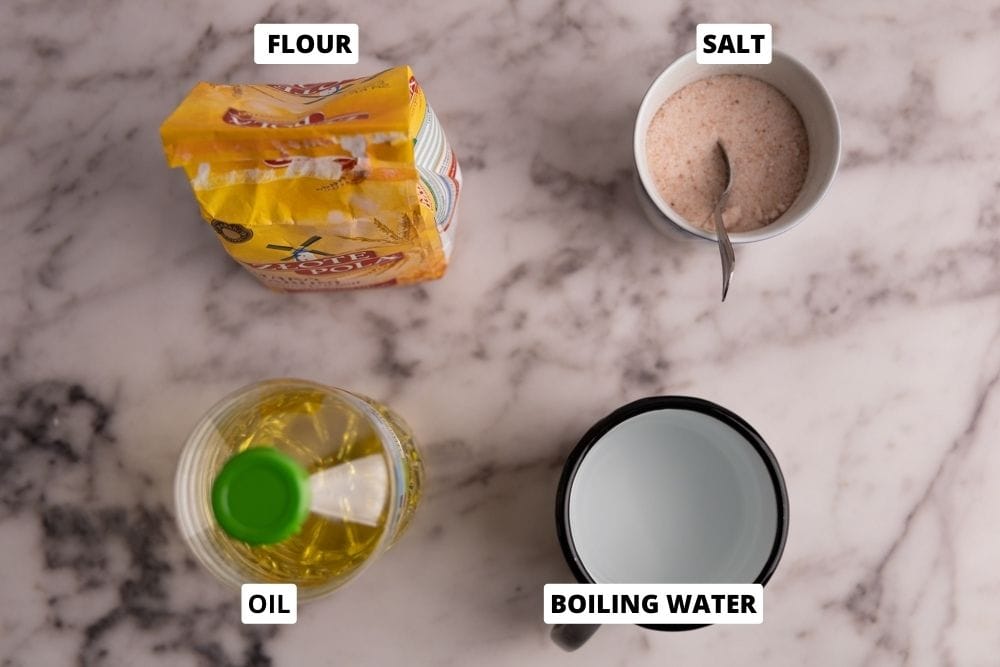
- Flour. Use all-purpose flour. If you use something like bread flour or whole wheat flour, you will need noticeably more liquid to achieve the right dough texture.
- Oil. Use a neutral-flavored oil, such as your regular cooking oil. Avoid olive oil as it can be bitter, which may affect the dough’s flavor.
- Salt. Use fine-grained salt for best results.
- Water. Plain boiled water is all you need; no need to be fancy here.
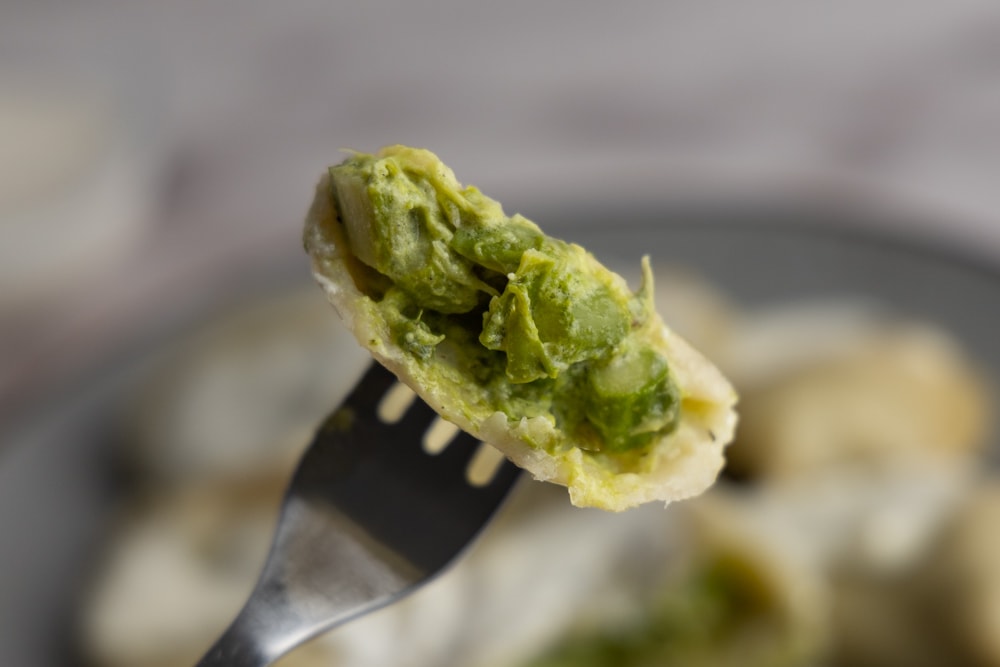
Asparagus Pierogi Filling

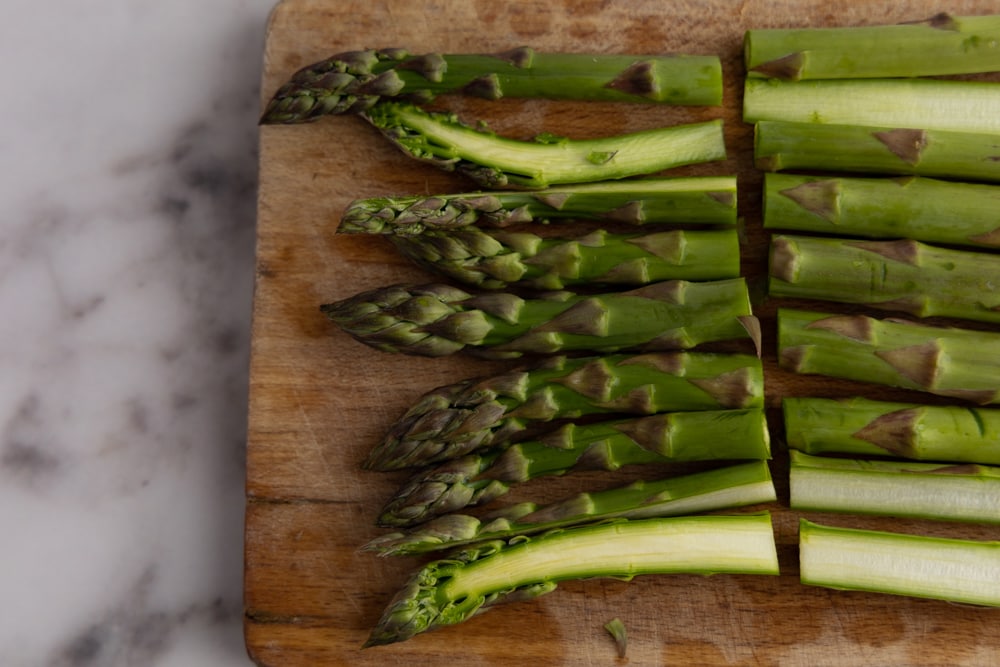
- Asparagus. Fresh and relatively thin spears are best, but if yours are on the older side, slightly soft, or quite large, it’s perfectly fine, too.
- Mascarpone cheese. You can use regular cream cheese if you don’t have mascarpone cheese. Just don’t go overboard with either, so the filling doesn’t become runny. If you’re interested in making the recipe vegan-friendly, there’s a helpful section later in the article.
- Salt. Fine-grained salt is probably best, but anything you got will do. Just make sure to taste-test the filling.
- Pepper. A pinch or two of regular black pepper is all you need.
Step-By-Step: How to Make Asparagus Pierogi
Step 1: Make Dough
(Read more about this in our pierogi dough recipe.)
- Boil a pot of water.
- Sift flour into a large bowl. Sifting probably isn’t necessary, but I recommend it anyways. Plus, it’s something you can do while waiting for the water to boil.
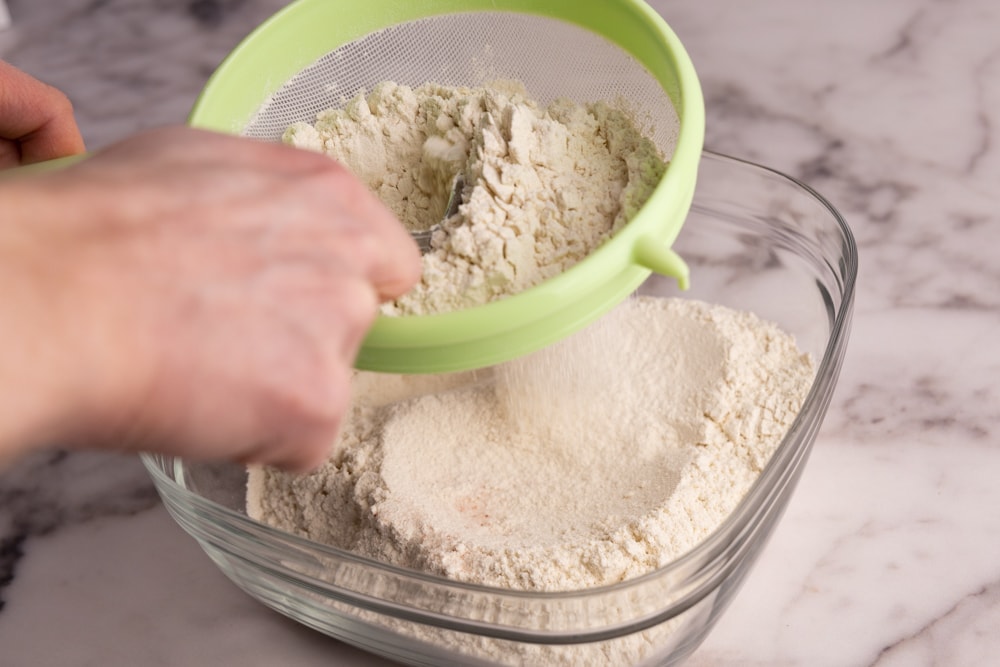
- Add salt and mix. Just a quick stir to spread the salt.
- Add oil and boiled water.
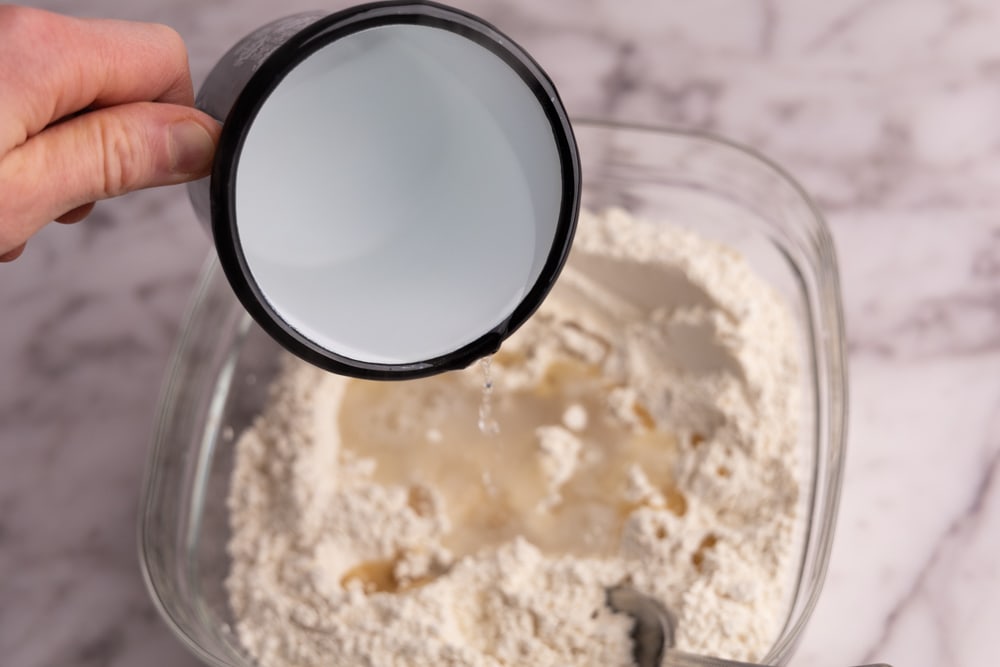
- Mix. Mix the ingredients by stirring with a regular tablespoon or a large wooden spoon. Be careful not to burn yourself, as you will be working with water that was boiling just a few moments ago. Stir until you reach the point where there is no visible water in the bowl, then switch to using your hands.
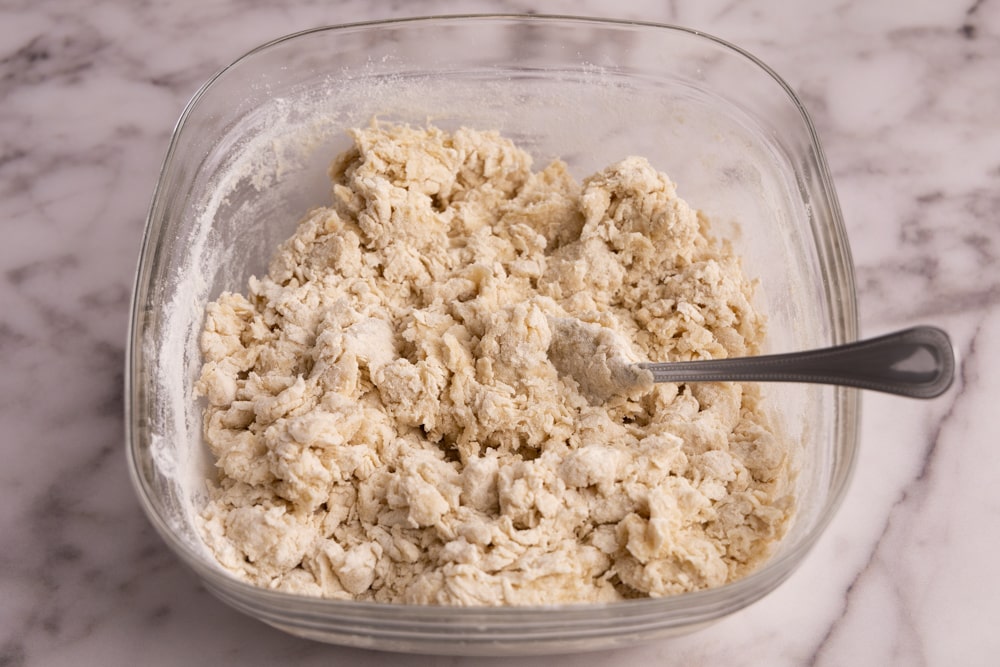
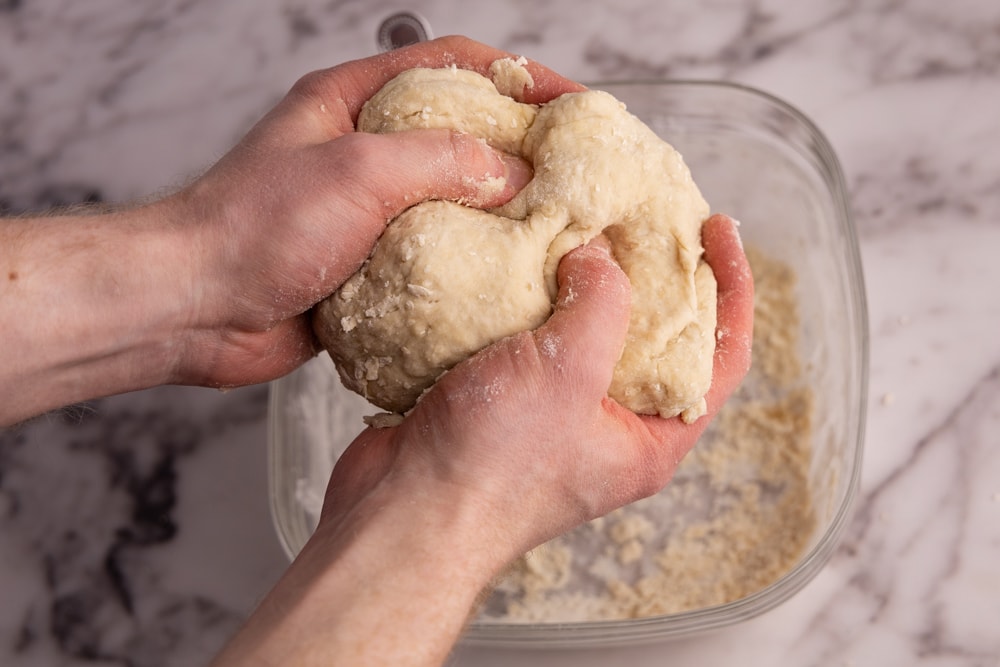
- Knead. Start slowly and make sure the dough isn’t too hot to handle. Knead until you have incorporated all the flour into a homogeneous dough ball, which usually takes 4 to 8 minutes.
 Kneading in progress. Note that there’s still flour left in the bowl.
 Dough ready – all the flour is incorporated and the dough is pretty homogenous.
- Wrap and rest. Wrap the dough ball tightly in plastic wrap and let it rest for about 30 minutes before continuing. This will allow the dough to relax and become easier to work with.

- Make pierogi. Once that half an hour of waiting is over, the dough is ready for rolling and making pierogi.
Step 2: Prep Filling
- Prep the asparagus. Start off by giving the spears a good wash, then lop off those tough, woody ends. Slice the spears in half, then cook them in salted water (I use about 1/2 tsp of salt per quart of water) for 7-8 minutes. Aim for soft but still a bit firm – we’re not going for asparagus mush here.
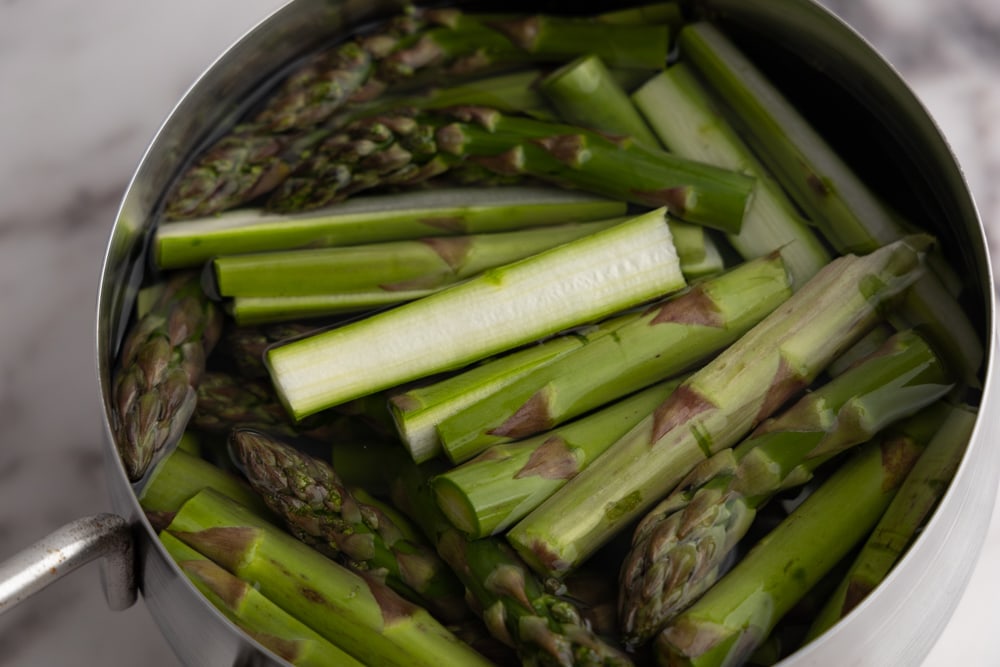
- Drain. Once drained, pop the spears back into the pot you used to cook them. Let them simmer on low heat (no water or fat in the pot) for another 3 to 4 minutes, stirring often so they don’t burn. This sneaky trick helps to evaporate any leftover water.
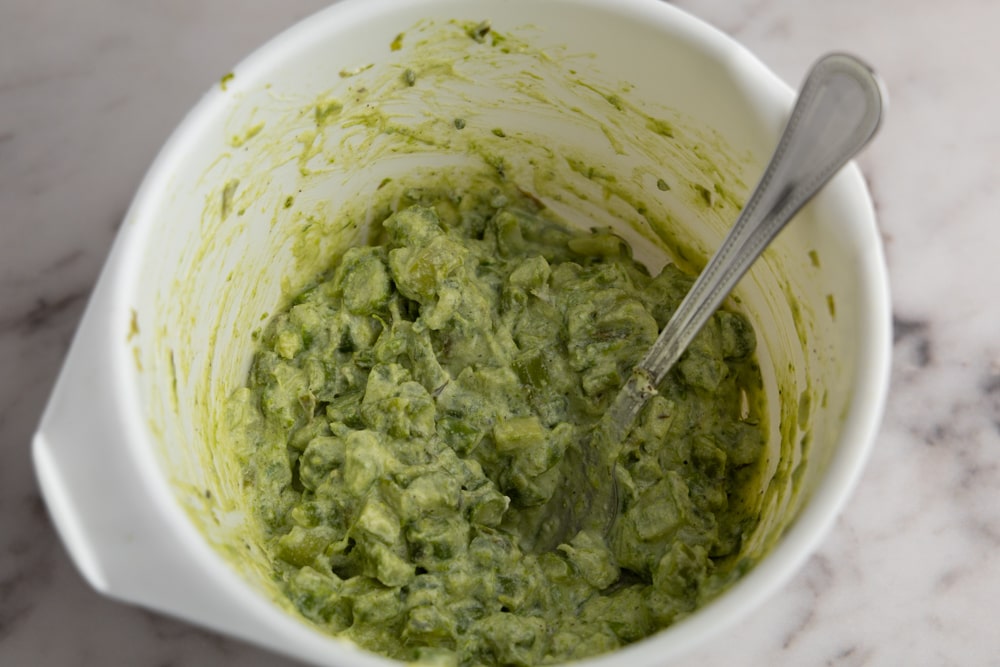
- Cut it up. After draining, cut your asparagus into thin, delicate pieces. If it’s gone a bit mushy and makes a mess when slicing, don’t sweat it – just whip out your handy hand blender and give it a quick blitz. Or use a fork if the veggie is this soft. With your asparagus sliced or blended, scoop them into a big bowl, and then invite the mascarpone cheese, salt, and pepper to the party. Remember that we already cooked asparagus in salted water, so you might only need an extra pinch or two to make it pop. Stir well, taste it, and adjust the seasoning if needed. Remember, you want the filling to taste terrific before moving on. If you’re not using it straight away, pop it in the fridge.
Step 3: Combine
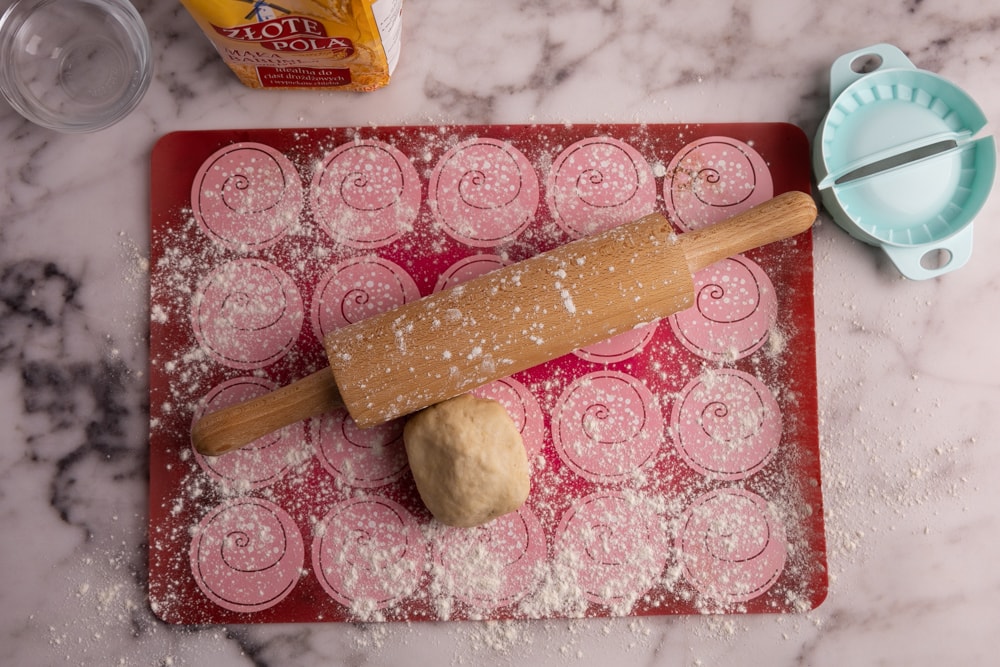
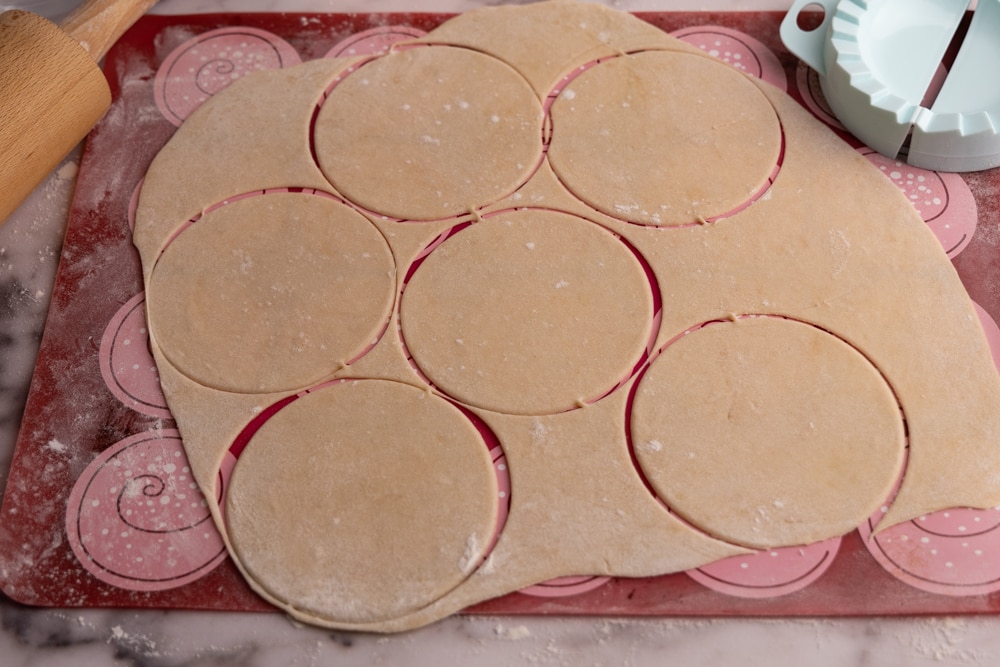
- Divide. Divide the pierogi dough into two or three parts. Take one part and spread it on a floured work surface, then roll it out until it’s nice and thin. Be careful not to roll it too thin, as it may tear when you form the pockets and seal the dough around the filling. Wrap the rest of the dough tightly to prevent it from drying out.
- Cut into circles. Cut palm-sized circles in the rolled pierogi dough. Anything round with a somewhat sharp edge is great, but a simple glass or mason jar works as well. Or use your pierogi maker if you have one. Form a ball with the dough left over after cutting and use it when rolling out the rest of the pierogi.
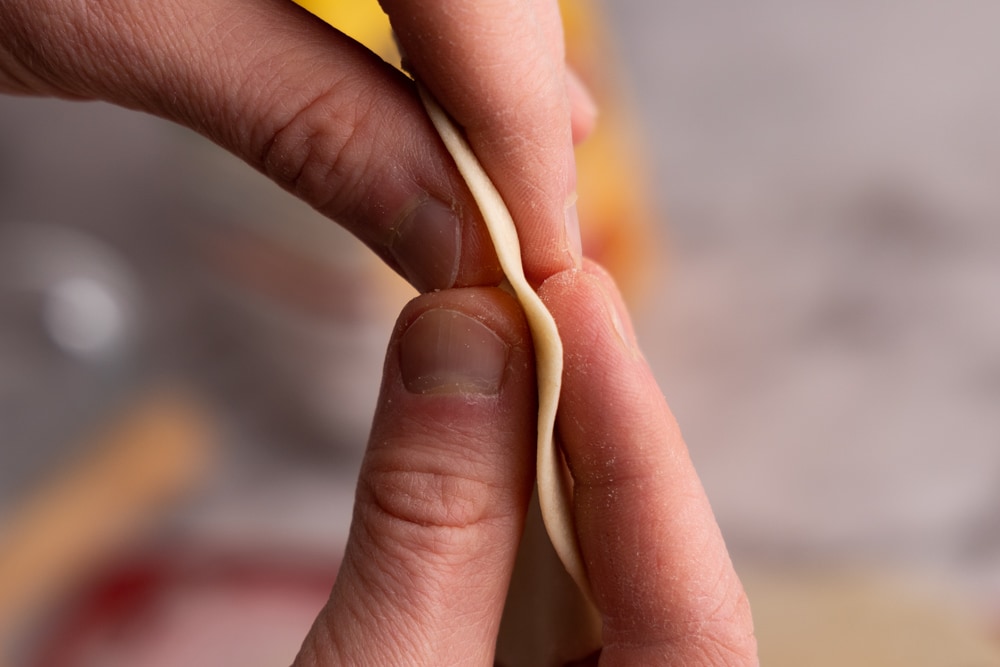
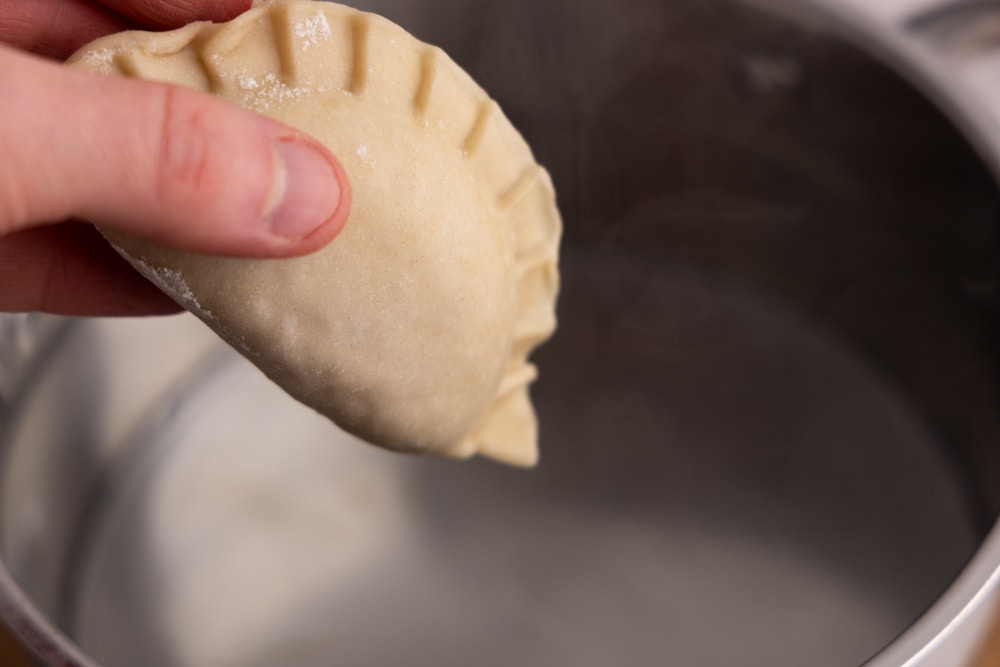
- Fill dough. Place a spoonful of the filling in the middle of the dough circle, then fold the dough over the filling and press the edges together starting in the middle. Try to leave as little air as possible in the pocket you’re forming. To make a good seal, moisten the outer edge of the dough using a wet finger before pressing the edges together.
- Cover with damp towel. Place each formed pierogi on a floured cookie sheet and cover them with a damp kitchen towel. The edges will dry out quickly otherwise. If you want to save space and let the pierogi touch each other, lightly brush the areas where they’ll touch with flour. This will prevent them from sticking together and causing the pierogi dough to tear when removed for boiling.
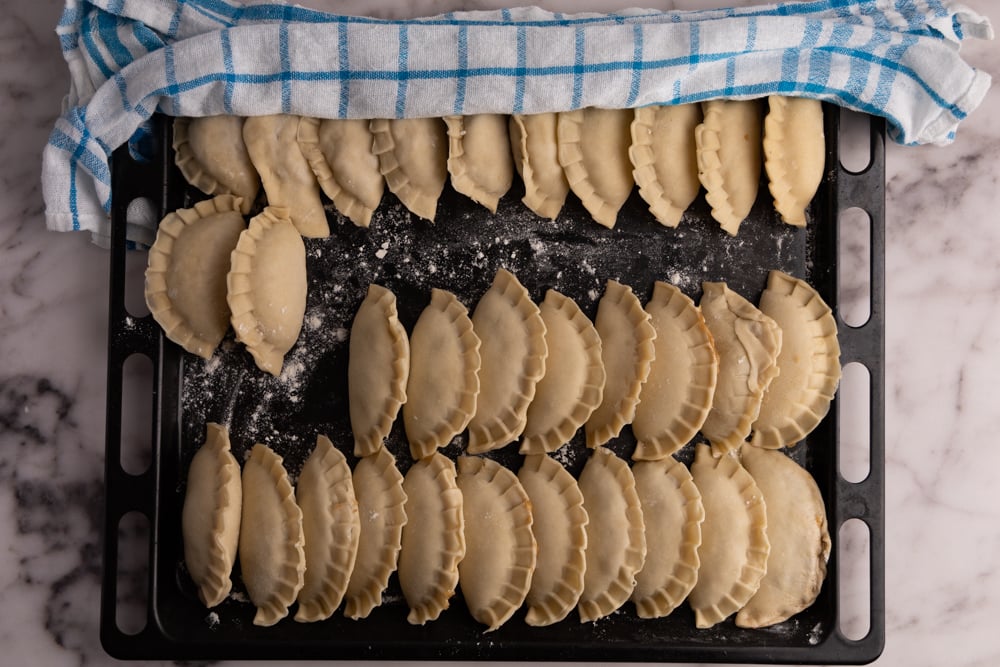
- Make more pierogies. Continue forming pierogi until you run out of dough or filling.
Step 4: Cook
- Boil water. Bring a large pot of salted water to a boil. I typically use one teaspoon of salt per quart of water but feel free to adjust the amount to your preferences.
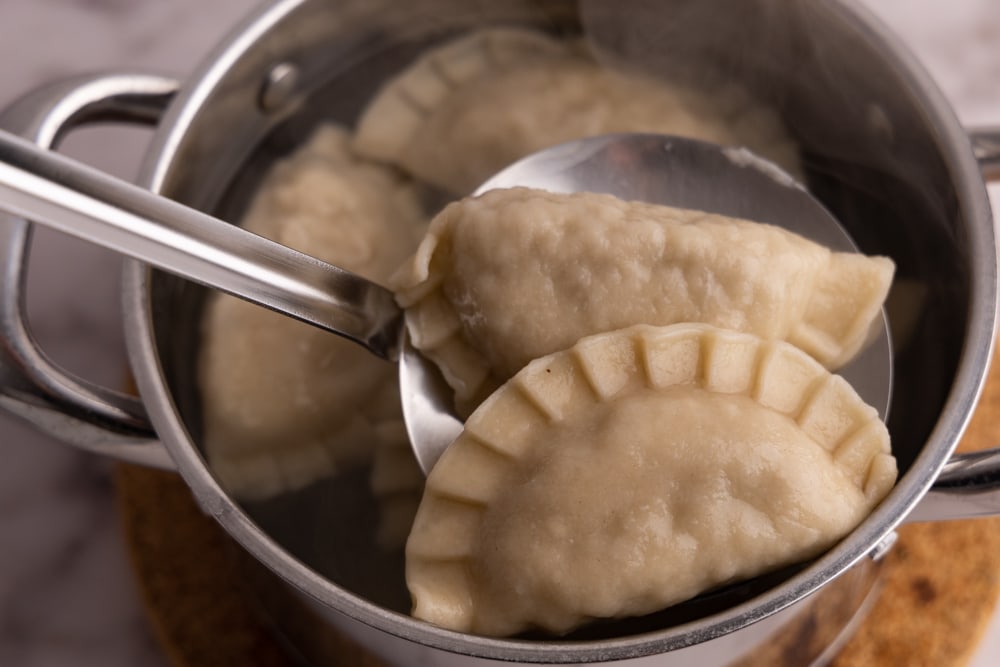
- Add a few pierogi. Once the water is boiling, add a few pierogi to the pot and stir them to prevent them from sticking to the bottom. Once the pierogi start floating to the surface, simmer them gently for another 3 to 4 minutes. Make sure not to overcrowd the pot so that the pierogi don’t stick together or cook unevenly.
- Remove and serve. Remove the pierogi from the water using a slotted spoon and serve.
Recipe Tips
- Go for an even cook with your asparagus spears. Especially for those chunky, thick ones – slice them in half lengthwise before you start cooking. You’ll end up with nicely cooked pieces that make perfect fillings.
- Keep your asparagus snappy! If you’re a fan of a bit of crunch, halt the cooking process by plunging your nearly-cooked spears into cold tap water. It’s not my usual move, but it keeps them from going too soft.
- Make sure you drain your asparagus well. Any extra moisture will be a downer, so give your spears a couple of extra minutes of cooking time after draining.
- Thinking of feeding a crowd? Make your life easier by doubling the dough and the filling. If you fancy a change, try a different filling for the other half of the dough. For vegan pierogi alternatives, how about these spinach pierogi or lentil pierogi? Or perhaps some apple pierogi for a sweet twist.
- For an extra touch of yum, pan-fry your pierogi after boiling. Get them nice and golden on both sides.
- Just like many other pierogi, these guys often taste even better the day after cooking.
- If your filling seems too soft, chill it in the fridge for about an hour before using it. It’ll firm up, making your pierogi-stuffing task much easier. I often prep the filling a day ahead and refrigerate it overnight.
- Keep a bowl of water within arm’s reach when you’re forming the pierogi. A quick dip of your fingers can moisten the dough’s edges, making pocket formation a cinch.
- Leftover dough or filling? Don’t sweat it. It’s normal, since exact measurements can be tricky. If you’ve got a lot of dough left, freeze it for next time. A little left? No worries, toss it. As for any extra filling, pop it in the freezer for your next pierogi-making adventure.
- Once you’ve used up about half the filling, get that water boiling. Start dropping in the pierogi as soon as it starts bubbling. While they’re cooking, carry on with the dough rolling and pocket forming, but don’t forget to check on your boiling pierogi every now and then.
Vegan Variation
Fancy a vegan take? You can easily swap out the mascarpone or cream cheese for cashew cream cheese or your favorite vegan yogurt.
Opting for yogurt? Start off by stirring in just a spoonful, then check the consistency. If you notice the filling turning a tad too liquid, hold off on adding more. The goal is to keep it nice and sturdy, perfect for crafting those lovely pockets.

Alternatively, you could go with a tablespoon of vegan mayo to bind the sliced spears together. Just don’t add salt before tasting (and perhaps a bit less to the cooking water), so you don’t end up with an overly salty filling.
Or you can skip the binding ingredient. Instead, you can blend up a third of the spears with a hand blender and mix it with the sliced spears. The pureed asparagus will work like a charm, binding all the ingredients together beautifully.
What to Serve with Asparagus Pierogi
Wondering what to couple with your asparagus pierogi? They are versatile and can be paired with a wide range of sides. Here are a few ideas to inspire you:
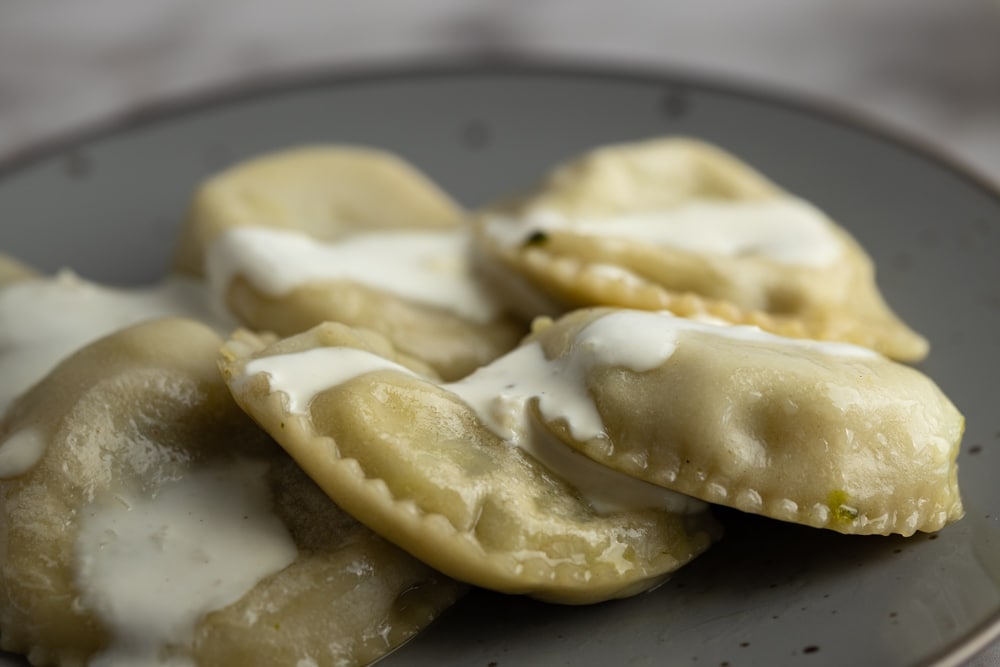
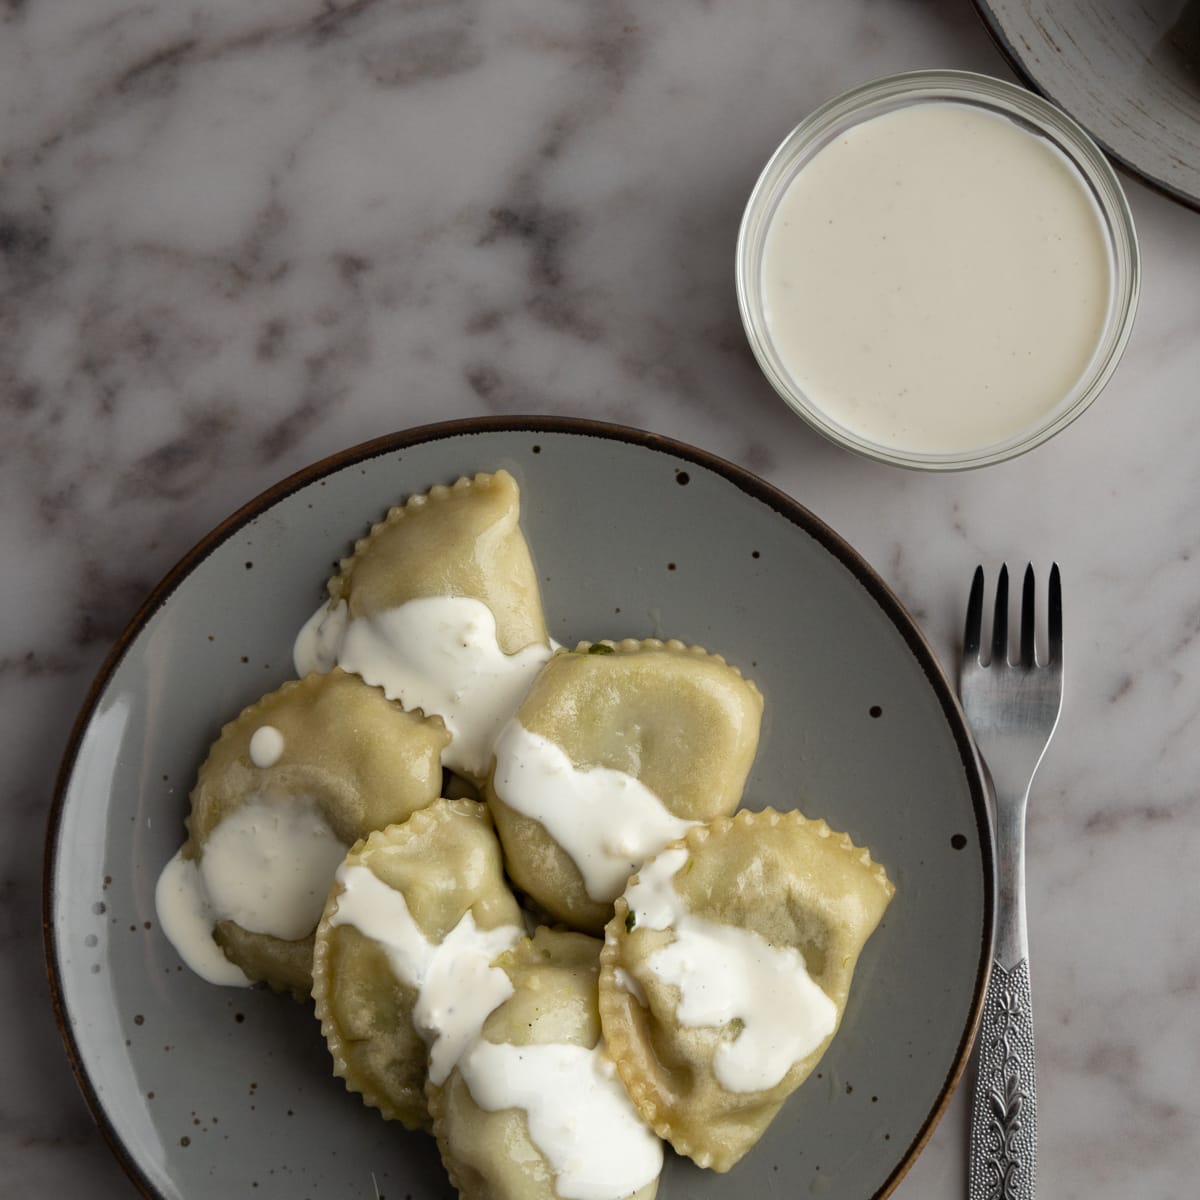
- Easy-peasy sauces and dips. If your pierogi are stealing the show as the main course, you only need a companion pierogi sauce or dip. Consider melted butter, a dollop of sour cream, a spoonful of yogurt, or a vegan alternative. They provide a luscious contrast to the pierogi that’s sure to delight. Or whip up a simple garlic sauce by stirring crushed garlic with some mayo, yogurt, and salt.
- Sautéed onions. Sautéed onions are a classic pierogi partner. Give your chopped onions a good sauté in a lightly greased skillet until they’re soft and translucent. Then, crown your pierogi with this deliciousness. Or, better yet, toss the pierogi into the pan after a few minutes of cooking the onions and sautee them together.
- A touch of protein. Fancy a protein boost? Try teaming your pierogi with grilled or pan-fried tofu, tempeh, or seitan. If you’re not sticking to vegan options, grilled chicken, sausage, or bacon make excellent pairings. Or how about sautéed onions and slices of kielbasa for a winning combo?
How to Store Asparagus Pierogi?
Wondering how to stash away your asparagus pierogi for later? First off, let them cool and dry solo on spacious plates.
After 15 to 20 minutes, flip them to ensure both sides get an even air-dry treatment. Once thoroughly dry, it’s time for them to huddle up in an airtight container. Aim for a single layer, keeping them from being overly chummy to avoid sticking.
If you’re looking to stack ’em up, play it safe by separating each layer with some parchment paper or plastic wrap.
Got leftovers? You can also freeze those spare pierogi for another day of deliciousness.
How to Reheat
The quickest way to reheat your asparagus pierogi is to pan-fry them. Here’s how:
- Heat a non-stick pan over medium heat.
- Add a tablespoon of oil or butter.
- Add the pierogi to the pan in a single layer.
- Cook for 4-6 minutes or until golden brown on the bottom.
- Flip and cook for another 4-6 minutes or until golden brown on the other side.
- Remove from the pan and serve.
This post may contain affiliate links. Read our privacy policy.
Equipment
Ingredients
Pierogi Dough
- 2 cups all-purpose flour ~250g
- ¼ tsp salt
- 1 ½ tbsp oil
- ½ cup boiling water ~120ml
Asparagus Pierogi Filling
- 1 bunch asparagus ~ one pound (or 450G)
- 2 oz mascarpone cheese or cream cheese (~60g)
- 2 pinches salt plus more for cooking the asparagus and pierogi
- 2 pinches black pepper
Instructions
Make Dough
- Boil Water: Boil a pot of water.½ cup boiling water
- Sift Flour: Sift flour into a large bowl.2 cups all-purpose flour
- Add Salt: Add salt and mix.¼ tsp salt
- Wet Ingredients: Add oil and boiled water.1 ½ tbsp oil
- Mix Ingredients: Mix the ingredients by stirring with a spoon. Be careful not to burn yourself. Once there is no visible water in the bowl, use your hands to knead the dough until it is a homogeneous ball.
- Wrap and Rest: Wrap the dough ball tightly in plastic wrap and let it rest for about 30 minutes before continuing.
- Make Pierogi: Once the wait is over, the dough is ready for rolling and making pierogi.
Prep Filling
- Prep Asparagus: Wash the asparagus and remove the woody ends of each spear. Cut them in half and cook them in salted water for 7-8 minutes until soft.1 bunch asparagus
- Drain: Drain the water and cook the spears on low heat for another 3 to 4 minutes to evaporate remaining water.
- Make Filling: Cut the asparagus into thin slices and transfer into a large bowl and combine with mascarpone cheese, salt, and pepper. Stir well and taste to ensure it's seasoned to your liking.2 oz mascarpone cheese, 2 pinches black pepper, 2 pinches salt
Combine
- Roll Out Dough: Divide dough into 2-3 parts. Roll one part thin on a floured surface, but not so thin that it tears. Wrap remaining dough to prevent drying.
- Cut: Cut palm-sized circles in the rolled dough. Reuse the leftover dough by forming a ball and rolling again.
- Fill: Place a spoonful of asparagus filling on each dough circle, fold over, and seal edges, removing as much air as possible. Moisten edges for a better seal. Place formed pierogi on a floured sheet, covered with a damp kitchen towel. Use flour to prevent sticking if they touch. Repeat until all dough or filling is used.
Cook
- Boil Water: Boil a large pot of salted water (1 tsp salt per quart).
- Cook: Add pierogi to boiling water, stirring to prevent sticking. Simmer gently for 3-4 minutes after they float to the surface.
- Remove and Serve: Remove with a slotted spoon and serve.